メインコンテンツにスキップ

Zebra ZP 450 Motherboard Replacement

必要な工具と部品

  1. Zebra ZP 450 Motherboard Replacement, Motherboard: 手順 1、 1の画像 1
    • Remove the three 12mm screws from the bottom of the printer using a Phillips #1 screwdriver.

    • Using the TR10 Torx screwdriver, remove the four 8mm screws from the bottom of the device.

  2. Zebra ZP 450 Motherboard Replacement: 手順 2、 1の画像 1
    • Remove the single 7mm screw located underneath the outfeed using the same Phillips #1 screwdriver.

  3. Zebra ZP 450 Motherboard Replacement: 手順 3、 1の画像 1
    • Using an opening pick, pry the plastic covering from around the power button and accessory ports.

  4. Zebra ZP 450 Motherboard Replacement: 手順 4、 3の画像 1 Zebra ZP 450 Motherboard Replacement: 手順 4、 3の画像 2 Zebra ZP 450 Motherboard Replacement: 手順 4、 3の画像 3
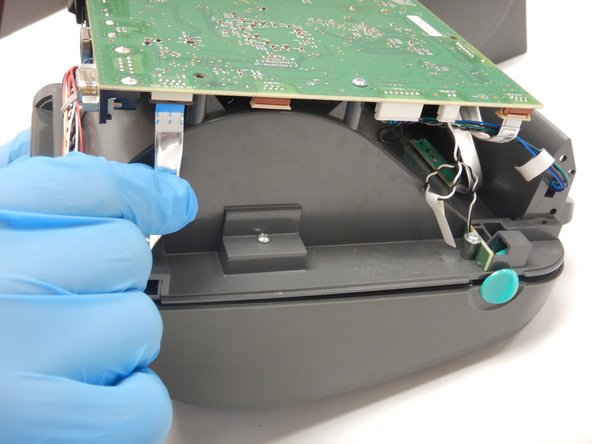
    • After lifting the plastic casing from the device, use the Phillips #1 screwdriver to remove the single 5mm screw securing the motherboard.

    • Remove all connections to the motherboard.

終わりに

To reassemble your device, follow these instructions in reverse order.

作成者

2人の作成者と共同で作成されました。

Daniel Garmon

メンバー登録日: 02/15/21

277 ポイント

3のガイドは作成済み

0 件のコメント

コメントを追加

統計データ:

過去 24時間: 2

過去 7 日: 3

過去 30 日: 9

今までの合計 377