メインコンテンツにスキップ

Zeal Optics iON Viewfinder Assembly Replacement

必要な工具と部品

  1. Zeal Optics iON Viewfinder Assembly Replacement, Lens: 手順 1、 2の画像 1 Zeal Optics iON Viewfinder Assembly Replacement, Lens: 手順 1、 2の画像 2
    • In the next few steps, you will be releasing the clips that hold the lens in place. Do not try to completely remove the lens until all the clips have been released.

    • Hold the iON in your hands with your thumbs on the clips next to the middle of the lens.

    • Pull the rubber housing apart to release the first two clips.

  2. Zeal Optics iON Viewfinder Assembly Replacement: 手順 2、 2の画像 1 Zeal Optics iON Viewfinder Assembly Replacement: 手順 2、 2の画像 2
    • Grab the inside of the plastic nose rest with your thumb and index finger.

    • Rotate the nose rest upwards until you feel that it is free from the lens.

  3. Zeal Optics iON Viewfinder Assembly Replacement: 手順 3、 2の画像 1 Zeal Optics iON Viewfinder Assembly Replacement: 手順 3、 2の画像 2
    • Rotate the device 180 degrees.

    • Grab the top of the goggle frame that holds the camera assembly.

    • Rotate the frame outwards until you feel that the clips inside it are free.

  4. Zeal Optics iON Viewfinder Assembly Replacement: 手順 4、 2の画像 1 Zeal Optics iON Viewfinder Assembly Replacement: 手順 4、 2の画像 2
    • While firmly holding the goggles with the palm of one hand, grab the top right corner of the frame and rotate it away from the lens.

  5. Zeal Optics iON Viewfinder Assembly Replacement: 手順 5、 2の画像 1 Zeal Optics iON Viewfinder Assembly Replacement: 手順 5、 2の画像 2
    • The lens should now be barely attached to the frame. If it still feels firmly attached, repeat any necessary steps to free the clips.

    • While holding the goggles in one hand, use the other to grab the lens from opposite ends, and rotate it out of the housing and away from any remaining clips.

  6. Zeal Optics iON Viewfinder Assembly Replacement, Camera Assembly: 手順 6、 1の画像 1
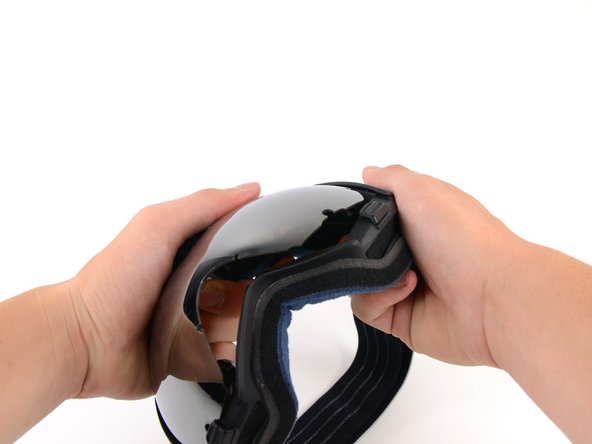
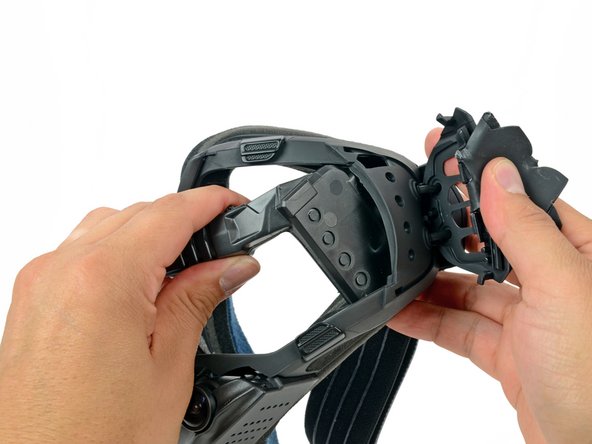
    • Remove the four 7.1 mm Phillips screws securing the camera housing to the goggle frame.

  7. Zeal Optics iON Viewfinder Assembly Replacement: 手順 7、 3の画像 1 Zeal Optics iON Viewfinder Assembly Replacement: 手順 7、 3の画像 2 Zeal Optics iON Viewfinder Assembly Replacement: 手順 7、 3の画像 3
    • Peel back the rubber battery cover from the inner left side of the frame.

    • While firmly holding the battery cover, pull the bottom of the strap mount cover up and off of the frame

  8. Zeal Optics iON Viewfinder Assembly Replacement: 手順 8、 2の画像 1 Zeal Optics iON Viewfinder Assembly Replacement: 手順 8、 2の画像 2
    • Once the bottom is free, continue pulling to free the top of the strap mount cover from the frame.

  9. Zeal Optics iON Viewfinder Assembly Replacement: 手順 9、 2の画像 1 Zeal Optics iON Viewfinder Assembly Replacement: 手順 9、 2の画像 2
    • Pull the battery out of its recess in the frame.

    • The battery is connected to the entire camera assembly and cannot be completely removed by itself.

  10. Zeal Optics iON Viewfinder Assembly Replacement: 手順 10、 3の画像 1 Zeal Optics iON Viewfinder Assembly Replacement: 手順 10、 3の画像 2 Zeal Optics iON Viewfinder Assembly Replacement: 手順 10、 3の画像 3
    • Peel the rubber keypad cover up from the inner right side of the frame.

    • While firmly holding the keypad cover, pull the top of the strap mount cover up and off of the frame

  11. Zeal Optics iON Viewfinder Assembly Replacement: 手順 11、 2の画像 1 Zeal Optics iON Viewfinder Assembly Replacement: 手順 11、 2の画像 2
    • Once the bottom is free, continue pulling to free the bottom of the strap mount cover from the frame.

  12. Zeal Optics iON Viewfinder Assembly Replacement: 手順 12、 2の画像 1 Zeal Optics iON Viewfinder Assembly Replacement: 手順 12、 2の画像 2
    • Hold the strap mount cover away from the frame and remove the keypad.

  13. Zeal Optics iON Viewfinder Assembly Replacement: 手順 13、 3の画像 1 Zeal Optics iON Viewfinder Assembly Replacement: 手順 13、 3の画像 2 Zeal Optics iON Viewfinder Assembly Replacement: 手順 13、 3の画像 3
    • Grab the viewfinder housing and pull it out of its recess.

    • Just like the battery, the viewfinder housing is connected to the rest of the camera assembly and cannot be removed by itself.

  14. Zeal Optics iON Viewfinder Assembly Replacement: 手順 14、 3の画像 1 Zeal Optics iON Viewfinder Assembly Replacement: 手順 14、 3の画像 2 Zeal Optics iON Viewfinder Assembly Replacement: 手順 14、 3の画像 3
    • Place one of your hands near the center of the frame with your thumb next to the camera housing.

    • With your other hand, grab the camera housing and pull it up and out of the frame.

  15. Zeal Optics iON Viewfinder Assembly Replacement: 手順 15、 2の画像 1 Zeal Optics iON Viewfinder Assembly Replacement: 手順 15、 2の画像 2
    • Remove the viewfinder assembly by pulling it through the opening in the top of the frame.

  16. Zeal Optics iON Viewfinder Assembly Replacement: 手順 16、 2の画像 1 Zeal Optics iON Viewfinder Assembly Replacement: 手順 16、 2の画像 2
    • In the same manner described above, remove the battery from the frame.

  17. Zeal Optics iON Viewfinder Assembly Replacement, Motherboard Assembly: 手順 17、 1の画像 1
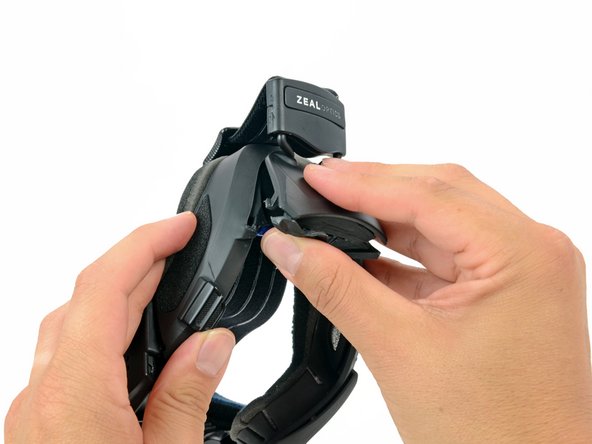
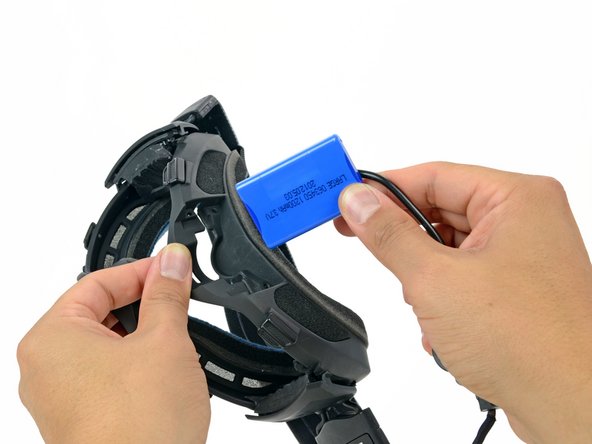
    • Remove the following four screws securing the back cover of the camera housing:

    • two silver 8.5 mm screws,

    • two black 8.8 mm screws.

  18. Zeal Optics iON Viewfinder Assembly Replacement: 手順 18、 2の画像 1 Zeal Optics iON Viewfinder Assembly Replacement: 手順 18、 2の画像 2
    • Peel the white sticker off the bottom of the camera housing.

  19. Zeal Optics iON Viewfinder Assembly Replacement: 手順 19、 3の画像 1 Zeal Optics iON Viewfinder Assembly Replacement: 手順 19、 3の画像 2 Zeal Optics iON Viewfinder Assembly Replacement: 手順 19、 3の画像 3
    • Lift the back cover off the camera housing and remove it.

  20. Zeal Optics iON Viewfinder Assembly Replacement: 手順 20、 2の画像 1 Zeal Optics iON Viewfinder Assembly Replacement: 手順 20、 2の画像 2
    • Use the tip of a spudger to pry up the retaining flap of the camera sensor cable ZIF connector on the motherboard.

    • Be sure that you are prying up on the hinged flap, not the connector itself.

  21. Zeal Optics iON Viewfinder Assembly Replacement: 手順 21、 2の画像 1 Zeal Optics iON Viewfinder Assembly Replacement: 手順 21、 2の画像 2
    • Pull the camera sensor ribbon cable straight out of its connector on the motherboard.

  22. Zeal Optics iON Viewfinder Assembly Replacement: 手順 22、 3の画像 1 Zeal Optics iON Viewfinder Assembly Replacement: 手順 22、 3の画像 2 Zeal Optics iON Viewfinder Assembly Replacement: 手順 22、 3の画像 3
    • Grab the edge of the motherboard and gently slide it out of the camera housing.

    • There may be some resistance due to the foam pad along the bottom of the camera housing.

  23. Zeal Optics iON Viewfinder Assembly Replacement, Viewfinder Assembly: 手順 23、 3の画像 1 Zeal Optics iON Viewfinder Assembly Replacement, Viewfinder Assembly: 手順 23、 3の画像 2 Zeal Optics iON Viewfinder Assembly Replacement, Viewfinder Assembly: 手順 23、 3の画像 3
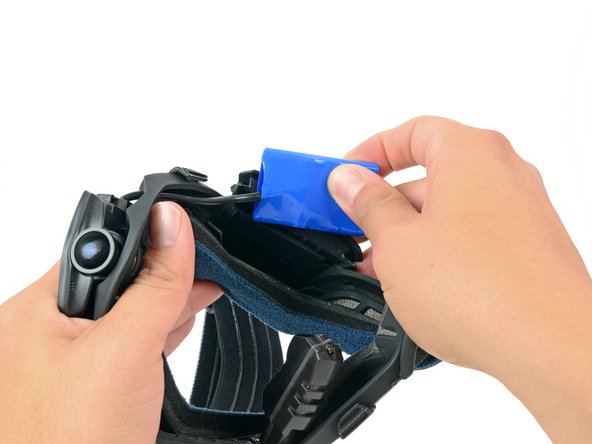
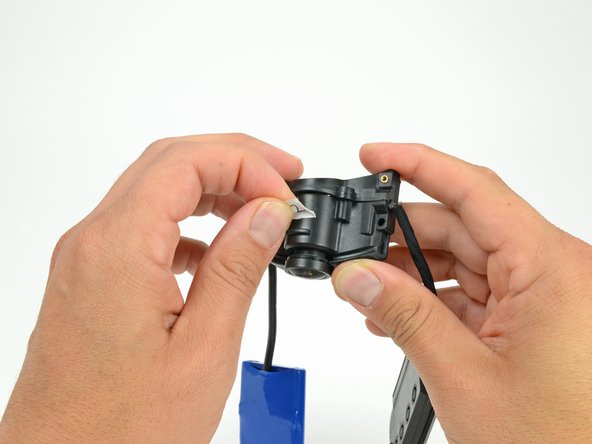
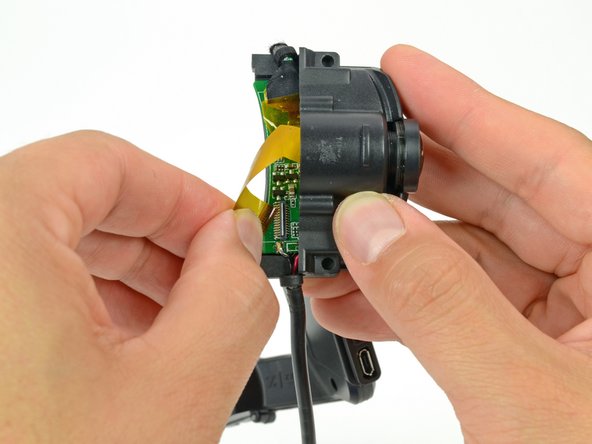
    • Peel back the Kapton tape covering the viewfinder assembly ribbon cable connector on the motherboard.

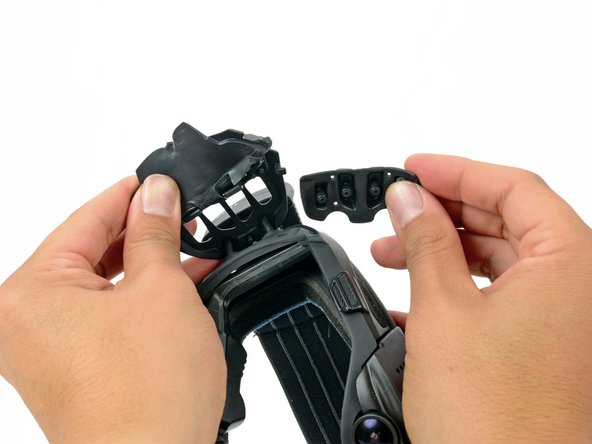
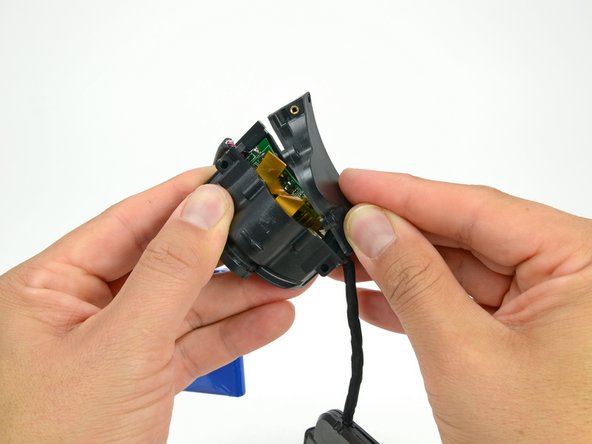
    • Use the tip of a spudger to flip up the retaining flap on the viewfinder assembly ribbon cable ZIF connector.

    • Be sure you are prying up on the hinged flap, not the connector itself.

  24. Zeal Optics iON Viewfinder Assembly Replacement: 手順 24、 2の画像 1 Zeal Optics iON Viewfinder Assembly Replacement: 手順 24、 2の画像 2
    • Pull the viewfinder assembly ribbon cable straight out of its socket on the motherboard.

終わりに

To reassemble your device, follow these instructions in reverse order.

ある他の人がこのガイドを完成しました。

作成者

1人の作成者と共同作成されました。

David Hodson

メンバー登録日: 04/13/10

150,467 ポイント

127のガイドは作成済み

0 件のコメント

コメントを追加

統計データ:

過去 24時間: 0

過去 7 日: 0

過去 30 日: 0

今までの合計 1,041