メインコンテンツにスキップ

ZTE Compel LCD Screen Replacement

必要な工具と部品

  1. ZTE Compel LCD Screen Replacement, Battery: 手順 1、 1の画像 1
    • Place the phone on a flat surface with the screen facing down. This will allow easy access to the removable black plastic cover on the back of the phone.

  2. ZTE Compel LCD Screen Replacement: 手順 2、 1の画像 1
    • In the bottom right corner of the device, use your fingernail to remove the back cover of the phone by lifting up and holding the device with your other hand.

  3. ZTE Compel LCD Screen Replacement: 手順 3、 1の画像 1
    • In the top-right area of the battery, use your fingernail to lift the battery out of the phone.

    • If your battery is corroded, take all necessary precautions, such as, gloves and protective eyewear.

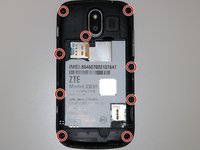
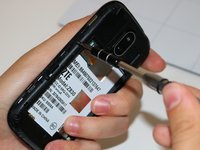
  4. ZTE Compel LCD Screen Replacement, Camera: 手順 4、 2の画像 1 ZTE Compel LCD Screen Replacement, Camera: 手順 4、 2の画像 2
    • Remove the 9 screws that measure 4 mm Phillips #000.

    • Use your iFixit Magnetic Project Mat, or any magnetic surface, to hold your removed screws while working on your ZTE Compel.

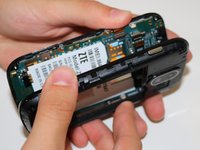
  5. ZTE Compel LCD Screen Replacement: 手順 5、 3の画像 1 ZTE Compel LCD Screen Replacement: 手順 5、 3の画像 2 ZTE Compel LCD Screen Replacement: 手順 5、 3の画像 3
    • Notice the crease in the shiny black plastic. Insert the flat end of your spudger here, about 3mm above the volume buttons, and work your spudger around the circumference of the phone until the front and back are separated.

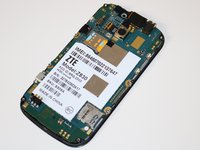
  6. ZTE Compel LCD Screen Replacement: 手順 6、 2の画像 1 ZTE Compel LCD Screen Replacement: 手順 6、 2の画像 2
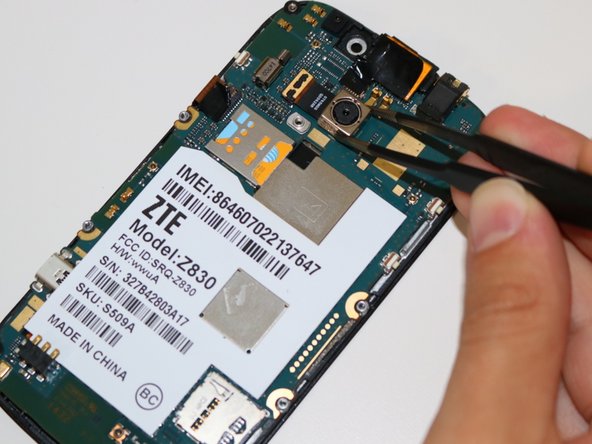
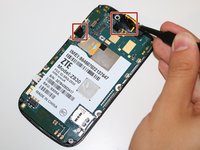
    • Remove the camera by placing your tweezers on the gold piece attached to camera and lift up, disconnecting from the motherboard.

    • Grip the camera with your tweezers and lift up to remove the camera.

    • May need to use light force to remove camera due to the adhesive on the motherboard.

  7. ZTE Compel LCD Screen Replacement, Motherboard: 手順 7、 2の画像 1 ZTE Compel LCD Screen Replacement, Motherboard: 手順 7、 2の画像 2
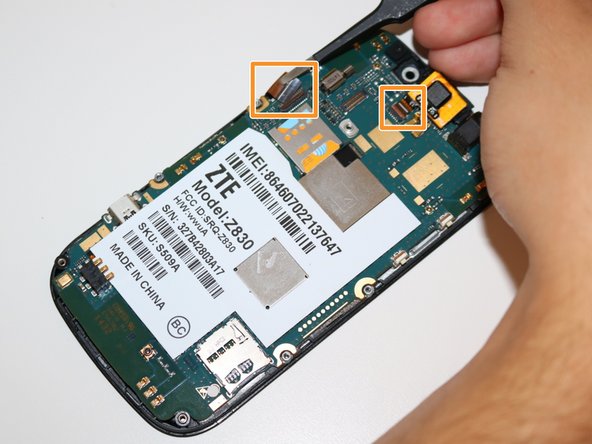
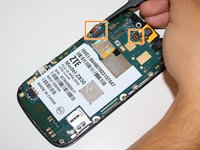
    • Use your tweezers to remove the black electrical tape covering connectors to the motherboard.

    • Use your tweezers to flip the brown clip up, and pull the ribbon connectors out of the connections.

  8. ZTE Compel LCD Screen Replacement: 手順 8、 1の画像 1
    • Use your tweezers to disconnect the final ribbon connector underneath the motherboard at the top of the phone. The motherboard can now be separated from the LCD Screen.

  9. ZTE Compel LCD Screen Replacement, LCD Screen: 手順 9、 1の画像 1
    • The front screen is separated from the motherboard, so you may replace the front LCD touch screen now.

終わりに

To reassemble your device, follow these instructions in reverse order.

ある他の人がこのガイドを完成しました。

作成者

2人の作成者と共同で作成されました。

Kidron Stamper

メンバー登録日: 09/06/18

327 ポイント

3のガイドは作成済み

チーム

Ohio State, Team S1-G4, Whitney Fall 2018 Ohio State, Team S1-G4, Whitney Fall 2018人のメンバー

OSU-WHITNEY-F18S1G4

2 メンバー

10のガイドは作成済み

0 件のコメント

コメントを追加

統計データ:

過去 24時間: 0

過去 7 日: 0

過去 30 日: 0

今までの合計 263