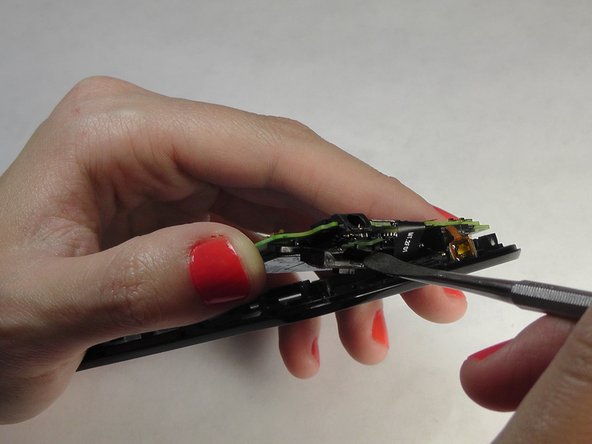
メインコンテンツにスキップ

ZTE Awe Headphone Jack Replacement

必要な工具と部品

  1. ZTE Awe Headphone Jack Replacement, Remove the back cover: 手順 1、 1の画像 1
    • Remove the back cover of the phone to expose the phone's mid-frame.

  2. ZTE Awe Headphone Jack Replacement, Remove battery: 手順 2、 1の画像 1
    • Pry the battery up and out of the phone.

  3. ZTE Awe Headphone Jack Replacement, Unscrew the phone's mid frame: 手順 3、 1の画像 1
    • Use the Phillips Head 00 screw driver to unscrew the seven 0.1mm screws from the phone's mid frame.

  4. ZTE Awe Headphone Jack Replacement, Separate the mid frame and the digitizer: 手順 4、 3の画像 1 ZTE Awe Headphone Jack Replacement, Separate the mid frame and the digitizer: 手順 4、 3の画像 2 ZTE Awe Headphone Jack Replacement, Separate the mid frame and the digitizer: 手順 4、 3の画像 3
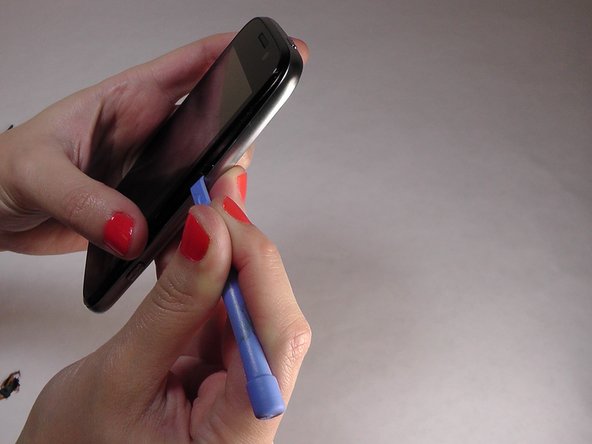
    • Wedge the flat end of the spudger between the mid frame and the digitizer.

  5. ZTE Awe Headphone Jack Replacement, Expose the motherboard: 手順 5、 2の画像 1 ZTE Awe Headphone Jack Replacement, Expose the motherboard: 手順 5、 2の画像 2
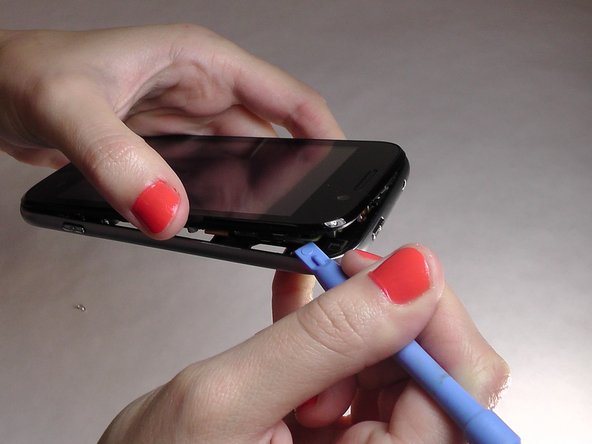
    • Gently pry the mid frame away from the rest of the phone to expose the motherboard.

  6. ZTE Awe Headphone Jack Replacement, Remove the audio jack: 手順 6、 3の画像 1 ZTE Awe Headphone Jack Replacement, Remove the audio jack: 手順 6、 3の画像 2 ZTE Awe Headphone Jack Replacement, Remove the audio jack: 手順 6、 3の画像 3
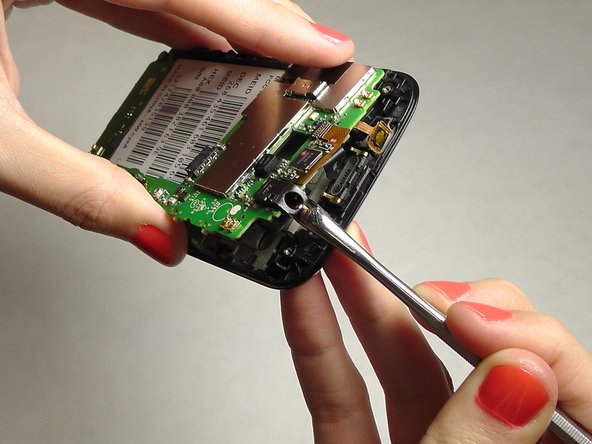
    • Locate the audio jack at the upper right hand corner of the device.

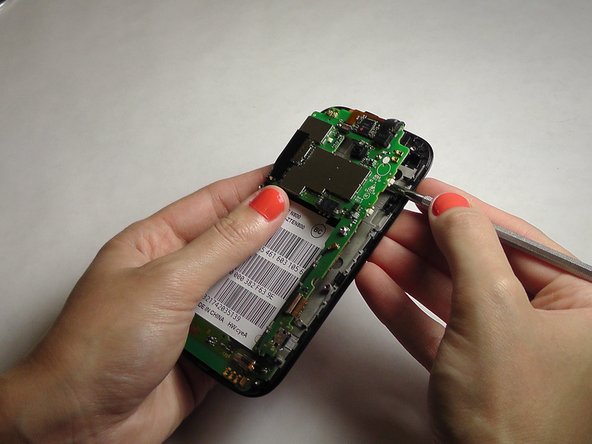
    • Use the metal spudger to pry the motherboard away from the device.

    • Use the metal spudger to unfasten the audio jack and pull it away from the motherboard.

終わりに

To reassemble your device, follow these instructions in reverse order.

4 の人々がこのガイドを完成させました。

作成者

5人の作成者と共同で作成されました。

Jennifer DeMeo

メンバー登録日: 10/07/14

1,035 ポイント

5のガイドは作成済み

チーム

USF Tampa, Team 1-2, Leahy Fall 2014 USF Tampa, Team 1-2, Leahy Fall 2014人のメンバー

USFT-LEAHY-F14S1G2

4 メンバー

10のガイドは作成済み

0 件のコメント

コメントを追加

統計データ:

過去 24時間: 1

過去 7 日: 5

過去 30 日: 6

今までの合計 2,500