メインコンテンツにスキップ

Yuneec Typhoon H Slip Ring Yaw Motor Replacement

必要な工具と部品

  1. Yuneec Typhoon H Slip Ring Yaw Motor Replacement, Slip Ring Yaw Motor: 手順 1、 1の画像 1
    • Remove the Motor Battery Component from the Drone.

  2. Yuneec Typhoon H Slip Ring Yaw Motor Replacement: 手順 2、 2の画像 1 Yuneec Typhoon H Slip Ring Yaw Motor Replacement: 手順 2、 2の画像 2
    • Prop the top cover of the motor piece off the Motor Battery Component. Using Phillips #00 screwdriver, unscrew the three screws (their lengths are 5.9 mm) that are in this top cover piece. This will remove the battery from the top piece.

  3. Yuneec Typhoon H Slip Ring Yaw Motor Replacement: 手順 3、 1の画像 1
    • Grabbing the Motor Piece, remove the bottom cap of this motor piece. The cap should pop right off.

  4. Yuneec Typhoon H Slip Ring Yaw Motor Replacement: 手順 4、 1の画像 1
    • Using the Philips #000 screwdriver, unscrew the two 5.9 mm screws and remove the retaining clip on top of the motor piece.

  5. Yuneec Typhoon H Slip Ring Yaw Motor Replacement: 手順 5、 1の画像 1
    • Using the Phillips #1 screwdriver, remove the four 6.3 mm motor mount screws on top of the motor piece.

  6. Yuneec Typhoon H Slip Ring Yaw Motor Replacement: 手順 6、 1の画像 1
    • Once these screws are removed, pop off the top of the motor piece.

  7. Yuneec Typhoon H Slip Ring Yaw Motor Replacement: 手順 7、 2の画像 1 Yuneec Typhoon H Slip Ring Yaw Motor Replacement: 手順 7、 2の画像 2
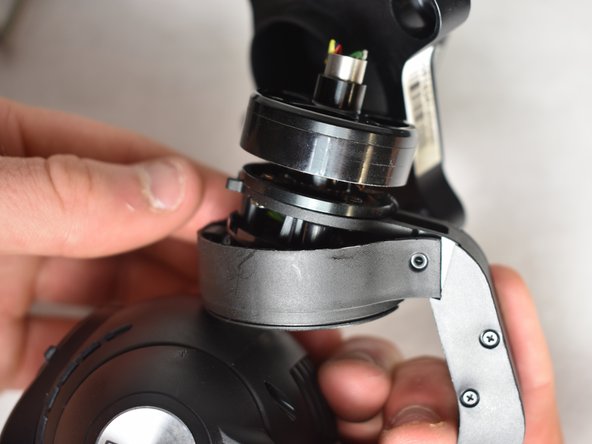
    • Using the Phillips #000 screwdriver, remove the two 4.9 mm screws on the side of the plastic cover holding the wires together.

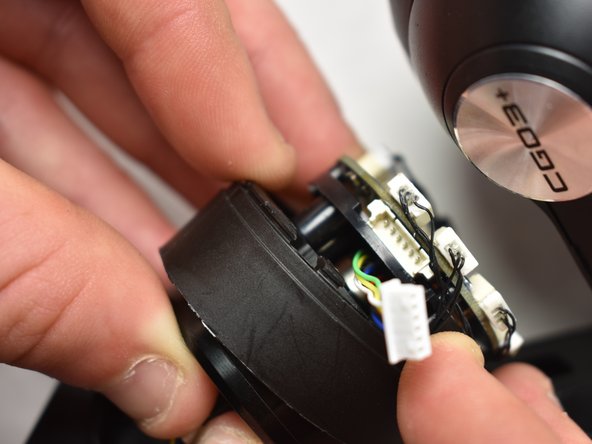
    • Once these screws are removed, press down on this plastic cover to reveal the wires. Pull the locking tabs that are on the end of this piece to completely remove this plastic cover.

  8. Yuneec Typhoon H Slip Ring Yaw Motor Replacement: 手順 8、 2の画像 1 Yuneec Typhoon H Slip Ring Yaw Motor Replacement: 手順 8、 2の画像 2
    • Pull out the white wire connecter that is currently in the wire assembly.

  9. Yuneec Typhoon H Slip Ring Yaw Motor Replacement: 手順 9、 1の画像 1
    • Remove the white wire connector cap using the tweezers. This is for the wires that are currently in the motor piece. Do take note of the orientation and order of the wires.

  10. Yuneec Typhoon H Slip Ring Yaw Motor Replacement: 手順 10、 2の画像 1 Yuneec Typhoon H Slip Ring Yaw Motor Replacement: 手順 10、 2の画像 2
    • Removed the damaged slip ring motor by guiding the wires through the opening in the motor piece. Use a pair of pliers to make sure the wires are pushed through the opening in the center of the motor piece.

終わりに

To reassemble your device, follow these instructions in reverse order (This process is in the guide steps for reference).

3 の人々がこのガイドを完成させました。

作成者

4人の作成者と共同で作成されました。

Davis Ross

メンバー登録日: 04/16/18

321 ポイント

1ガイドが承認済み

チーム

Cal Poly, Team S22-G3, Maness Spring 2018 Cal Poly, Team S22-G3, Maness Spring 2018人のメンバー

CPSU-MANESS-S18S22G3

4 メンバー

5のガイドは作成済み

2 件のコメント

Ive done all the above but digging out the epoxy it took almost all wire with it i couldve solderd to so what to do now its the white wire by the way the camera still stabalises and points straight just cant manually control

donkymeet - 返信

The White or Green wire is most likely not making connection

YuneecSkins.com -

コメントを追加

統計データ:

過去 24時間: 0

過去 7 日: 6

過去 30 日: 10

今までの合計 1,316