メインコンテンツにスキップ

Yoga Tab 3 Pro Rear Panel Replacement

必要な工具と部品

  1. Yoga Tab 3 Pro Rear Panel Replacement, Preparation: 手順 1、 3の画像 1 Yoga Tab 3 Pro Rear Panel Replacement, Preparation: 手順 1、 3の画像 2 Yoga Tab 3 Pro Rear Panel Replacement, Preparation: 手順 1、 3の画像 3
    • Flip the tablet with the rear panel facing up.

    • Push the central button to lift the support.

    • Open the support entirely, using your hands.

    • Remember to turn off the device before doing any repair.

  2. Yoga Tab 3 Pro Rear Panel Replacement, Unscrew the rear shell: 手順 2、 3の画像 1 Yoga Tab 3 Pro Rear Panel Replacement, Unscrew the rear shell: 手順 2、 3の画像 2 Yoga Tab 3 Pro Rear Panel Replacement, Unscrew the rear shell: 手順 2、 3の画像 3
    • You'll need to remove the adesive on the back plate before removing the screws.

    • Remove the sticker using the plastic spudger by lifting it up from one side, then you can remove it entirely by using your fingers.

    • Use the Philips #0 screwriver to remove the three screws.

  3. Yoga Tab 3 Pro Rear Panel Replacement, Separate the two halfs: 手順 3、 3の画像 1 Yoga Tab 3 Pro Rear Panel Replacement, Separate the two halfs: 手順 3、 3の画像 2 Yoga Tab 3 Pro Rear Panel Replacement, Separate the two halfs: 手順 3、 3の画像 3
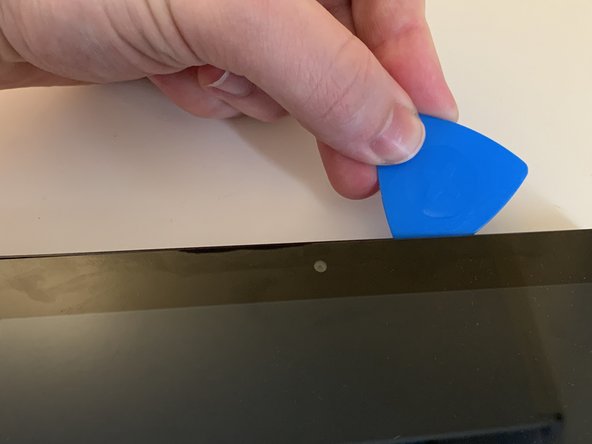
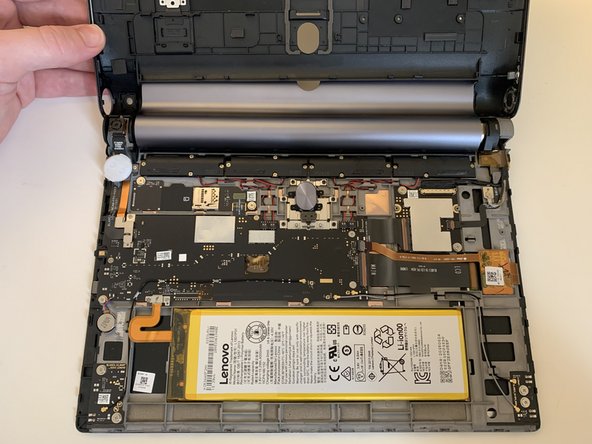
    • Divide the two halfs by inserting the spudger in the gap between the front shell and the rear one. To help you out with this job you can also use some guitar picks.

    • Do the same procedure on all three visible sides, including the two round side parts.

    • Be careful not to insert the spudger too deep into the device, to not damage the internal component.

    • You could use a little bit of force since the half is also hooked in the central portion on the tablet.

    • Important: the rear shell is the one that you remove from the front one; the internal component including the display, will stay attached to the front panel.

  4. Yoga Tab 3 Pro Rear Panel Replacement, Separation: 手順 4、 3の画像 1 Yoga Tab 3 Pro Rear Panel Replacement, Separation: 手順 4、 3の画像 2 Yoga Tab 3 Pro Rear Panel Replacement, Separation: 手順 4、 3の画像 3
    • Once you unhook all the internal clips you can easily remove the rear panel.

    • Watch out at the two side keys and at the central one, since they'll detach form the rear shell. and You'll need to put them back during the reassembly.

終わりに

To reassemble the device, folllow these instruction in reverse order.

ある他の人がこのガイドを完成しました。

以下の翻訳者の皆さんにお礼を申し上げます:

it en

100%

Domenyck Paolyさんは世界中で修理する私たちを助けてくれています! あなたも貢献してみませんか?
翻訳を始める ›

作成者

1人の作成者と共同作成されました。

jacopo

メンバー登録日: 03/25/14

4,382 ポイント

3のガイドは作成済み

チーム

JappoTech JappoTech人のメンバー

Business

1 メンバー

7のガイドは作成済み

0 件のコメント

コメントを追加

統計データ:

過去 24時間: 1

過去 7 日: 3

過去 30 日: 18

今までの合計 254