メインコンテンツにスキップ
Xserve G5 CD Drive Replacement

Xserve G5 CD Drive Replacement

alphaLONE

alphaLONE

最終更新日: May 3, 2020

5分
とても簡単
コミュニティメンバーによる寄稿ガイド

It's my first guide so hello fixers ! This Xserve G5 is the top of the top : Dual 2.7 Ghz PowerPC G5 from IBM, 2 GB DDR, 3x 80GB. But a sad day, the PSU died. That's all. So now, repair !

必要な工具と部品

  1. Xserve G5 CD Drive Replacement, CD/DVD drive: 手順 1、 1の画像 1
    • Here's my dead Xserve G5. I need a new power supply for it. So he will serve for the demo.

  2. Xserve G5 CD Drive Replacement: 手順 2、 1の画像 1
    • Unscrew the two screws.

  3. Xserve G5 CD Drive Replacement: 手順 3、 1の画像 1
    • Remove the top of the server. You will have something like this.

  4. Xserve G5 CD Drive Replacement: 手順 4、 1の画像 1
    • Hello little CD drive ! It's retirement time !

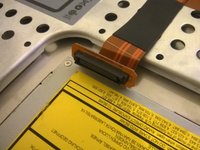
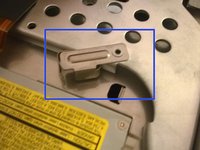
  5. Xserve G5 CD Drive Replacement: 手順 5、 2の画像 1 Xserve G5 CD Drive Replacement: 手順 5、 2の画像 2
    • Disconnect the cable.

    • Push the little metal thing to the left to unsecure the CD drive.

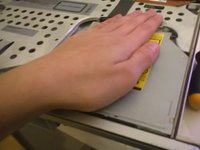
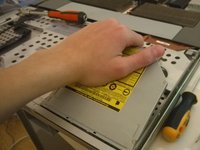
  6. Xserve G5 CD Drive Replacement: 手順 6、 3の画像 1 Xserve G5 CD Drive Replacement: 手順 6、 3の画像 2 Xserve G5 CD Drive Replacement: 手順 6、 3の画像 3
    • Push the drive

    • Pull the drive.

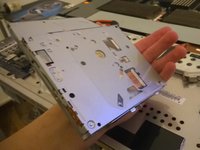
    • And finally, take the drive !

終わりに

To reassemble your device, follow these instructions in reverse order.

7 の人々がこのガイドを完成させました。

alphaLONE

メンバー登録日: 07/01/11

975 ポイント

3のガイドは作成済み

2 Guide Comments

Great explanation!

subscriber - 返信

Thanks for the input! I sadly don't have the blade anymore and can't make other, more detailed guides about other components, but I'm still impressed people liked this one.

alphaLONE -

コメントを追加

統計データ:

過去 24時間: 1

過去 7 日: 5

過去 30 日: 23

今までの合計 4,524