メインコンテンツにスキップ

Xiaomi Yi Motherboard Replacement

必要な工具と部品

  1. Xiaomi Yi Motherboard Replacement, Battery: 手順 1、 2の画像 1 Xiaomi Yi Motherboard Replacement, Battery: 手順 1、 2の画像 2
    • Push the battery door switch to the left.

    • Lift the battery door up.

  2. Xiaomi Yi Motherboard Replacement: 手順 2、 3の画像 1 Xiaomi Yi Motherboard Replacement: 手順 2、 3の画像 2 Xiaomi Yi Motherboard Replacement: 手順 2、 3の画像 3
    • Lift the battery tab up.

    • Remove the battery by pulling the removal tab.

  3. Xiaomi Yi Motherboard Replacement, Front Panel: 手順 3、 2の画像 1 Xiaomi Yi Motherboard Replacement, Front Panel: 手順 3、 2の画像 2
    • Introduce the plastic opening tool into any of the sides of the camera.

    • Pry with the plastic opening tool at the seam between the front and the back panel.

  4. Xiaomi Yi Motherboard Replacement: 手順 4、 3の画像 1 Xiaomi Yi Motherboard Replacement: 手順 4、 3の画像 2 Xiaomi Yi Motherboard Replacement: 手順 4、 3の画像 3
    • Slide prying tool along the seam until front panel is fully separated from the back panel.

  5. Xiaomi Yi Motherboard Replacement, Back Panel: 手順 5、 2の画像 1 Xiaomi Yi Motherboard Replacement, Back Panel: 手順 5、 2の画像 2
    • Remove the four 3.8 mm Phillips #000 screws located in the outer corners of the motherboard.

  6. Xiaomi Yi Motherboard Replacement: 手順 6、 3の画像 1 Xiaomi Yi Motherboard Replacement: 手順 6、 3の画像 2 Xiaomi Yi Motherboard Replacement: 手順 6、 3の画像 3
    • Pull on and remove the black spacer located at the top inside of the camera body using the tweezers and set the part aside.

  7. Xiaomi Yi Motherboard Replacement: 手順 7、 2の画像 1 Xiaomi Yi Motherboard Replacement: 手順 7、 2の画像 2
    • Remove the motherboard from from the back case by gently pulling on the lens housing.

    • Back panel remains.

  8. Xiaomi Yi Motherboard Replacement, Motherboard: 手順 8、 2の画像 1 Xiaomi Yi Motherboard Replacement, Motherboard: 手順 8、 2の画像 2
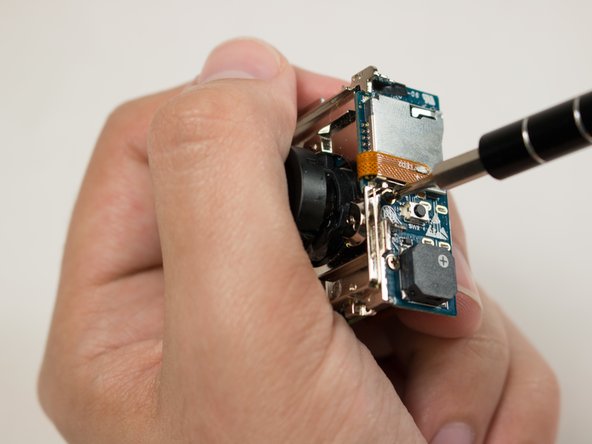
    • Remove the two 3.1 mm Phillips #000 screws securing the motherboard to the chassis.

    • Be sure to support the motherboard, the ribbon cable connection can easily be damaged.

  9. Xiaomi Yi Motherboard Replacement: 手順 9、 3の画像 1 Xiaomi Yi Motherboard Replacement: 手順 9、 3の画像 2 Xiaomi Yi Motherboard Replacement: 手順 9、 3の画像 3
    • Locate the rubber spacer between the image sensor and the ribbon connection for the motherboard.

    • Using the tweezers gently remove the spacer block and set aside.

  10. Xiaomi Yi Motherboard Replacement: 手順 10、 2の画像 1 Xiaomi Yi Motherboard Replacement: 手順 10、 2の画像 2
    • Pry gently using the flat end of the black spudger to remove the ribbon connector.

    • Lift the lens assembly up and away from the motherboard.

    • Motherboard remains.

終わりに

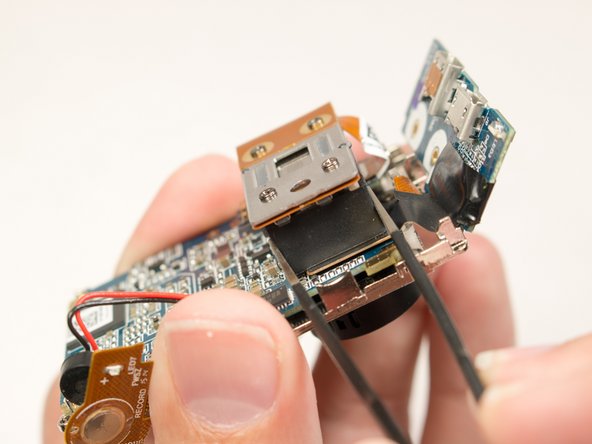
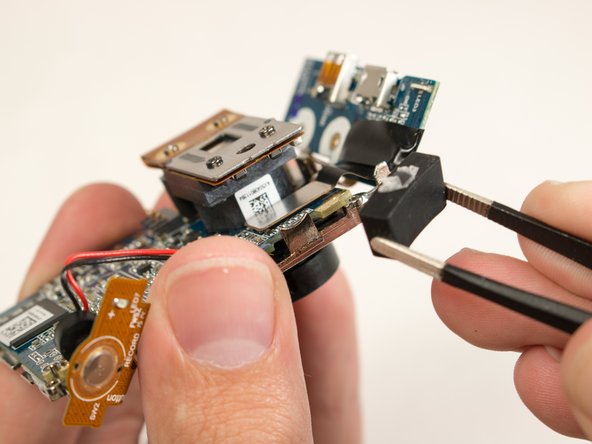
To reassemble your device, follow these instructions in reverse order.

11 の人々がこのガイドを完成させました。

作成者

2人の作成者と共同で作成されました。

William Zipperer

メンバー登録日: 09/03/15

711 ポイント

3のガイドは作成済み

チーム

USF Tampa, Team 15-5, Blackwell Fall 2015 USF Tampa, Team 15-5, Blackwell Fall 2015人のメンバー

USFT-BLACKWELL-F15S15G5

3 メンバー

10のガイドは作成済み

8 件のコメント

Where you buy motherboard for xiaomi yi ?

diamond1981 - 返信

I wonder where I can buy this part ribbon connector to buy.

viilelaa - 返信

Link for buying it waaaaaaaay cheaper:http://bit.ly/XiaoMiYi1080P

tozilen - 返信

Great guide but useless, there is no spare parts on the market for this camera

Nebojsa Rosic - 返信

IC repair is always possible

AdamA -

コメントを追加

統計データ:

過去 24時間: 0

過去 7 日: 3

過去 30 日: 14

今までの合計 12,215