このバージョンは誤った内容を含んでいる可能性があります。最新の承認済みスナップショットに切り替えてください。
必要な工具と部品
-
この手順は未翻訳です。 翻訳を手伝う。
-
Grab a suction cup tool and place it near the bottom of the phone.
-
Pull up on the suction cup to slightly lift the LCD Panel from the body of the phone.
-
Starting from the bottom, slide in a plastic opening tool between the gap of the LCD and the phone.
-
Using a combination of the plastic opening tool and picks, slide around the gaps to unhook the clips, unhinging the panel from the body of the phone.
-
Flip the phone screen towards the bottom of the device and lay the screen facing down.
-
-
この手順は未翻訳です。 翻訳を手伝う。
-
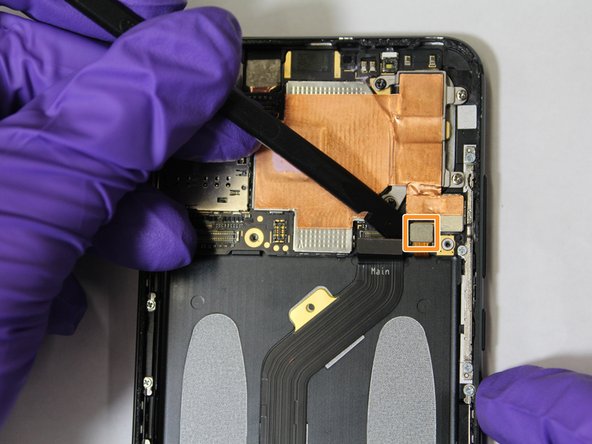
Using a plastic spudger remove the battery connector ribbon cable by getting underneath the connector and gently lifting it off.
-
Using a plastic sudger remove the screen connector ribbon cable by lifting from the underneath.
-
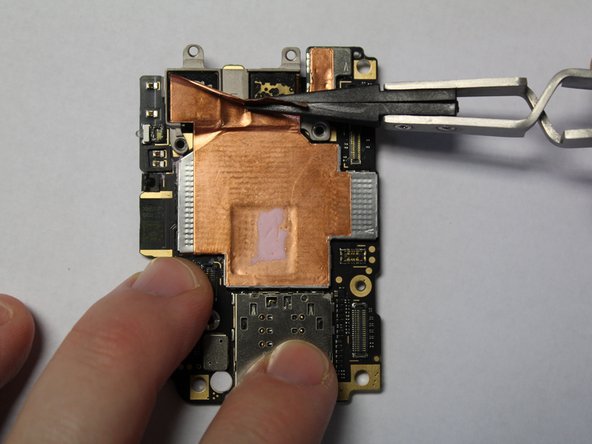
After you remove the ribbon cable the panel should be free to remove and replace.
-
-
-
この手順は未翻訳です。 翻訳を手伝う。
-
On the bottom of the battery are two pull tabs. They are glued on to the battery similarly like a sticker.
-
To remove the battery pull these pull tabs downwards. WARNING: proceed with extreme caution, avoid bending or puncturing the battery.
-
You can use tweezers to lift the pull tabs from the battery. Pull downwards and the adhesive will slowly be removed from the battery.
-


5 の人々がこのガイドを完成させました。

チーム

The Citadel Military College of South Carolina, Team S2-G8, Eggleston Spring 2020 The Citadel Military College of South Carolina, Team S2-G8, Eggleston Spring 2020人のメンバー
CMCSC-EGGLESTON-S20S2G8
3 メンバー
4のガイドは作成済み