メインコンテンツにスキップ

Xelio P1001A-BK Rear Camera Replacement

必要な工具と部品

  1. Xelio P1001A-BK Rear Camera Replacement, Back Cover: 手順 1、 2の画像 1 Xelio P1001A-BK Rear Camera Replacement, Back Cover: 手順 1、 2の画像 2
    • Remove the two 3 mm retaining screws from the side of the tablet with a Phillips #0 screwdriver.

  2. Xelio P1001A-BK Rear Camera Replacement: 手順 2、 2の画像 1 Xelio P1001A-BK Rear Camera Replacement: 手順 2、 2の画像 2
    • Insert the plastic opening tool in between the shelf halves and lift the top shelf half to detach the securing tabs.

    • There are four securing tabs located on each long side.

    • Before fully separating the shell halves, observe if the speakers are separated from the shell half. If they are still in their sockets, gently pry them loose with the plastic opening tool.

  3. Xelio P1001A-BK Rear Camera Replacement, Rear Camera: 手順 3、 1の画像 1
    • Locate ribbon connector, make sure it is secure.

  4. Xelio P1001A-BK Rear Camera Replacement: 手順 4、 1の画像 1
    • With a plastic opening tool, gently pry the camera body from its retaining socket

  5. Xelio P1001A-BK Rear Camera Replacement: 手順 5、 1の画像 1
    • Make sure the camera is unobstructed

  6. Xelio P1001A-BK Rear Camera Replacement: 手順 6、 3の画像 1 Xelio P1001A-BK Rear Camera Replacement: 手順 6、 3の画像 2 Xelio P1001A-BK Rear Camera Replacement: 手順 6、 3の画像 3
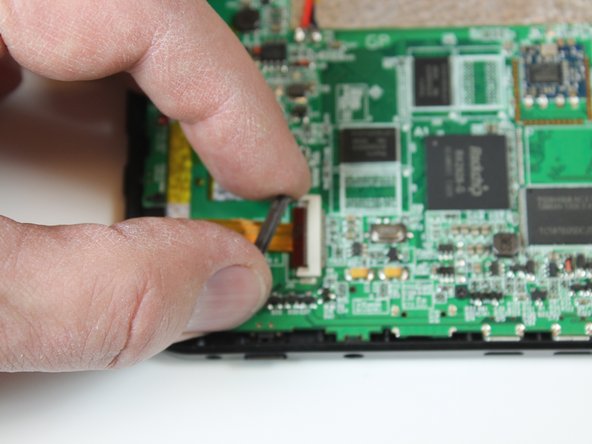
    • If there is still no picture, remove the securing tab on the ribbon connector by inserting the plastic opening tool between the tab on the ribbon cable connector body.

    • Slowly twist the opening tool to loosen the tab. Move the screwdriver to different parts of the tab to move it a little bit at a time.

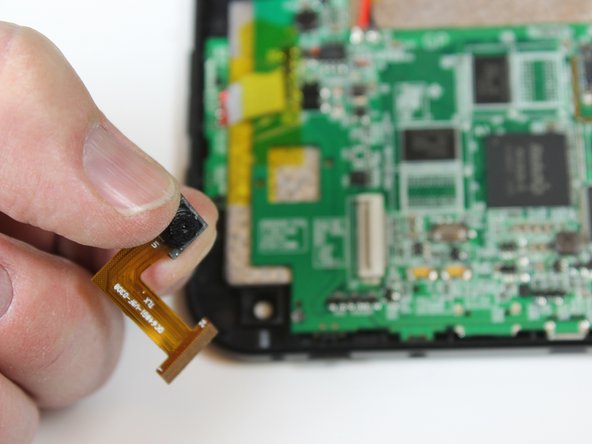
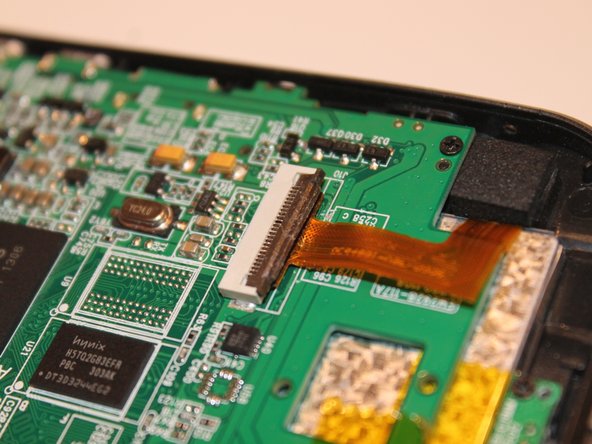
    • Once the tab is loose, remove it then slide the ribbon cable from its connector and remove the camera from the tablet

  7. Xelio P1001A-BK Rear Camera Replacement: 手順 7、 1の画像 1
    この手順で使用する道具:
    Microfiber Cleaning Cloths
    $3.99
    購入する
    • With a microfiber lens cleaning cloth, clean the camera lens

  8. Xelio P1001A-BK Rear Camera Replacement: 手順 8、 3の画像 1 Xelio P1001A-BK Rear Camera Replacement: 手順 8、 3の画像 2 Xelio P1001A-BK Rear Camera Replacement: 手順 8、 3の画像 3
    • To install a new camera, slide the ribbon cable back into its connector

    • Reinstall the ribbon cable securing tab

    • Note the indentation that goes along the edge of the securing tab. It must be facing up to orient the tab correctly

    • Install the camera in its retaining socket

終わりに

To reassemble your device, follow these instructions in reverse order.

作成者

4人の作成者と共同で作成されました。

Caleb

メンバー登録日: 03/11/15

101 ポイント

1ガイドが承認済み

チーム

Colorado Springs, Team 4-2, Panko Spring 2015 Colorado Springs, Team 4-2, Panko Spring 2015人のメンバー

UCCS-PANKO-S15S4G2

3 メンバー

12のガイドは作成済み

0 件のコメント

コメントを追加

統計データ:

過去 24時間: 0

過去 7 日: 0

過去 30 日: 0

今までの合計 120