メインコンテンツにスキップ

このバージョンは誤った内容を含んでいる可能性があります。最新の承認済みスナップショットに切り替えてください。

必要な工具と部品

  1. この手順は未翻訳です。 翻訳を手伝う。

    : 手順 1、 2の画像 1 : 手順 1、 2の画像 2
    • Remove the two 3 mm retaining screws from the side of the tablet with a Phillips #0 screwdriver.

  2. この手順は未翻訳です。 翻訳を手伝う。

    : 手順 2、 2の画像 1 : 手順 2、 2の画像 2
    • Insert the plastic opening tool in between the shelf halves and lift the top shelf half to detach the securing tabs.

    • There are four securing tabs located on each long side.

    • Before fully separating the shell halves, observe if the speakers are separated from the shell half. If they are still in their sockets, gently pry them loose with the plastic opening tool.

  3. この手順は未翻訳です。 翻訳を手伝う。

    : 手順 3、 2の画像 1 : 手順 3、 2の画像 2
    • De-solder the two wires that connect the battery pack to the motherboard using a needle-nose plier and a soldering iron.

    • Wrap the exposed end of the black negative wire with electrical tape.

  4. この手順は未翻訳です。 翻訳を手伝う。

    : 手順 4、 1の画像 1
    • Trace the outline of the battery pack on the screen back shield with a black Sharpie marker.

    • This will aid in positioning the new battery pack.

  5. この手順は未翻訳です。 翻訳を手伝う。

    : 手順 5、 1の画像 1
    • WARNING: Never use a knife or sharp object around a battery. Puncturing a battery may potentially cause a fire.

    • Carefully slide a spudger under the adhesive pads in between the battery pack and the screen back shield.

    • Remove the battery pack.

    • Avoid bending the battery pack.

  6. この手順は未翻訳です。 翻訳を手伝う。

    : 手順 6、 1の画像 1
    • Apply a small amount of silicon glue to the new battery on the side it will touch the screen back shield.

    • Place the battery pack on the screen back shield inside the outline.

  7. この手順は未翻訳です。 翻訳を手伝う。

    : 手順 7、 2の画像 1 : 手順 7、 2の画像 2
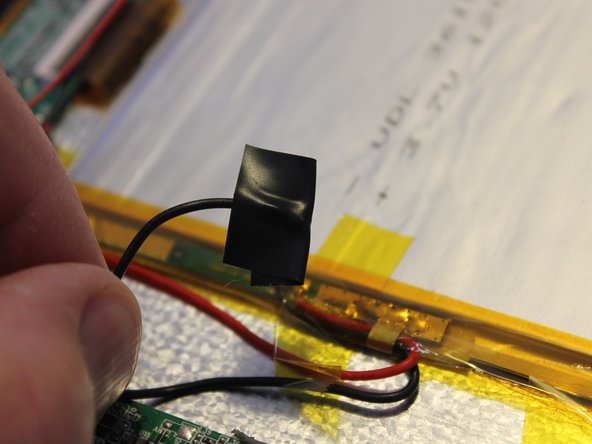
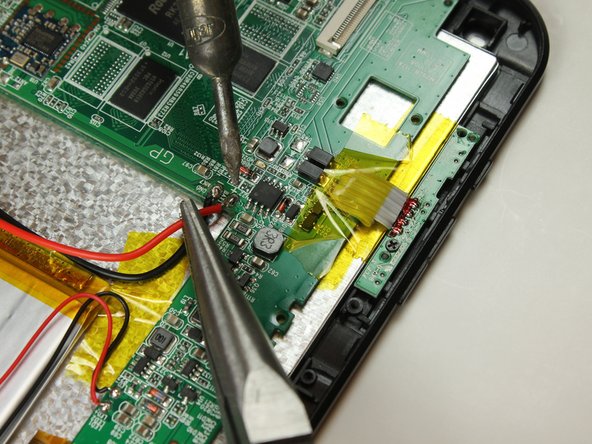
    • Solder the red battery wire to the point labeled BATT +, and the black battery wire to the point BATT -.

    • If the wire ends are not exposed, strip 3mm of insulation from the end using a wire stripper. Start with the black negative wire and wrap the exposed ends with electrical tape.

ゴール

作成者

8人の作成者と共同で作成されました。

Michael Case

メンバー登録日: 03/11/15

110 ポイント

2のガイドは作成済み

チーム

Colorado Springs, Team 4-2, Panko Spring 2015 Colorado Springs, Team 4-2, Panko Spring 2015人のメンバー

UCCS-PANKO-S15S4G2

3 メンバー

12のガイドは作成済み

0 件のコメント

コメントを追加

統計データ:

過去 24時間: 0

過去 7 日: 0

過去 30 日: 0

今までの合計 189