メインコンテンツにスキップ

このバージョンは誤った内容を含んでいる可能性があります。最新の承認済みスナップショットに切り替えてください。

必要な工具と部品

  1. , ハードドライブ: 手順 1、 1の画像 1
    • Xboxの電源が安全に抜かれていることを確認し、水平で安定した場所に寝かせてください。

  2. : 手順 2、 1の画像 1
    • Xboxを裏返すと、4つのゴム足が見えます。

    • メタル製スパッジャーを使って、4つのゴム足を外します。

  3. : 手順 3、 2の画像 1 : 手順 3、 2の画像 2
    • ケース底面の2つのラベルの下に、さらに2本のネジが隠れています。

    • ラベルを剥がすか、ラベルを貫通するネジ穴を手で触って感じ取り、穴を開けるだけで十分です。

  4. : 手順 4、 1の画像 1
    • 底面カバーを上部カバーに固定している6本のT20トルクスネジを外します。

  5. : 手順 5、 2の画像 1 : 手順 5、 2の画像 2
    • 底面シェルと上部ケースが外れたら、慎重にXboxのトップカバーを持ち上げて外します。

  6. : 手順 6、 2の画像 1 : 手順 6、 2の画像 2
    • ハードディスクをXboxに固定している3本の3mmT10ネジを外します。

    • IDEリボンケーブルを持ち上げたときにだけ見えるネジが、ハードディスクドライブの後部左側に1つあります。他の2つはハードディスクドライブの前面右側と左側にあります。

    • ディスクドライブの左下にあるネジは、ちょうど角に近いところにあります。

  7. : 手順 7、 2の画像 1 : 手順 7、 2の画像 2
    • ハードドライブの電源ケーブルをキャリアから外し、ハードドライブを持ち上げて取り出すのに十分な弛みを持たせます。

    • プラスチック製のハードドライブキャリアを持ち上げて、Xboxケースから取り出します。

  8. : 手順 8、 3の画像 1 : 手順 8、 3の画像 2 : 手順 8、 3の画像 3
    • プラスチック製ハードドライブキャリアから4本の3.4mmT15トルクスネジを取り外します(片側2本ずつ)。

    • プラスチック製のキャリアからハードディスクを慎重に取り外します。優しく揺らすと、ハードディスクが簡単に出てきます。

  9. : 手順 9、 2の画像 1 : 手順 9、 2の画像 2
    • ハードドライブデータリボンケーブルと電源ケーブルの両方を、ハードドライブからまっすぐ上に引き上げます。

    • しっかりと固定されている場合がありますので、注意して取り外してください。ケーブルアセンブリを損傷する可能性があるので、ワイヤーを引っ張らないでください。

  10. , ディスクドライブ: 手順 10、 3の画像 1 , ディスクドライブ: 手順 10、 3の画像 2 , ディスクドライブ: 手順 10、 3の画像 3
    • ディスクドライブを外します。すぐに外れるはずです。

    • ディスクドライブの裏側から黄色のケーブルとリボンケーブルの接続を外します。

  11. : 手順 11、 1の画像 1
    • ディスクドライブの周りにある黒いプラスチックのタブをこじると、ディスクドライブを筐体から取り外すことができます。取り外したら、ドライブを脇に置いてください。

    • コンソールが使えない状態にのみ外します!

  12. この手順は未翻訳です。 翻訳を手伝う。

    : 手順 12、 2の画像 1 : 手順 12、 2の画像 2
    • Remove two #1 PH screws

    • Remove upper metal housing

    • Remove two T10 Screws

    • Remove lower metal housing

  13. この手順は未翻訳です。 翻訳を手伝う。

    : 手順 13、 2の画像 1 : 手順 13、 2の画像 2
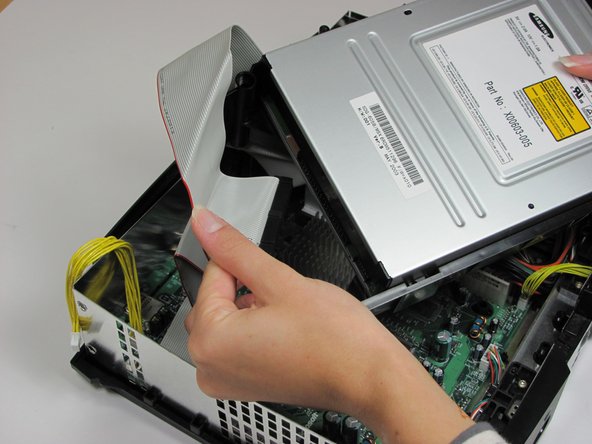
    • Remove two PH1 screws

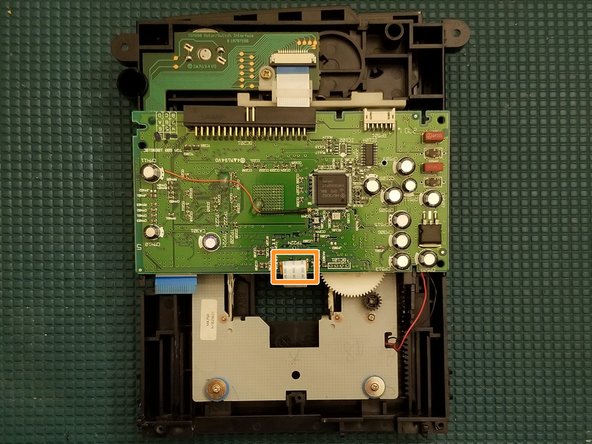
    • Gently pull up on the ribbon retaining tab. Do NOT pull on ribbon. It will slide itself out in final step

    • Orange/Yellow steps only required if you need to remove the entire PCB

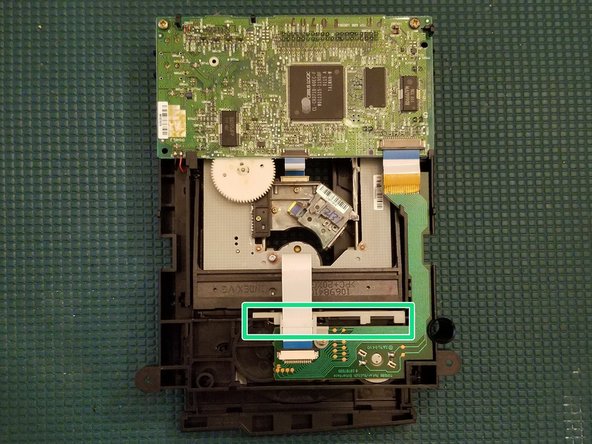
    • Gently pull up on the ribbon retaining tab. Ribbon is attached to underside of PCB via a sticky pad. Gently pull the ribbon away from pad

    • Desolder both points. Red (Left) Black (Right)

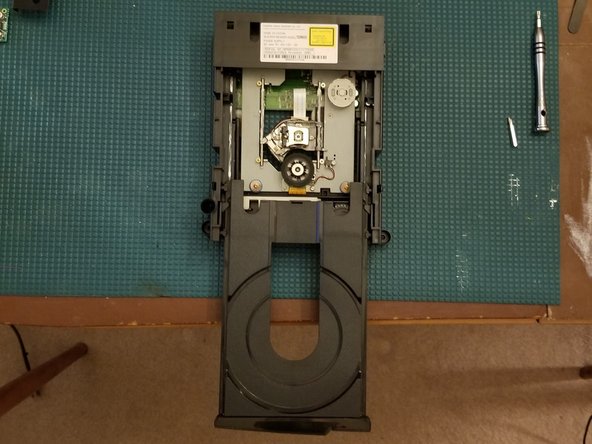
    • Gently press up on the PCB where you removed the two PH1 screws and rotate the board upside down

    • If your drive is "dead" this is where I would suggest replacing your electrolytic capacitors. There are 12 on the Thomson drive

  14. この手順は未翻訳です。 翻訳を手伝う。

    : 手順 14、 3の画像 1 : 手順 14、 3の画像 2 : 手順 14、 3の画像 3
    • With the drive upside down slide the white lever to the right

    • Drive door will eject about a half inch

    • Flip the drive over and slowly pull the door out

    • Don't forget to slide the white lever back to the left during reassembly

  15. この手順は未翻訳です。 翻訳を手伝う。

    : 手順 15、 2の画像 1 : 手順 15、 2の画像 2
    • These drives are seasoned. Model 1.0 Xboxes were made in 2001 and nearly 20yrs old now. It's wise to re-lubricate them anywhere moving parts or friction is applied

    • If your drive door sticks when pressing the eject button, now is the time to replace your drive belt. Do this before applying grease to eliminate accidentally getting it on your belt

    • Apply grease to highlighted areas

    • Don't forget the tooth track, highlighted yellow, shown in previous step

    • Apply a liberal glob of grease along the tooth track and insert/withdraw the drive door a few times to easily lubricate the gears highlighted pink

    • With a cotton swab, gently clean your laser with 91% or higher isopropyl alcohol

ゴール

2 の人々がこのガイドを完成させました。

作成者

1人の作成者と共同作成されました。

Navy Vet 2015

メンバー登録日: 06/25/15

7,296 ポイント

15のガイドは作成済み

3 件のコメント

What is the plastic disk at the top of the drive above where the dvd sits is called?

Austin Perdue - 返信

can it cause error 12 even if it opens drive? talking 1st gen xbox i also move the laser am not sure if i need to realign the spinning disc or both?

Austin Perdue - 返信

laser did get clean but even with opening drive gets error 12….

Austin Perdue - 返信

コメントを追加

統計データ:

過去 24時間: 3

過去 7 日: 21

過去 30 日: 87

今までの合計 4,701