はじめに
This guide covers how to remove the Blu Ray disk drive in the Xbox One X. This is a straightforward process once the outer shell of the Xbox has been removed.
必要な工具と部品
-
-
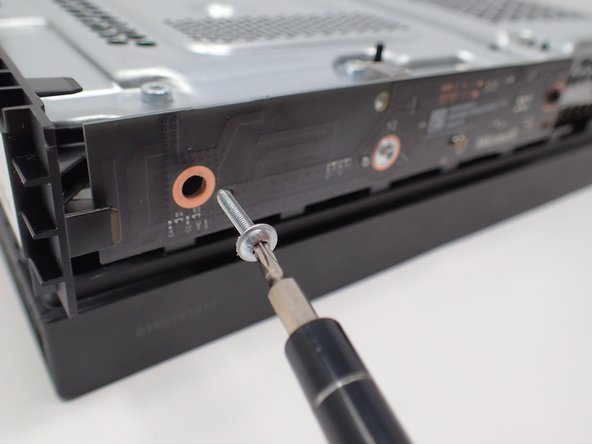
Use a T9 Torx screwdriver to remove the 13mm screw which is under and to the left of the power input.
-
-
-
Orient the case so that the front of the Xbox (the side with the power button) is facing you.
-
Remove the top of the case by sliding the case towards you.
Bitte auch diesen Schritt überarbeiten. Es wird lediglich das Gehäuse für ca 2-4 Zentimeter nach hinten verschoben, dann sollte bereits das erste Hinterniss kommen, welches man ohne Gewalt nicht bewältigen kann. Hier muss das Gehäuse auf der Rechten Seite angehoben werden, dann lässt sich das Gehäuse ohne Probleme entfernen. Auch beim Zusammenbauen. Erst auf der Linkenseite bis zum ersten Plastik Haken (ca 2-4 Zentimeter vom Ende entfern) anlegen, danach auf der Rechten seite einklicken. Das Gehäuse kann auf der Rechten Seite auch etwas gedehnt werden, dabei geht nichts kaputt.
Please also revise this step. It is only the case for about 2-4 centimeters moved backwards, then should already come the first butt that you can not cope without violence. Here, the housing must be raised on the right side, then the housing can be removed without problems. Also when assembling. First put on the left side until the first plastic hook (about 2-4 centimeters from the end), then click on the right side. The case can also be slightly stretched on the right side, nothing breaks.
-
-
-
Using a T9 Torx screwdriver, remove the two 15mm silver screws that are holding a circuit board/panel to the side of the interior metal casing.
-
Using the same screwdriver, remove the 9mm black screw located farther to the right on the same circuit board/panel.
I feel like someone wanted to use a T9 for everything, but these were T8.
You can use a T8 or T9 for this step. I was able to get all three screws with a T9 but there’s so little difference that both will work.
-
-
-
-
Pull the upper edge of the white clip down, and then remove the white connector from the dislocated panel using precision tweezers.
Unfortunately the manual is not correct here. Above the black slot is a white switch / pen, fold it over with your fingernail, so fold it over to the front. Then the cable can be easily removed without any problems and tweezers. GERMAN: Hier ist die Anleitung leider nicht korrekt. Oberhalb des schwarzen Steckplatzes befindet sich ein weißer Schalter/Stift, diesen mit dem Fingernagel umklappen, also praktisch zu der Vorderseite umklappen. Danach lässt sich das Kabel ohne Probleme und Pinzette einfach abziehen.
Thanks for telling me that
NR26 -
Thank you. Had no idea what the !&&* this guy was talking about with the “pull down" part. You flip it downward gently like a flap.
It is not necessary to remove the white flat cable. After removing the three gold screws from the board, go to the next steps and in step 9 remove the cover while hold the board against the cover to prevent stress on the white cable.
Whole Witt - 返信
@Whole Witt, I second this. When you get to step 9 to remove the cover, just carefully remove the board, then remove the cover along with the board. You can leave the board in the cover.
-
-
-
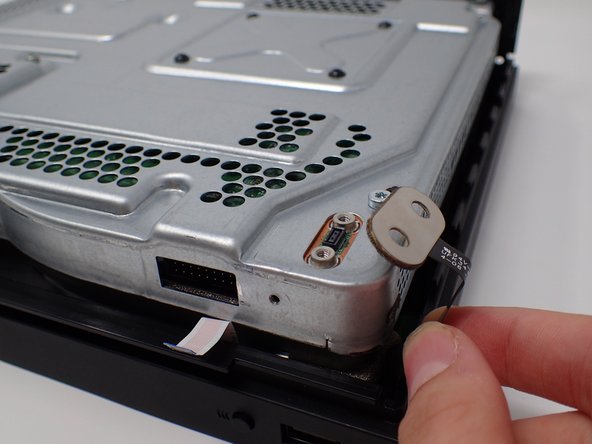
On the top of the device in the corner directly above the white connector, there is an oval plate held in place by two screws.
-
Remove both of these 7mm screws with a Torx T9 screwdriver.
-
Lift the detached plate off to the side.
These are actually T8. Be careful trying to use a T9.
what is the name of this strip it tore on mine how do I get it replaced?
-
-
-
Use a Torx T9 screwdriver to remove the six 47mm long screws, which attach the bottom side of the outer case.
These are all T10 on my Scorpio.
These are T10 on the Xbox One X MFR Date 22-OCT-2017. You could get away with T9 and would be careful.
My manufacture date is 15-JUN-18 and is not a Scorpio and is still T10. I would not recommend using a T9.
They are t-10 and t-8
-
-
-
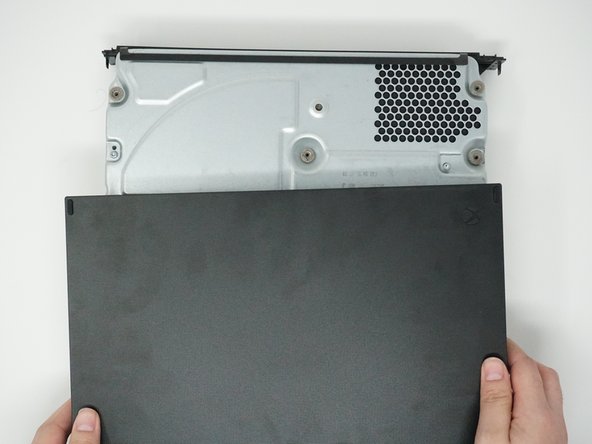
Turn the Xbox over, so that the bottom of the case is on top.
-
Lift the bottom of the case off of the Xbox by pulling it up and toward you.
I had to slide it forward off of the disc drive a little bit before I could lift up.
When putting this cover back on, lay it flat and slide the case into it, slightly angling the front down so the plastic lugs on the BD-ROM fascia board slide into the slots in the cover You’ll have to push to the left slightly (with the cover flat side down and the front facing you) so as to depress the clip on the left-front side of the cover. You can check that the cover is on correctly by looking at the back of the cover and case and ensuring the screw holes on the cover line up with the case bezel.
-
-
-
Flip over the device again, so that the top is facing upwards.
-
Remove the 4 smaller 11mm screws in the lower left corner on the metal casing using a Torx T9 screwdriver.
All T10 for me. The 4 red circle screws are for the hard drive and should be removed later.
This step appears it should be before Step 9
These are also T10 like in Step 8
This is unnecessary to remove the cover, this is ONLY necessary for the HD.
Note the 5th screw to remove, top middle, otherwise the casing will not come off in step 12.
-
-
-
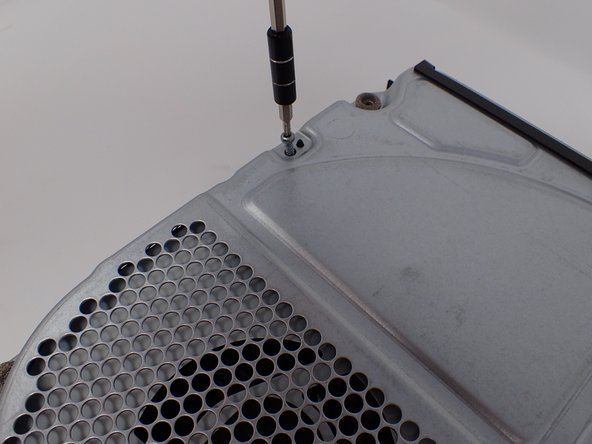
Flip over the device again, so that the bottom is facing upwards.
-
Using a Torx T10 screwdriver, remove the two screws located on opposite sides of the metal casing. One is near the fan vent, and the other is near the power supply vent.
-
-
-
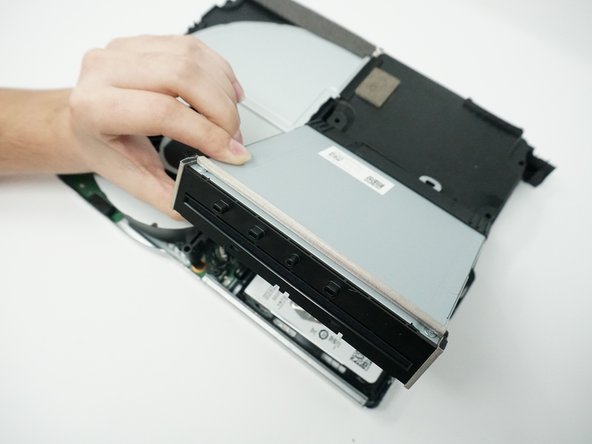
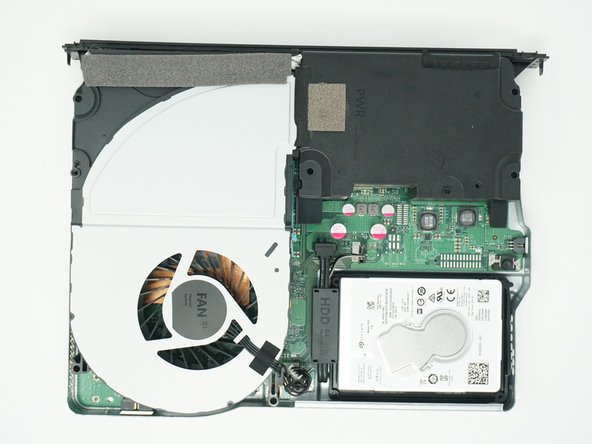
Using your fingers, gently unplug the two sets of wires connecting the drive to the motherboard.
-
Alternatively, you can disconnect the wires from the drive-side sockets. This is much easier if you have not removed the power supply.
-
The BD drive should now be completely detached from the rest of the device, and it can be set aside.
This step is much easier if you remove the black power supply module. Both wires are removed straight up (not towards the front of the Xbox, and forcing them forward could damage the wire, connector or board.
You don’t have to remove the drive. just leave it connected after you remove the drive.
If you’re just trying to get to the hard drive, I would recommend leaving the BD-ROM connected and just turn and rest it on the fan.
-


To reassemble your device, follow these instructions in reverse order.
To reassemble your device, follow these instructions in reverse order.
4 の人々がこのガイドを完成させました。
チーム

Cal Poly, Team S2-G6, Livingston Winter 2018 Cal Poly, Team S2-G6, Livingston Winter 2018人のメンバー
CPSU-LIVINGSTON-W18S2G6
4 メンバー
23のガイドは作成済み
5 件のコメント
ok it says no other parts required besides the tweezers and the t9 screw driver, but it doesn't mention what model of BD-ROM is suitable to replace it with.
Please FIX Number 8 THIS IS NOT RIGHT!
Unfortunately the manual is not correct here. Above the black slot is a white switch / pen, fold it over with your fingernail, so fold it over to the front. Then the cable can be easily removed without any problems and tweezers. GERMAN: Hier ist die Anleitung leider nicht korrekt. Oberhalb des schwarzen Steckplatzes befindet sich ein weißer Schalter/Stift, diesen mit dem Fingernagel umklappen, also praktisch zu der Vorderseite umklappen. Danach lässt sich das Kabel ohne Probleme und Pinzette einfach abziehen.
What is the model of the BD ROM drive for the xBox 1 X?
Followed this guide and https://www.youtube.com/watch?v=wO-QanKR... and upgraded my Xbox One X Project Scorpio edition to 2TB SSD. Thanks and keep up the good work