はじめに
このガイドでは、Xbox One Xのプラスチック製アウターケースの取り外し方法を詳しく説明します。この手順は、損傷したケースを交換する場合に役立ちます。アウターケースの取り外しは、内部部品を交換する場合にも必要です。開始する前に、適切な工具に加えて、部品を整理するためのスペースが十分で、かつ清潔な環境があることを確認しておくことをお勧めします。Xboxを分解すると、メーカー保証が無効になる場合があることに注意してください。このため、メーカーが定めた条項と条件を事前に確認しておいたほうがいいでしょう。
必要な工具と部品
-
-
Xboxの前面(電源ボタンがある側)を手前に向けます。
-
ケースを手前にスライドさせて、ケースの上部を取り外します。
Bitte auch diesen Schritt überarbeiten. Es wird lediglich das Gehäuse für ca 2-4 Zentimeter nach hinten verschoben, dann sollte bereits das erste Hinterniss kommen, welches man ohne Gewalt nicht bewältigen kann. Hier muss das Gehäuse auf der Rechten Seite angehoben werden, dann lässt sich das Gehäuse ohne Probleme entfernen. Auch beim Zusammenbauen. Erst auf der Linkenseite bis zum ersten Plastik Haken (ca 2-4 Zentimeter vom Ende entfern) anlegen, danach auf der Rechten seite einklicken. Das Gehäuse kann auf der Rechten Seite auch etwas gedehnt werden, dabei geht nichts kaputt.
Please also revise this step. It is only the case for about 2-4 centimeters moved backwards, then should already come the first butt that you can not cope without violence. Here, the housing must be raised on the right side, then the housing can be removed without problems. Also when assembling. First put on the left side until the first plastic hook (about 2-4 centimeters from the end), then click on the right side. The case can also be slightly stretched on the right side, nothing breaks.
-
-
-
-
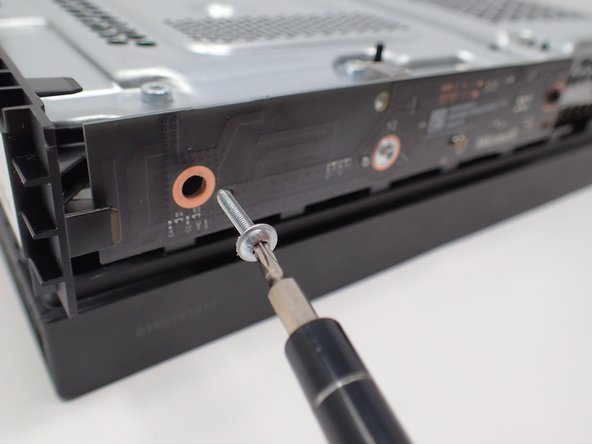
T9トルクスドライバーを使用して、回路基板/パネルを内部の金属ケース側面に固定している、銀色の15 ㎜ネジ2本をを取り外します。
-
同じドライバーを使用して、同じ回路基板/パネルの右にある黒い9 ㎜のネジを取り外します。
I feel like someone wanted to use a T9 for everything, but these were T8.
You can use a T8 or T9 for this step. I was able to get all three screws with a T9 but there’s so little difference that both will work.
-
-
-
白いクリップの上部端を下向きに引っ張り、それから精密ピンセットを使用して、白いコネクタを外れたパネルから取り外します。
Unfortunately the manual is not correct here. Above the black slot is a white switch / pen, fold it over with your fingernail, so fold it over to the front. Then the cable can be easily removed without any problems and tweezers. GERMAN: Hier ist die Anleitung leider nicht korrekt. Oberhalb des schwarzen Steckplatzes befindet sich ein weißer Schalter/Stift, diesen mit dem Fingernagel umklappen, also praktisch zu der Vorderseite umklappen. Danach lässt sich das Kabel ohne Probleme und Pinzette einfach abziehen.
Thanks for telling me that
NR26 -
Thank you. Had no idea what the !&&* this guy was talking about with the “pull down" part. You flip it downward gently like a flap.
It is not necessary to remove the white flat cable. After removing the three gold screws from the board, go to the next steps and in step 9 remove the cover while hold the board against the cover to prevent stress on the white cable.
Whole Witt - 返信
@Whole Witt, I second this. When you get to step 9 to remove the cover, just carefully remove the board, then remove the cover along with the board. You can leave the board in the cover.
-
-
-
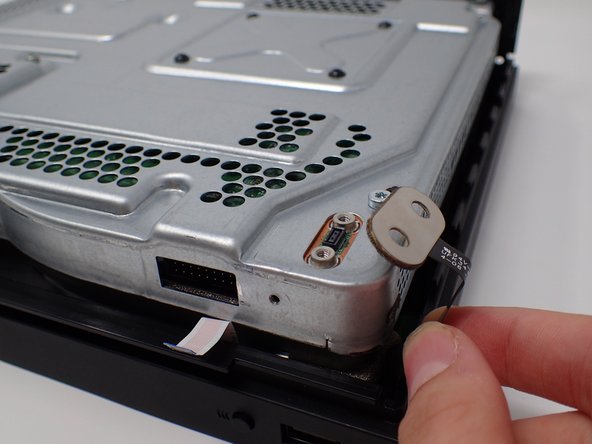
デバイス上部の隅(白いコネクタのすぐ上)に、楕円形のプレートが2本のネジで固定されています。
-
この2本の7 ㎜ネジを、T9ドライバーで取り外します。
-
取り外したプレートを、側面に向かって持ち上げます。
These are actually T8. Be careful trying to use a T9.
what is the name of this strip it tore on mine how do I get it replaced?
-
-
-
T9トルクスドライバーを使用して、底面をアウターケースに取り付けている、47 ㎜の長軸ネジ6本を取り外します。
These are all T10 on my Scorpio.
These are T10 on the Xbox One X MFR Date 22-OCT-2017. You could get away with T9 and would be careful.
My manufacture date is 15-JUN-18 and is not a Scorpio and is still T10. I would not recommend using a T9.
They are t-10 and t-8
-
-
-
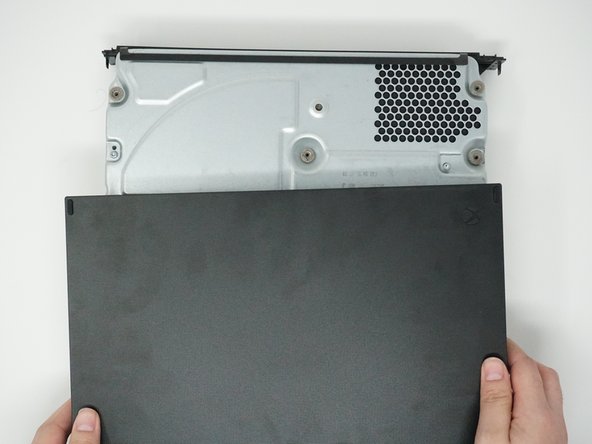
Xboxを裏返して、ケースの底部を上に向けます。
-
ケースの底部を持ち上げ、手前に引っ張ってXboxから分離します。
I had to slide it forward off of the disc drive a little bit before I could lift up.
When putting this cover back on, lay it flat and slide the case into it, slightly angling the front down so the plastic lugs on the BD-ROM fascia board slide into the slots in the cover You’ll have to push to the left slightly (with the cover flat side down and the front facing you) so as to depress the clip on the left-front side of the cover. You can check that the cover is on correctly by looking at the back of the cover and case and ensuring the screw holes on the cover line up with the case bezel.
-


元通りに組み立てるには、これらの手順を逆に実行してください。
元通りに組み立てるには、これらの手順を逆に実行してください。
7 の人々がこのガイドを完成させました。
以下の翻訳者の皆さんにお礼を申し上げます:
100%


これらの翻訳者の方々は世界を修理する私たちのサポートをしてくれています。 あなたも貢献してみませんか?
翻訳を始める ›
チーム

Cal Poly, Team S2-G6, Livingston Winter 2018 Cal Poly, Team S2-G6, Livingston Winter 2018人のメンバー
CPSU-LIVINGSTON-W18S2G6
4 メンバー
23のガイドは作成済み
2 件のコメント
Where do you get the outer case from? And if I only want to replace the outer case could I just follow the first 3 steps?
Following. I need a replacement project Scorpio case. the system I got it from was from Mercari and the guy did a poor job in taking care of the case and I need a top Scorpio case.