メインコンテンツにスキップ

Xbox One Wireless Controller 1697 Bumpers Replacement

必要な工具と部品

  1. Xbox One Wireless Controller 1697 Bumpers Replacement, Bumpers: 手順 1、 1の画像 1
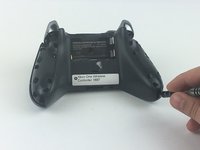
    • Remove the battery pack cover.

    • Remove the two AA batteries.

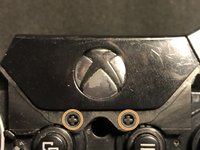
    • Carefully remove the sticker or puncture to reveal the screw.

  2. Xbox One Wireless Controller 1697 Bumpers Replacement: 手順 2、 3の画像 1 Xbox One Wireless Controller 1697 Bumpers Replacement: 手順 2、 3の画像 2 Xbox One Wireless Controller 1697 Bumpers Replacement: 手順 2、 3の画像 3
    • Remove the side handles by wedging the spudger around the side panels.

    • Pry the side panel by moving the spudger back and forth. You must do this along the entire seam to remove the side handle panel.

    • There are seven clips that need to be opened to remove each handle panel.

  3. Xbox One Wireless Controller 1697 Bumpers Replacement: 手順 3、 3の画像 1 Xbox One Wireless Controller 1697 Bumpers Replacement: 手順 3、 3の画像 2 Xbox One Wireless Controller 1697 Bumpers Replacement: 手順 3、 3の画像 3
    • Removing the side handles allows access to remove the faceplate.

    • Use the TORX TR8 screwdriver to remove the five TR9 Torx screws.

  4. Xbox One Wireless Controller 1697 Bumpers Replacement: 手順 4、 3の画像 1 Xbox One Wireless Controller 1697 Bumpers Replacement: 手順 4、 3の画像 2 Xbox One Wireless Controller 1697 Bumpers Replacement: 手順 4、 3の画像 3
    • Now that the bumpers are easily visible make sure to clean any dirt or grime that may be around the bumpers.

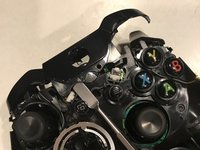
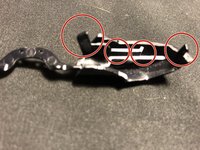
    • The bumpers are connected by a middle plastic cover that is around the Xbox home button. Remove this plastic piece by lifting the plastic cover over the two pins, pressing the home button in, and pushing the cover towards the top of the controller.

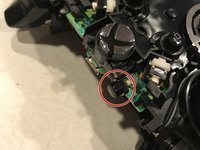
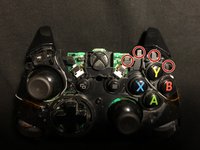
    • Be aware of the sync button loosely placed under the plastic covering. Ensure it is put back before putting back the bumper/plastic cover assembly.

    • Remove the current bumper assembly by pulling them off the plastic cover.

  5. Xbox One Wireless Controller 1697 Bumpers Replacement: 手順 5、 3の画像 1 Xbox One Wireless Controller 1697 Bumpers Replacement: 手順 5、 3の画像 2 Xbox One Wireless Controller 1697 Bumpers Replacement: 手順 5、 3の画像 3
    • The controller is now ready for the new bumper assembly.

    • Align the new bumpers onto the top of the controller by holding down the triggers and aligning the four pins on both sides.

    • Set the new home button cover over the micro USB port, push the home button in, and pull the cover over the two pins shown.

終わりに

Your device is now ready to be used.

60 の人々がこのガイドを完成させました。

作成者

9人の作成者と共同で作成されました。

Ryan Burroughs

メンバー登録日: 09/25/17

1,168 ポイント

2のガイドは作成済み

チーム

USF Tampa, Team S9-G1, Remmell Fall 2017 USF Tampa, Team S9-G1, Remmell Fall 2017人のメンバー

USFT-REMMELL-F17S9G1

4 メンバー

13のガイドは作成済み

12 件のコメント

the bumpers take some finesse to remove, so be patient

Vincent - 返信

You should add a security hex screwdriver to your tools list, along with the gauge that is required.

Travis Weston - 返信

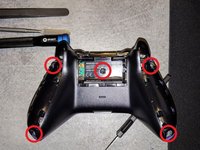
There is a fifth screw in the battery compartment that holds the faceplate on. Take an exacto knife and cut out sticker where the hole is.

Scott Williams - 返信

Could you elaborate on the “remove the bumpers” part (last step) please, thank you.

r.d.huijsmans - 返信

Great guide. Helped me easily fix a sticky bumper and save 60$

Bryon Crockett - 返信

コメントを追加

統計データ:

過去 24時間: 16

過去 7 日: 111

過去 30 日: 481

今までの合計 77,753