はじめに
This is the wireless connection for the Xbox controllers and Headsets with the Xbox Series One S. You'll notice it has a Wifi mac address. Headsets and controllers disconnecting is a symptom of this card having issues. It's possible removing the card, cleaning the contacts, and reseating will return the card to normal behavior before ordering a replacement.
If your Xbox One S is not picking up motion signals when playing certain games follow this guide to replace your IR blaster. Make sure to check that you are within line of sight of the front of the Xbox One S and there is no barrier between the user and the device.
必要な工具と部品
-
-
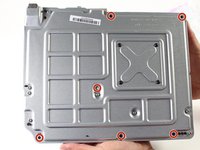
Begin by working at the case on the rear where the warranty sticker is located. Insert the plastic opening tool into the gap between the bottom of the case and the grated top side. Then find the clips in between that hold the case in place. Use the opening tool to pop the clips out. The best method is to pry the black case away from the bottom.
-
Use the opening tool to pop the clips out. The best method is to pry the black case away from the bottom.
-
-


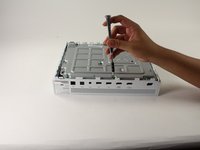


To reassemble your device, follow these instructions in reverse order.
To reassemble your device, follow these instructions in reverse order.
15 の人々がこのガイドを完成させました。
チーム

Cal Poly, Team S22-G3, Livingston Spring 2017 Cal Poly, Team S22-G3, Livingston Spring 2017人のメンバー
CPSU-LIVINGSTON-S17S22G3
4 メンバー
59のガイドは作成済み
2 件のコメント
When the board gets replaced does the power light still function normally? I just replaced one because a power button failed and while the new switches work the indicator lights will not power on
Question. What's size and type of button does this board use? I have one with the eject and sync button sheered off.