必要な工具と部品
-
-
-
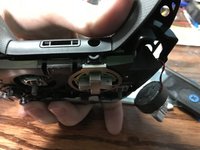
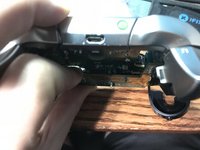
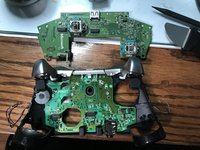
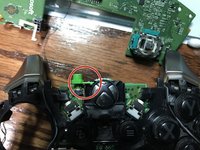
左右それぞれ4本ずつ繋がっている電線のはんだ付けを外して下さい。これらは振動モーターと右トリガー(RT)・左トリガー(LR)に接続されています。
-
-
-
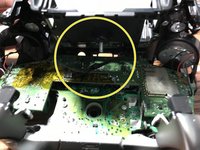
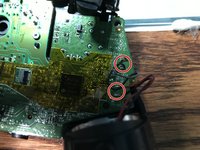
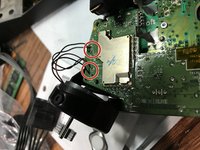
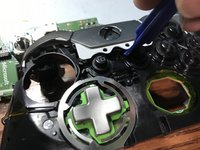
コントローラーのマザーボードに元々ついていたLEDのはんだ付けを外して下さい。LEDの両側に対して作業を行い、元々のはんだ付けを全て取り除いて下さい。
-
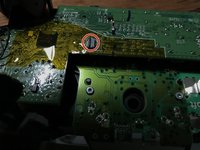
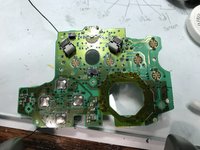
新しいLEDをはんだ付けして下さい。
-


組み立て直す際は、上記の手順と逆の順番で作業を行なって下さい。
6 の人々がこのガイドを完成させました。

7件のガイドコメント
So question I’m having troubles with my elite controller every time I go to plug it in and the charging port in the back of the controller it starts to smoke what’s my problem
It sounds like it could be a lot of things…
smoke is obvious a dead stop (stop plugging it in until you repair it).
I would first check the charge port and make sure it is firmly attached if it isn’t you can easily replace the usb port. Next it could be the mainboard charging circuit. if it is this…replace the controller is likely the ideal solution.
I was looking to do this mod for fun. Do you have or know where I can get the led part number? A schematic or bom would be nice. Thanks
0805 SMD LED Diode Lights
i bought these https://www.amazon.com/gp/product/B01CUG...
Thank you. I ordered them so we will see what happens.