はじめに
消耗したXbox 360 下部ケースを交換します。
必要な工具と部品
-
-
スパッジャーの平面側先端、もしくはXbox 360開口ツールの先端を下部ベントの正面側端にできた小さな隙間に差し込みます。
-
下部ベントの正面端をこじ開けて、フェイスプレートを外します。
You can avoid this step by pulling the front cover off. Just make sure you don't break the springs for the USB bay area.
Hello, thank you ifix for this guide, I followed this guide, I got stuck at some point but I resolved it. Also I want to share this resource: Step by Step guide to fix Xbox 360 errors it helped me go through all the things associated with Xbox 360 and the troubleshooting of errors. Hope this can also help you all.
-
-
-
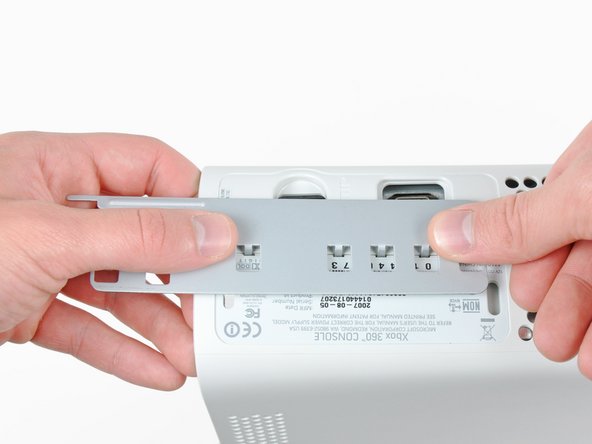
スパッジャーの平面側先端を、フェイスプレートと電源ボタン付近の外側ケースの間に差し込みます。
-
スパッジャーをフェイスプレートの端に沿ってスライドして、コンソール正面側に固定されているクリップを外します。
The faceplate just pulls off, using a tool is completely unneccessary. https://beta.support.xbox.com/help/xbox-...
-
-
-
-
スパッジャーの平面側先端を前で説明した小さな隙間に差し込み、クリップを外します。
I found this step difficult. I wasn't able to see where the clips were from the pictures. If you look at step 14 you can see what the clips look like after the vent is taken off. Once you realize where they are it is a lot easier.
-
-
-
コンソールの上部端を下向きに立てます。
-
コンソールから慎重に保証対象外となる、ボイドステッカーを剥がします。
LOL “Romove the warenty seal”
-
-
-
Xbox 360の開口ツールを使って、 I/Oポート付近の上部ケースと下部ケースを固定しているクリップを押し込みます。
-
ツールで押し込みながら、下部と上部ケースを押して固定クリップを外します。
I didn't have an XBox tool, so I followed instructions in this video for this step (https://www.youtube.com/watch?v=qaxIB6cX...) to pry it open with your fingers and a screwdriver.
The small (metal) women's hair clip is best for un-latching the tabs. The screw drivers just make the holes bigger.
Denny Ross - 返信
You can also use the pointed end of a plastic spudger to push each clip free while you separate the case with your free hand.
-


デバイスを再組み立てする際は、これらの手順を逆の順番に従って作業を進めてください。
デバイスを再組み立てする際は、これらの手順を逆の順番に従って作業を進めてください。
39 の人々がこのガイドを完成させました。
以下の翻訳者の皆さんにお礼を申し上げます:
100%

Midori Doiさんは世界中で修理する私たちを助けてくれています! あなたも貢献してみませんか?
翻訳を始める ›

WARNING: Just replacing the drive will not make it work correctly. Microsoft has married the drives to the motherboard. Hence, in order to get full operation out of the drive you'll have to perform more steps not listed here. Search in the FAQ on this specific topic for more details. Otherwise, before buying a new drive, try cleaning the inside of the old one and/or replace the belt involved in opening and closing the drive door.
- Good Luck
Eric - 返信
Thanks..helped!
joseph zulu - 返信
bress the button and lift with the same hand! i thought mine was stuck because of this pic!!!
Maths with Luigi - 返信