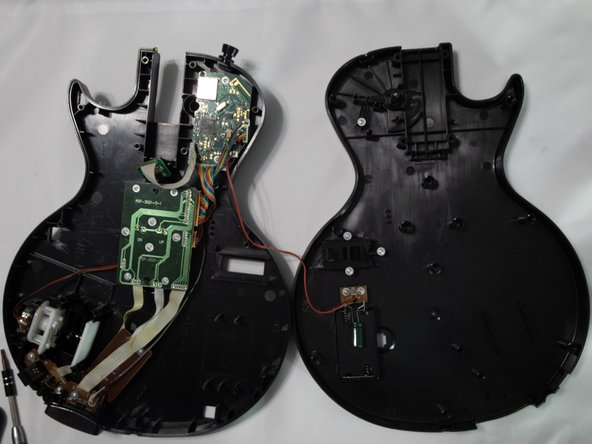
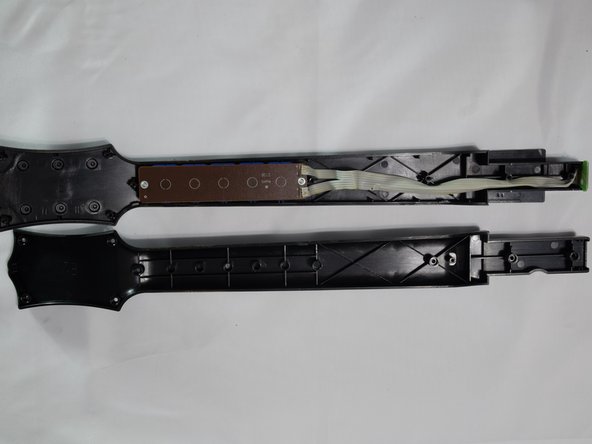
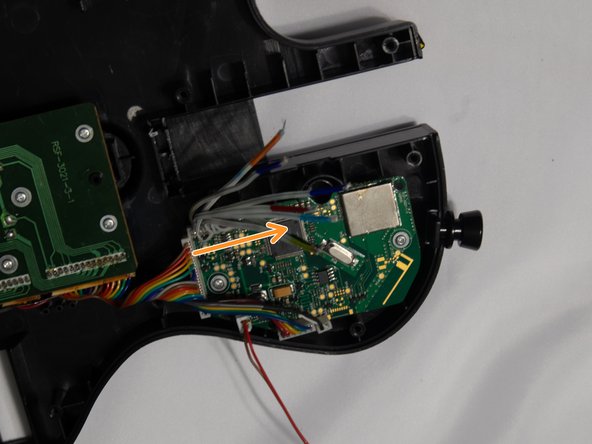
メインコンテンツにスキップ

Xbox 360 Guitar Hero Wireless Controller Pogo-Pin Connector Replacement

必要な工具と部品

  1. Xbox 360 Guitar Hero Wireless Controller Pogo-Pin Connector Replacement, Replacing the Pogo-Pin Connector with a DB9: 手順 1、 3の画像 1 Xbox 360 Guitar Hero Wireless Controller Pogo-Pin Connector Replacement, Replacing the Pogo-Pin Connector with a DB9: 手順 1、 3の画像 2 Xbox 360 Guitar Hero Wireless Controller Pogo-Pin Connector Replacement, Replacing the Pogo-Pin Connector with a DB9: 手順 1、 3の画像 3
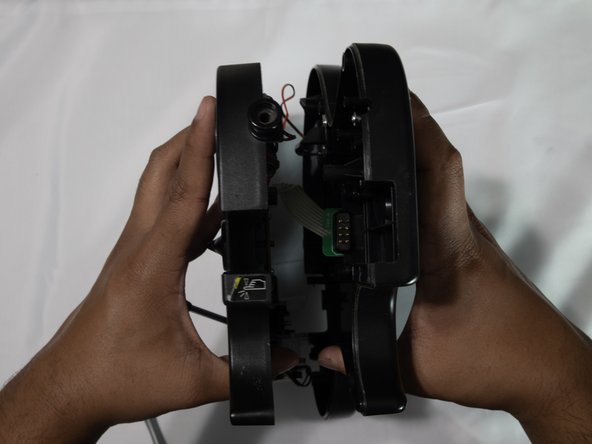
    • Have the controller on its back and separate the neck and body of the guitar. Do this by using the switch on the back and pulling the neck from the body at the same time.

  2. Xbox 360 Guitar Hero Wireless Controller Pogo-Pin Connector Replacement: 手順 2、 3の画像 1 Xbox 360 Guitar Hero Wireless Controller Pogo-Pin Connector Replacement: 手順 2、 3の画像 2 Xbox 360 Guitar Hero Wireless Controller Pogo-Pin Connector Replacement: 手順 2、 3の画像 3
    • Push the switch next to the battery cover.

    • This will release the faceplate on the front of the controller.

  3. Xbox 360 Guitar Hero Wireless Controller Pogo-Pin Connector Replacement: 手順 3、 3の画像 1 Xbox 360 Guitar Hero Wireless Controller Pogo-Pin Connector Replacement: 手順 3、 3の画像 2 Xbox 360 Guitar Hero Wireless Controller Pogo-Pin Connector Replacement: 手順 3、 3の画像 3
    • Open the body of the guitar by unscrewing 11 10 mm screws from the circled screw holes with a Torx T10 screwdriver.

    • Open the body of the guitar so it's laying open as seen in the image.

  4. Xbox 360 Guitar Hero Wireless Controller Pogo-Pin Connector Replacement: 手順 4、 3の画像 1 Xbox 360 Guitar Hero Wireless Controller Pogo-Pin Connector Replacement: 手順 4、 3の画像 2 Xbox 360 Guitar Hero Wireless Controller Pogo-Pin Connector Replacement: 手順 4、 3の画像 3
    • Separate the wires by pulling them apart.

    • De-solder the wires from the connector by pressing the iron against the solder points and then pulling the wire away.

    • Applying flux along the solder points could assist the process of desoldering.

    • Pulling too fast on the wire could damage the wire or any other components it's connected to.

    • Fumes from desoldering can be dangerous, so it's recommended to have a fume extractor next to you while desoldering.

  5. Xbox 360 Guitar Hero Wireless Controller Pogo-Pin Connector Replacement: 手順 5、 2の画像 1 Xbox 360 Guitar Hero Wireless Controller Pogo-Pin Connector Replacement: 手順 5、 2の画像 2
    • Using a Torx T10 screwdriver, unscrew the eight 10 mm screws along the circled screw holes to take the backing off the guitar's neck.

  6. Xbox 360 Guitar Hero Wireless Controller Pogo-Pin Connector Replacement: 手順 6、 3の画像 1 Xbox 360 Guitar Hero Wireless Controller Pogo-Pin Connector Replacement: 手順 6、 3の画像 2 Xbox 360 Guitar Hero Wireless Controller Pogo-Pin Connector Replacement: 手順 6、 3の画像 3
    • Separate the wires using an X-acto knife to cut between the wires and pull to fully separate the wires.

    • Desolder the wires by pressing the iron against the solder points and pull the wires away.

    • Applying flux along the solder points could assist the process of desoldering.

    • Fumes from desoldering can be dangerous, so it's recommended to have a fume extractor next to you.

    • Pulling too fast on the wire could damage the wire or any other components it's connected to.

  7. Xbox 360 Guitar Hero Wireless Controller Pogo-Pin Connector Replacement: 手順 7、 3の画像 1 Xbox 360 Guitar Hero Wireless Controller Pogo-Pin Connector Replacement: 手順 7、 3の画像 2 Xbox 360 Guitar Hero Wireless Controller Pogo-Pin Connector Replacement: 手順 7、 3の画像 3
    • In order to use the DB9 connectors, you need to cut the sides off of it so it can fit in the shell of the guitar.

    • Use flux and solder to stitch the two sides of the metal sheet together.

    • Fumes from soldering can be dangerous, so it's recommended to have a fume extractor next to you.

  8. Xbox 360 Guitar Hero Wireless Controller Pogo-Pin Connector Replacement: 手順 8、 2の画像 1 Xbox 360 Guitar Hero Wireless Controller Pogo-Pin Connector Replacement: 手順 8、 2の画像 2
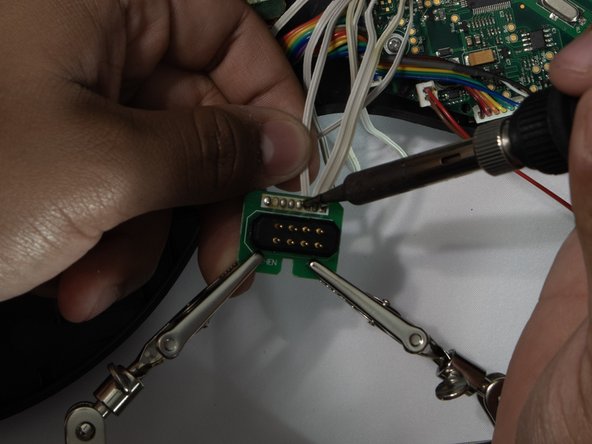
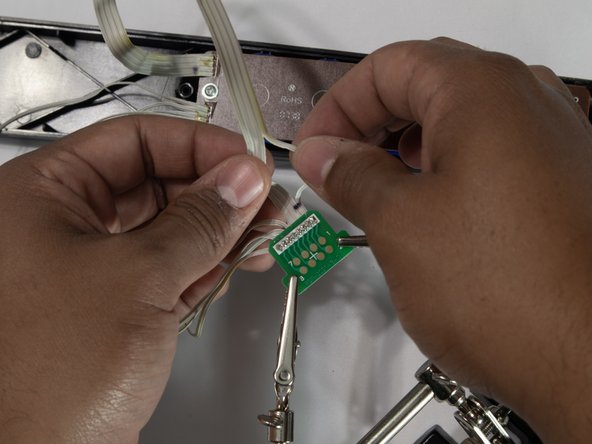
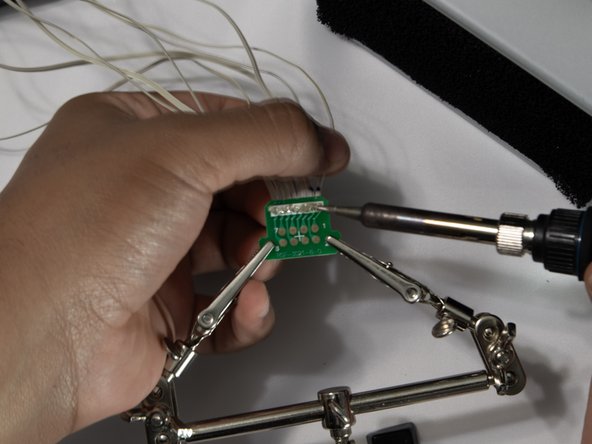
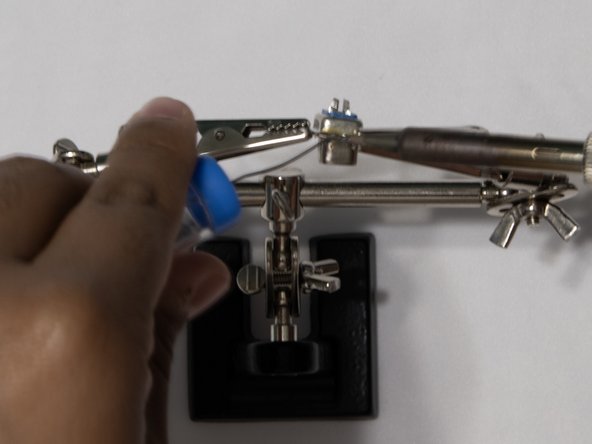
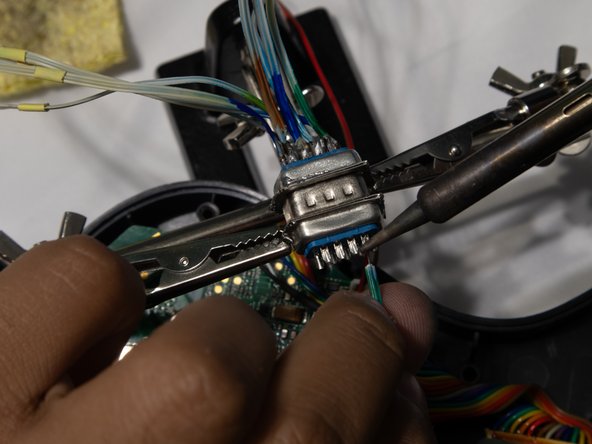
    • Before soldering the wires to the connectors, make sure to color the wires. This makes sure that you are soldering the correct wires to the connectors.

    • The wire colors for the neck are as follows: 1-Green, 2-Dark Blue, 3-Light Blue, 4-Orange, 5-Dark Blue, 6-Yellow, 7-Red, 8-Dark Blue.

    • Looking at the board that's in the neck of the guitar, you can see that the wires are soldered to numbered spots. These are the numbers that will correspond with the colors.

    • The wire colors for the body are the same as the neck.

    • The wires on the body of the guitar are labeled 1-8 following the direction of the arrow.

    • The colors for the wires of the guitar are the same as the colors for the wires on the neck.

  9. Xbox 360 Guitar Hero Wireless Controller Pogo-Pin Connector Replacement: 手順 9、 3の画像 1 Xbox 360 Guitar Hero Wireless Controller Pogo-Pin Connector Replacement: 手順 9、 3の画像 2 Xbox 360 Guitar Hero Wireless Controller Pogo-Pin Connector Replacement: 手順 9、 3の画像 3
    この手順で使用する道具:
    Desoldering Pump
    $3.99
    購入する
    • Solder the wires to the DB9 connectors leaving the middle pin empty to make it easier to put the connectors in the body.

    • The order you solder the wires doesn't matter as long as the wires are matching on both sides.

    • After the wires are soldered, you can close the guitar and reverse the process of taking apart the controller.

    • Using a desoldering pump/sucker would be useful for any mistakes along the way.

    • Make sure to solder the neck wires to the male connector and the body wires to the female connector.

    • Fumes from soldering can be dangerous, so it's recommended to have a fume extractor next to you.

終わりに

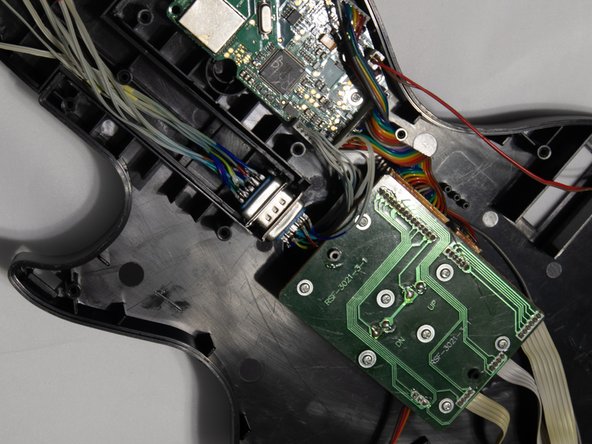
To reassemble your device, follow these instructions in reverse order.

作成者

3人の作成者と共同で作成されました。

XanderC

メンバー登録日: 09/24/23

172 ポイント

1ガイドが承認済み

チーム

Austin Community College, Team 1-5, Meigs Fall 2023 Austin Community College, Team 1-5, Meigs Fall 2023人のメンバー

AUSTINCC-MEIGS-F23S1G5

2 メンバー

1のガイドは作成済み

0 件のコメント

コメントを追加

統計データ:

過去 24時間: 1

過去 7 日: 18

過去 30 日: 123

今までの合計 471