メインコンテンツにスキップ

Wyze WVCR200s Wheels Replacement

必要な工具と部品

  1. Wyze WVCR200s Wheels Replacement, Brush Roll: 手順 1、 1の画像 1
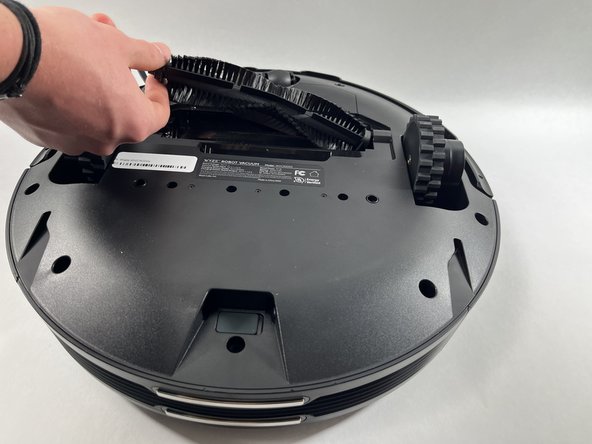
    • Flip the vacuum upside down so the bottom is facing up.

    • In the center of the device, you should see the rotating brush that stretches from one wheel to the other.

  2. Wyze WVCR200s Wheels Replacement: 手順 2、 2の画像 1 Wyze WVCR200s Wheels Replacement: 手順 2、 2の画像 2
    • Pinch the blue tabs below the rotating brush towards each other.

    • Lift the plastic housing surrounding the rotating brushing straight up, and the remove it from the vacuum.

  3. Wyze WVCR200s Wheels Replacement: 手順 3、 3の画像 1 Wyze WVCR200s Wheels Replacement: 手順 3、 3の画像 2 Wyze WVCR200s Wheels Replacement: 手順 3、 3の画像 3
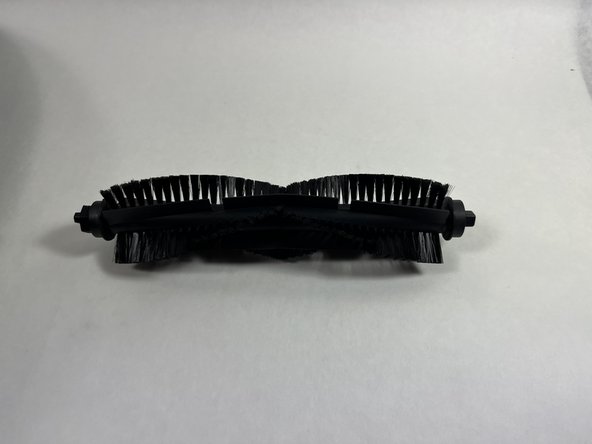
    • To remove the rotating brush, lift one end of the brush upwards, and remove.

  4. Wyze WVCR200s Wheels Replacement, Battery: 手順 4、 1の画像 1
    • Use a screwdriver to remove four screws along the edge, just above where the brush was removed.

  5. Wyze WVCR200s Wheels Replacement: 手順 5、 1の画像 1
    • Lift the battery cover up and out of the vacuum.

  6. Wyze WVCR200s Wheels Replacement: 手順 6、 2の画像 1 Wyze WVCR200s Wheels Replacement: 手順 6、 2の画像 2
    • Lift the battery out from underneath the cover.

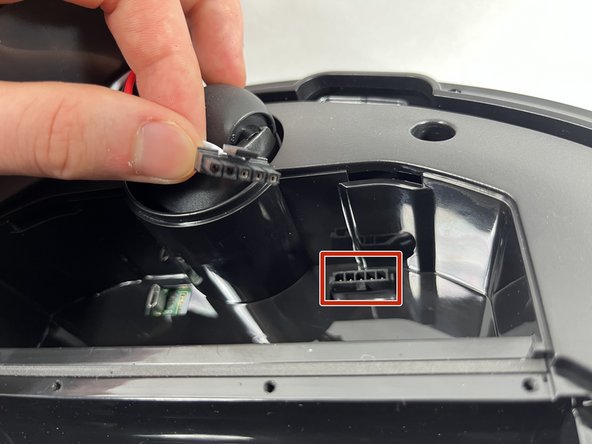
    • Be careful not to pull or yank the battery out, it is connected by wires to the vacuum port.

    • Carefully disconnect the battery from the vacuum port.

  7. Wyze WVCR200s Wheels Replacement, Side Brush: 手順 7、 1の画像 1
    • Flip the vacuum upside down so the underside of the device is facing up.

    • On the upper left of the device, you should see a spinning brush with three arms protruding out. This is the side brush.

  8. Wyze WVCR200s Wheels Replacement: 手順 8、 1の画像 1
    • To remove, grab the three arms of the brush and pull upwards. The arms should be tight, but should not require too much force to lift off.

    • Once the brush is off, a square peg that holds the brush should be visible.

    • Place the replacement brush on the square peg, and press down with moderate pressure.

  9. Wyze WVCR200s Wheels Replacement, Bumper: 手順 9、 1の画像 1
    • Flip the vacuum over.

  10. Wyze WVCR200s Wheels Replacement: 手順 10、 1の画像 1
    • Use a Phillips screwdriver to remove the six screws along the bottom edge of the bumper.

  11. Wyze WVCR200s Wheels Replacement: 手順 11、 3の画像 1 Wyze WVCR200s Wheels Replacement: 手順 11、 3の画像 2 Wyze WVCR200s Wheels Replacement: 手順 11、 3の画像 3
    • The small plastic connector holding the bumper in place should now be loose. Make sure it's disconnected.

    • Pull the bumper straight off of the vacuum.

  12. Wyze WVCR200s Wheels Replacement, Wheels: 手順 12、 2の画像 1 Wyze WVCR200s Wheels Replacement, Wheels: 手順 12、 2の画像 2
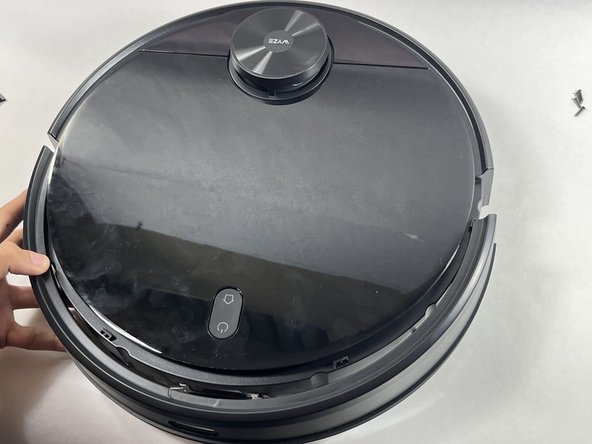
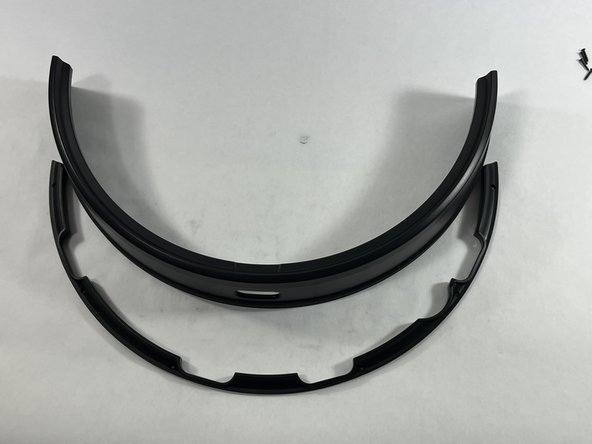
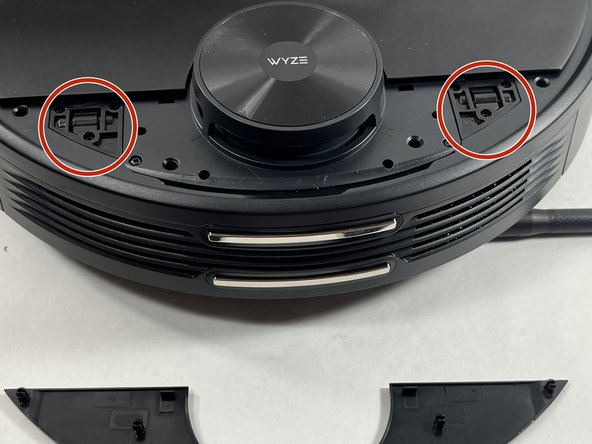
    • Use a spudger to pry the cover off that surrounds the vacuum mechanism.

    • Remove the six screws securing the access cover hinges.

    • Remove the cover.

  13. Wyze WVCR200s Wheels Replacement: 手順 13、 3の画像 1 Wyze WVCR200s Wheels Replacement: 手順 13、 3の画像 2 Wyze WVCR200s Wheels Replacement: 手順 13、 3の画像 3
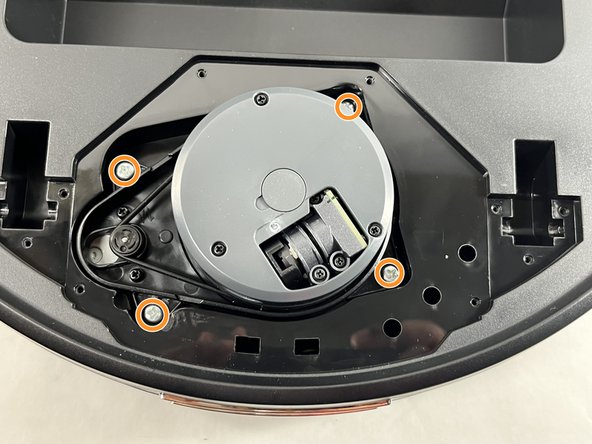
    • Use a screwdriver to remove the four screws surrounding the LIDAR sensor cover.

    • Use a screwdriver to remove the four screws holding the mechanism itself.

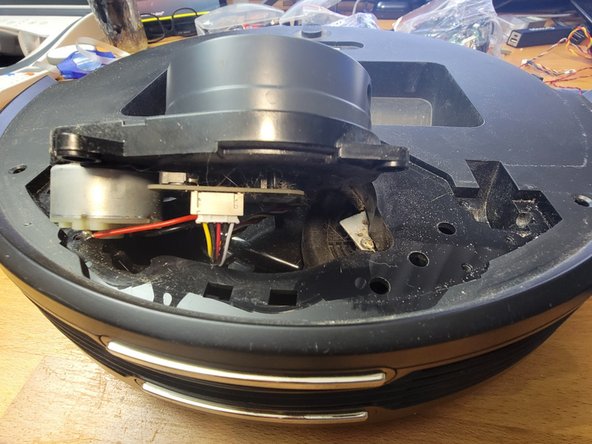
    • Lift the LIDAR sensor from the vacuum.

    • It is connected to the vacuum by a cable so don't pull it out quickly or yank it out.

    • Note how the connector is plugged in for reassembly.

    • Disconnect the cable from the vacuum.

  14. Wyze WVCR200s Wheels Replacement: 手順 14、 3の画像 1 Wyze WVCR200s Wheels Replacement: 手順 14、 3の画像 2 Wyze WVCR200s Wheels Replacement: 手順 14、 3の画像 3
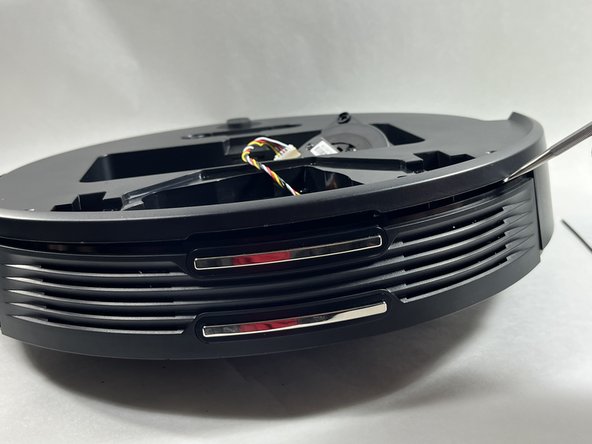
    • Use a screwdriver to remove the ten screws on the back side of the vacuum that hold the outer shell in place.

    • Use a spudger or opening tool to pry along the edges of the vacuum and separate the two parts.

  15. Wyze WVCR200s Wheels Replacement: 手順 15、 3の画像 1 Wyze WVCR200s Wheels Replacement: 手順 15、 3の画像 2 Wyze WVCR200s Wheels Replacement: 手順 15、 3の画像 3
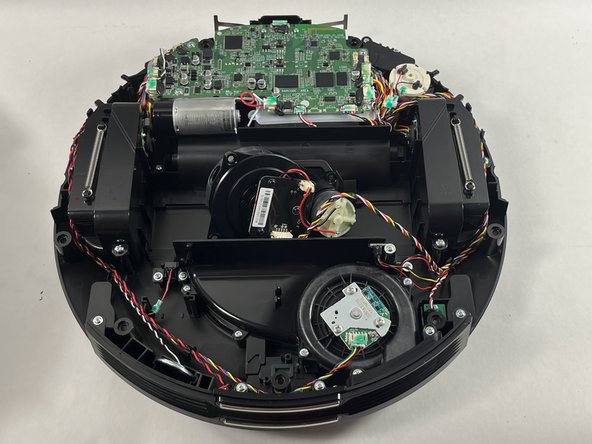
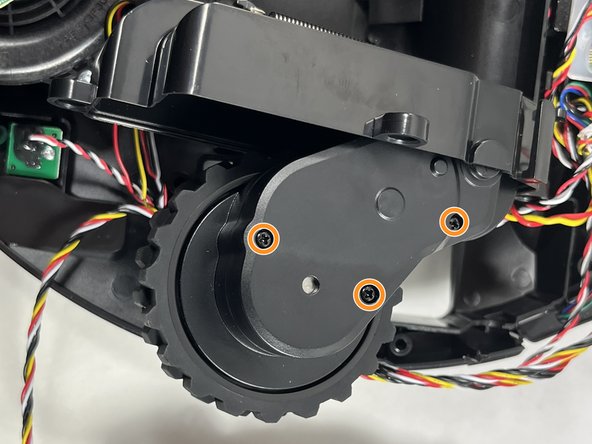
    • The wheels are located on each side of the vacuum.

    • Use a screwdriver to remove three screws from each wheel holding them in place.

    • Remove the wheels.

  16. Wyze WVCR200s Wheels Replacement, Change the RIGHT complete wheel assembly: 手順 16、 2の画像 1 Wyze WVCR200s Wheels Replacement, Change the RIGHT complete wheel assembly: 手順 16、 2の画像 2
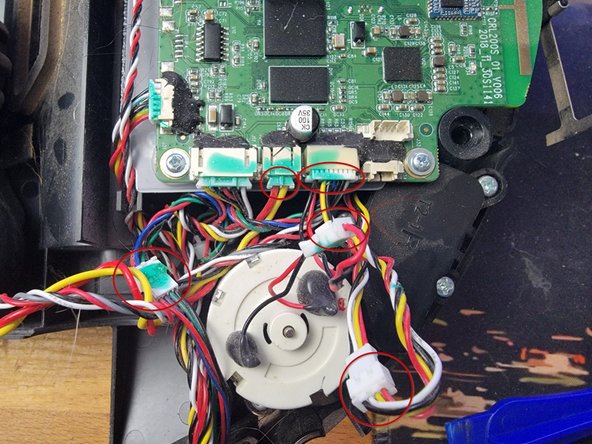
    • There are 5 connectors on a new wheel assembly, but the connectors vary a little for the left wheel assembly vs the right wheel assembly. These images are specific to the right wheel assembly. See the next step for the left wheel assembly images.

    • Locate the 5 connectors on the vacuum. Note the direction all plugs are plugged in so the connectors can be reconnected the same way.

    • Also note in the image, there is a dab of glue (bluish green stuff on each connector) helping to hold the connectors together. It's a good idea to use an adhesive when changing the wheel assembly.

    • Use care when disconnecting and reconnecting the connectors as these can be difficult to get apart.

  17. Wyze WVCR200s Wheels Replacement, Change the LEFT wheel assembly: 手順 17、 3の画像 1 Wyze WVCR200s Wheels Replacement, Change the LEFT wheel assembly: 手順 17、 3の画像 2 Wyze WVCR200s Wheels Replacement, Change the LEFT wheel assembly: 手順 17、 3の画像 3
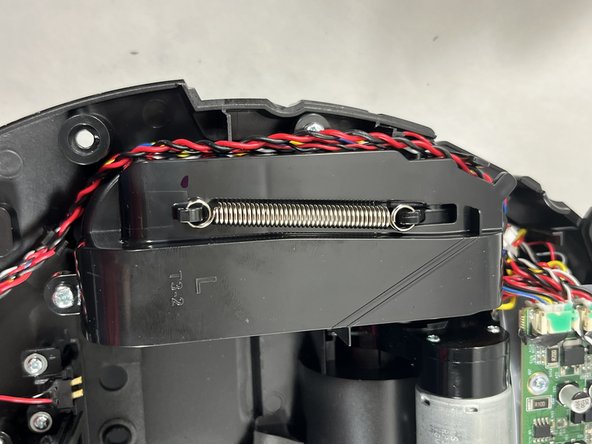
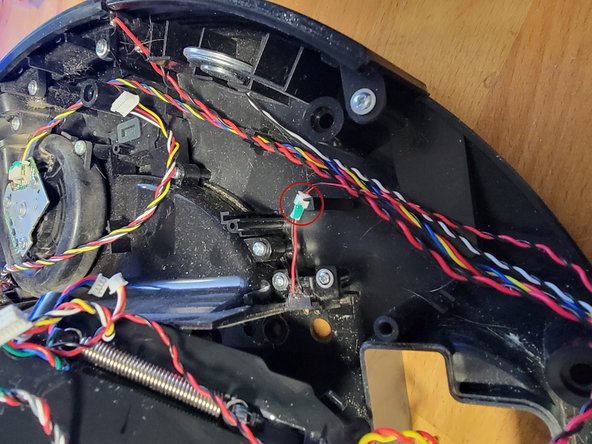
    • This is very similar to the right wheel assembly, but the connector locations are a bit different. MAKE NOTE of how the cables/wires are run around the wheel assembly. Failure to tuck the wires back into the same wire guides may result in issues getting the cover back on, or interference with the bumper switch and or wheel assembly.

    • Locate the 5 connectors for the left wheel assembly. Note the direction for all plugs so the connectors can be reconnected the same way. See the images for the location of the plugs.

    • For the left wheel, two of the sockets for these plugs are under the motherboard. Two others are tucked under the motherboard, and the 5th connector goes to the bin sensor behind the wheel assembly.

    • After replacing the wheel assembly, take your time to make sure all the wires are tucked in properly, and if there's a tie wrap around the cables to hold them out of the way of the bumper switch, replace the tie wrap with a new one.

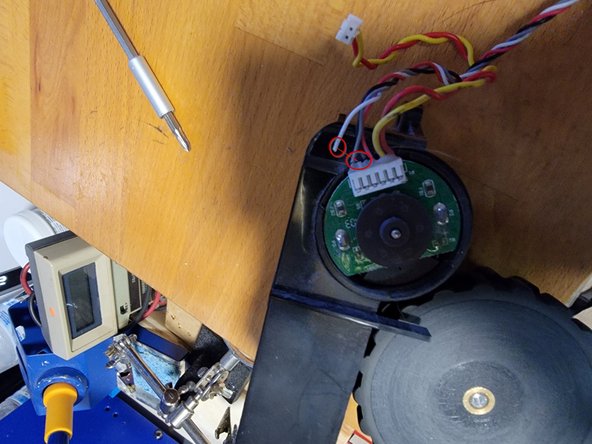
    • The last image shows a BAD left wheel assembly. Note how the white wire is severed from the plug on the wheel assembly.

終わりに

To reassemble your device, follow these instructions in reverse order.

2 の人々がこのガイドを完成させました。

作成者

4人の作成者と共同で作成されました。

Steven Cabral

メンバー登録日: 03/20/23

158 ポイント

1ガイドが承認済み

チーム

UMass Dartmouth, Team 5-5, Ramos Spring 2023 UMass Dartmouth, Team 5-5, Ramos Spring 2023人のメンバー

UMASSD-RAMOS-S23S5G5

4 メンバー

5のガイドは作成済み

0 件のコメント

コメントを追加

統計データ:

過去 24時間: 1

過去 7 日: 17

過去 30 日: 104

今までの合計 1,228