はじめに
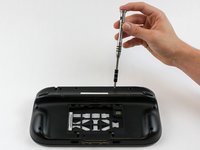
このガイドでは任天堂Wii U GamePadからWi-Fi基板を取り出します。
必要な工具と部品
-
-
この手順で使用する道具:Tweezers$4.99
-
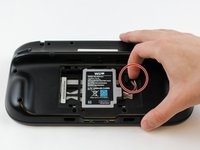
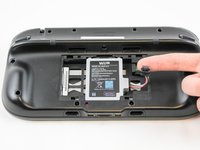
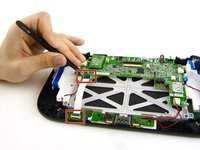
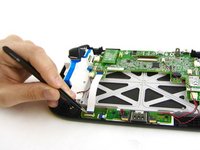
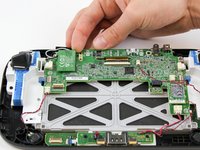
ピンセットでマザーボードと白色のフレックスケーブルを繋いでいるバックルの上部と下部を開きます。
-
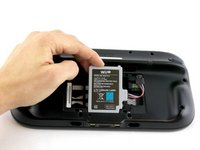
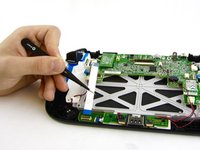
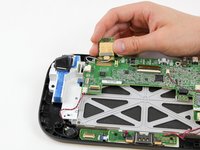
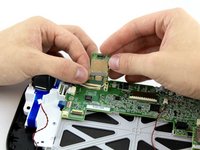
ピンセットで白色のフレックスケーブルを取り出します。
-


デバイスを再組み立てする際は、これらのインストラクションを逆の順番に従って作業を進めてください。
デバイスを再組み立てする際は、これらのインストラクションを逆の順番に従って作業を進めてください。
21 の人々がこのガイドを完成させました。
以下の翻訳者の皆さんにお礼を申し上げます:
100%

これらの翻訳者の方々は世界を修理する私たちのサポートをしてくれています。 あなたも貢献してみませんか?
翻訳を始める ›
チーム

USF Tampa, Team 1-6, Sullivan Spring 2016 USF Tampa, Team 1-6, Sullivan Spring 2016人のメンバー
USFT-SULLIVAN-S16S1G6
4 メンバー
40のガイドは作成済み
13 件のコメント
I just completed this repair on our Game Pad, and it worked perfectly!
There were two things that I noted that may be of use to anyone else completing this repair. First, the 9mm screws on the back may be located under small stickers used to conceal the screw holes. If you take them up carefully with a knife or other flat blade, you can reuse them if desired. Second, I didn’t see the need to remove the white ribbon cable in step #6. I successfully completed the repair without that step.
I just completed this repair on our Game Pad, and the guide worked perfectly!
There were two things that I noticed that may be of help to someone else completing this repair. First, note that the 9mm screws holding the back on may be located under small black stickers used to hide the screw holes. If you take them up carefully with a knife or other flat blade, you should be able to reuse them if you desire. Second, I didn’t see a need to remove the white ribbon cable in Step #6. I successfully completed the repair without that step.
Cheers!
This fix worked perfectly - our Wii U was virtually unusable because of the severely limited range of the gamepad. My kids are thrilled that they can comfortably play again!
Bill Jones - 返信
Worked perfectly, gamepad only worked within 2 ft of the console and now works 15ft away.
Instructions were concise, well illustrated and easy to complete.
Thanks a lot!
I went to do this - already have another chip - but I discovered there are no wires attached! The white and black wires shown are not in my gamepad at all. I’m amazed I can connect in the first place. Any idea how I can replace the wires that attach to the chip? Or work around it?