はじめに
Use this guide to change the power cord on your Whirlpool Dryer. This guide is intended for electric dryers.
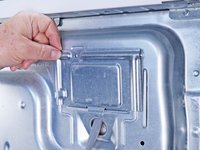
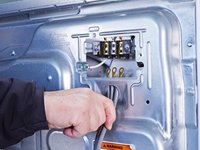
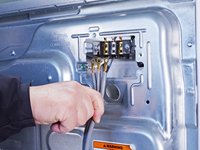
Sometimes the power cord can get pinched or damaged and need to be replaced, and this guide will get you through it.
This guide will work for most Whirlpool electric dryers. This guide is written with a model WED87HED dryer. If you have a different model, you may encounter some minor disassembly differences, but the overall repair process will be the same.
必要な工具と部品


終わりに
To reassemble your device, follow these instructions in reverse order.
Repair didn’t go as planned? Ask our Answers community for help.

