メインコンテンツにスキップ

Wand Company Star Trek Communicator Antenna Grille Replacement

必要な工具と部品

  1. Wand Company Star Trek Communicator Antenna Grille Replacement, Antenna Grille: 手順 1、 1の画像 1
    • Power off the Star trek Bluetooth Communicator before disassembling by holding down the left button for five seconds. A "woosh-down" sound indicates the power is going off, and no lights will blink.

  2. Wand Company Star Trek Communicator Antenna Grille Replacement: 手順 2、 2の画像 1 Wand Company Star Trek Communicator Antenna Grille Replacement: 手順 2、 2の画像 2
    • Remove the four T6 Torx screws (1.70mm) located on the back of the device.

    • Remove the black plastic cover by gently pulling it.

  3. Wand Company Star Trek Communicator Antenna Grille Replacement: 手順 3、 2の画像 1 Wand Company Star Trek Communicator Antenna Grille Replacement: 手順 3、 2の画像 2
    • Remove the protective foam located around the speaker and charging magnets.

    • Be careful not to lose the two magnets located between the microphone and the speaker. The magnets can be easily removed if they come in contact with other magnetic materials. Use non-magnetic tools if possible.

  4. Wand Company Star Trek Communicator Antenna Grille Replacement: 手順 4、 1の画像 1
    • Remove the two Phillips PH0 (0.9mm) screws located to the side of each magnet.

  5. Wand Company Star Trek Communicator Antenna Grille Replacement: 手順 5、 1の画像 1
    • Remove the black cover.

    • Do not try to completely separate the black cover from the rest of the device since there are thin wires attached to the speaker and microphone.

  6. Wand Company Star Trek Communicator Antenna Grille Replacement: 手順 6、 1の画像 1
    • Remove the protective foam attached to the battery.

    • The protective foam may be adhered to the underside of the plastic cover.

  7. Wand Company Star Trek Communicator Antenna Grille Replacement: 手順 7、 2の画像 1 Wand Company Star Trek Communicator Antenna Grille Replacement: 手順 7、 2の画像 2
    • Remove the five Phillips PH0 (0.9mm) screws located at the top and bottom of the silver plate. The three upper screws are different lengths and gauge than the lower two.

  8. Wand Company Star Trek Communicator Antenna Grille Replacement: 手順 8、 1の画像 1
    • Remove the silver plate.

    • Carefully pivot and/or flip the midplate so as not to put stress on the thin wires. You can gently seat the miplate onto the plastic cover to keep them together securely.

    • Be careful not to lose the two hinge pins with plastic sleeves, located on the outer hinges of the antenna grill. If removed from their location, put them gently back into place. They must be positioned properly before the steel midplate is put back in place.

  9. Wand Company Star Trek Communicator Antenna Grille Replacement: 手順 9、 1の画像 1
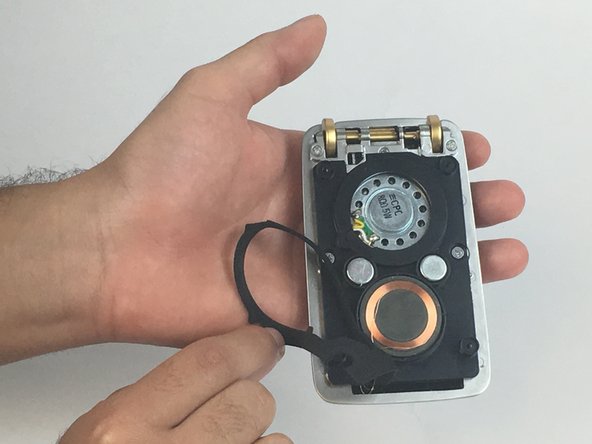
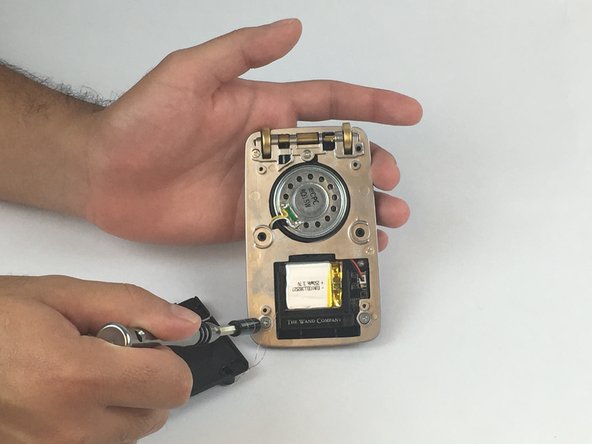
    • Remove the antenna grill.

    • Be careful of the plastic "brake" sleeve that mates with a triangular protrusion on the hinge spindle. The brake sleeve is spring-loaded, and is what gently holds the antenna in the open or closed position.

    I just want to note that re-installing the grille (or installing a replacement) can be very tricky. Especially that little spring. Like the original poster said, you can't let those little pins fall out of the ends, but you have to find a way to get that little spring in just the right position or it might fall out. The pin that holds the spring must be pushed as far to the right (from the back of the communicator) as it will go and the spring must be installed onto the pin with the little bent arm on the left. As you position the grille into place, the little bent arm on the left of the spring must be pushed past the small stopping point molded into the inside of the front half of the communicator case. I hope this helps.

    gschyve - 返信

終わりに

To reassemble your device, follow these instructions in reverse order.

3 の人々がこのガイドを完成させました。

作成者

6人の作成者と共同で作成されました。

hans flores

メンバー登録日: 02/15/17

138 ポイント

1ガイドが承認済み

チーム

USF Tampa, Team 5-6, Passmore Spring 2017 USF Tampa, Team 5-6, Passmore Spring 2017人のメンバー

USFT-PASSMORE-S17S5G6

4 メンバー

3のガイドは作成済み

3 件のコメント

Really?!

I tried this tonight and I now have a bag of useless components. You made no mention of the SPRING on the antenna grille which flew off on removal of the grille and then I had no idea which way it was located on re-assembly. I guessed the orientation then couldn’t get the metal plate to fit back on. That led to me snapping one of the hair thin wires! I now have £120 of junk components. Thanks a lot!

Phil - 返信

Where can we get a replacement grille?

Matthew Campbell - 返信

I know this post is more than a year old, but I was able to contact the Wand Company and purchase a replacement grille from them.

gschyve -

コメントを追加

統計データ:

過去 24時間: 0

過去 7 日: 1

過去 30 日: 7

今までの合計 1,167