メインコンテンツにスキップ

Wacom Cintiq 24HD Power Button Replacement

必要な工具と部品

  1. Wacom Cintiq 24HD Power Button Replacement, Stand: 手順 1、 1の画像 1
    • Unplug any cables from the USB, power, display or DVI-D ports by gripping the cord by the connector and pulling straight out of the port.

    • Unplugging the cables by pulling on the cord or pulling at an angle can damage the cable or connector.

  2. Wacom Cintiq 24HD Power Button Replacement: 手順 2、 3の画像 1 Wacom Cintiq 24HD Power Button Replacement: 手順 2、 3の画像 2 Wacom Cintiq 24HD Power Button Replacement: 手順 2、 3の画像 3
    • Place the device screen down on a flat surface.

    • Remove eight 10mm Phillips #2 screws (four on each leg of the stand) by turning the screwdriver counterclockwise.

  3. Wacom Cintiq 24HD Power Button Replacement: 手順 3、 1の画像 1
    • Lift the stand up and away from the rest of the device so the legs separate from the mounting plate.

  4. Wacom Cintiq 24HD Power Button Replacement, Back Panel: 手順 4、 3の画像 1 Wacom Cintiq 24HD Power Button Replacement, Back Panel: 手順 4、 3の画像 2 Wacom Cintiq 24HD Power Button Replacement, Back Panel: 手順 4、 3の画像 3
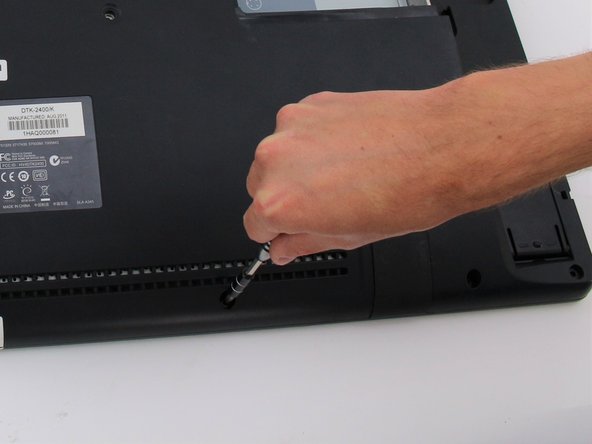
    • Remove eighteen 10.2mm Phillips #1 screws from the perimeter of the back panel by turning the screwdriver counterclockwise.

    • Remove one 11.9mm Phillips #1 screw from the center of the back panel.

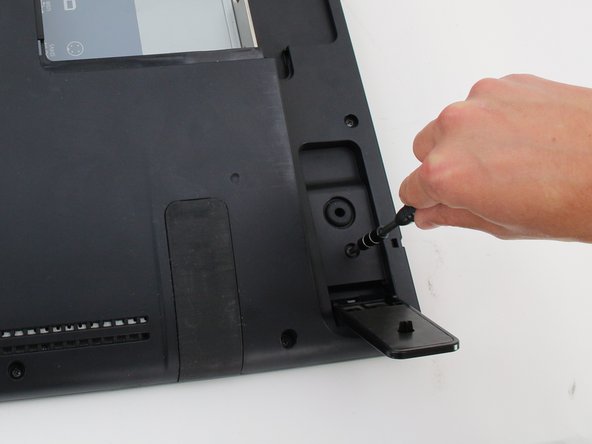
    • Remove two 10.2mm Phillips #1 screws from underneath hinged panels in the bottom right and left corners.

    • Our device does not include the cover panels for the USB, DVI-D, and power ports. You must first remove these cover panels shown in green in order to remove the back panel.

  5. Wacom Cintiq 24HD Power Button Replacement: 手順 5、 2の画像 1 Wacom Cintiq 24HD Power Button Replacement: 手順 5、 2の画像 2
    • Lift the back panel up by a corner and insert a plastic opening tool in the gap.

    • Slide the tool along the gap around the perimeter of the device while lifting to unlatch the back panel.

    • The latches on the back panel will make loud clicking noises when opening.

    • Remove the panel by lifting it up and off of the device.

  6. Wacom Cintiq 24HD Power Button Replacement, Power Button: 手順 6、 2の画像 1 Wacom Cintiq 24HD Power Button Replacement, Power Button: 手順 6、 2の画像 2
    • Remove the rubber cover on the power button by lifting up and off.

  7. Wacom Cintiq 24HD Power Button Replacement: 手順 7、 1の画像 1
    • Remove the two 9.5mm Phillips #2 screws by turning the screwdriver counterclockwise.

  8. Wacom Cintiq 24HD Power Button Replacement: 手順 8、 2の画像 1 Wacom Cintiq 24HD Power Button Replacement: 手順 8、 2の画像 2
    • Remove the cable connected to the button board by pinching close to the connector and pulling the wiring straight out from the port.

終わりに

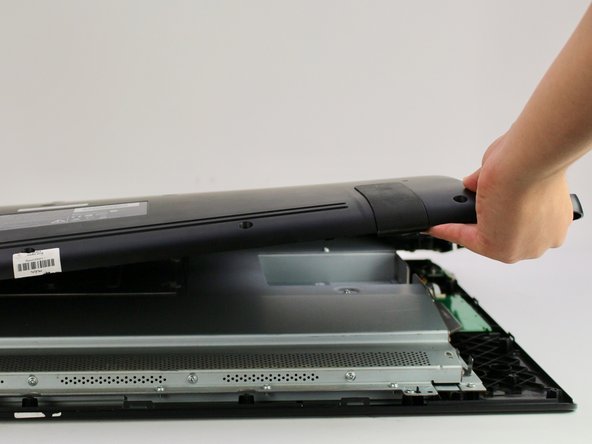
To reassemble your device, follow these instructions in reverse order.

ある他の人がこのガイドを完成しました。

作成者

4人の作成者と共同で作成されました。

Jay Sung

メンバー登録日: 10/08/18

481 ポイント

4のガイドは作成済み

チーム

Cal Poly, Team S15-G3, White Fall 2018 Cal Poly, Team S15-G3, White Fall 2018人のメンバー

CPSU-WHITE-F18S15G3

4 メンバー

18のガイドは作成済み

0 件のコメント

コメントを追加

統計データ:

過去 24時間: 0

過去 7 日: 7

過去 30 日: 26

今までの合計 1,711