メインコンテンツにスキップ

Vtech InnoTab 3 Rear Panel Diassembly

必要な工具と部品

  1. Vtech InnoTab 3 Rear Panel Diassembly, Rear Panel: 手順 1、 3の画像 1 Vtech InnoTab 3 Rear Panel Diassembly, Rear Panel: 手順 1、 3の画像 2 Vtech InnoTab 3 Rear Panel Diassembly, Rear Panel: 手順 1、 3の画像 3
    • Slide the battery compartment door lock down.

    • While still holding the battery compartment lock down, slide the two battery doors outwards on either side of the device.

    • Carefully remove the batteries from the battery compartment.

    • The standard option for the InnoTab 3 is four AA batteries. Vtech also offers a rechargeable battery online, but both battery options are removed from the device the same way.

  2. Vtech InnoTab 3 Rear Panel Diassembly: 手順 2、 1の画像 1
    • Remove the six 7.6mm screws found in the battery compartment using a PH00 screwdriver.

  3. Vtech InnoTab 3 Rear Panel Diassembly: 手順 3、 3の画像 1 Vtech InnoTab 3 Rear Panel Diassembly: 手順 3、 3の画像 2 Vtech InnoTab 3 Rear Panel Diassembly: 手順 3、 3の画像 3
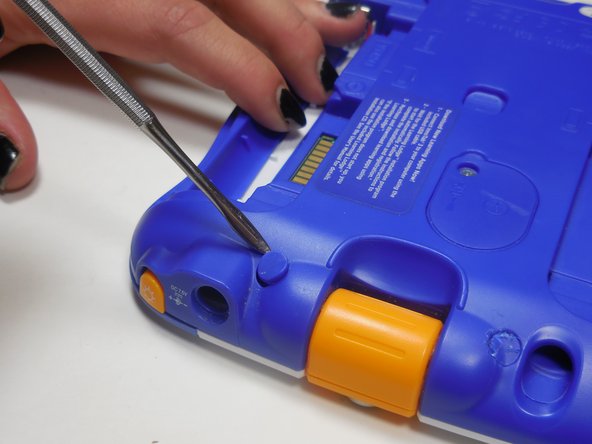
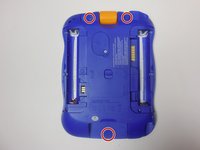
    • There are three hidden screws on the back of the device, two at the top and one near the bottom.

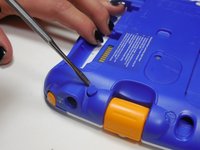
    • Using a nylon or metal spudger, remove the three caps that hide the screws.

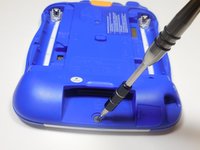
    • Remove the 5mm screw near the bottom and the two 7.6mm at the top using a PH00 screwdriver.

  4. Vtech InnoTab 3 Rear Panel Diassembly: 手順 4、 1の画像 1
    • Carefully separate the back panel from the front panel revealing the motherboard connected to the front panel.

終わりに

To reassemble your device, follow these instructions in reverse order.

作成者

2人の作成者と共同で作成されました。

Brooke Livingston

メンバー登録日: 03/11/15

110 ポイント

1ガイドが承認済み

チーム

Colorado Springs, Team 5-4, Panko Spring 2015 Colorado Springs, Team 5-4, Panko Spring 2015人のメンバー

UCCS-PANKO-S15S5G4

3 メンバー

10のガイドは作成済み

0 件のコメント

コメントを追加

統計データ:

過去 24時間: 0

過去 7 日: 0

過去 30 日: 2

今までの合計 1,122