メインコンテンツにスキップ

この修理ガイドは変更されています。最新の未承認バージョンに切り替えます。

Vizio VTAB1008 Front Facing Camera Replacement

必要な工具と部品

  1. Vizio VTAB1008 Front Facing Camera Replacement, Vizio VTAB1008 Back Cover Removal: 手順 1、 2の画像 1 Vizio VTAB1008 Front Facing Camera Replacement, Vizio VTAB1008 Back Cover Removal: 手順 1、 2の画像 2
    • Carefully slide the heavy duty opening tool between the gap on the side of the device with no buttons.

    • Do not insert the opening tool too far into the tablet as this can damage connectors close to edges of the cover.

    • The angled tip of the opening tool can be wedged into the device by pressing on the back of the opening tool with the thumb. Move the opening tool in a sliding motion to ensure all tabs separate.

    • Corner tabs may require a more forceful prying tool. If needed, carefully insert the metal prying tool into corners to separate the tabs.

  2. Vizio VTAB1008 Front Facing Camera Replacement: 手順 2、 1の画像 1
    • Look into the tablet for loose connectors.

    • There are three loose connectors: one for the screen, one for the digitizer, and one for the motherboard. They are held in place by the pressure of the backing and screen assemblies.

    • Flip the backing from the button-less side over, being careful not to separate the ribbon connector from the display screen.

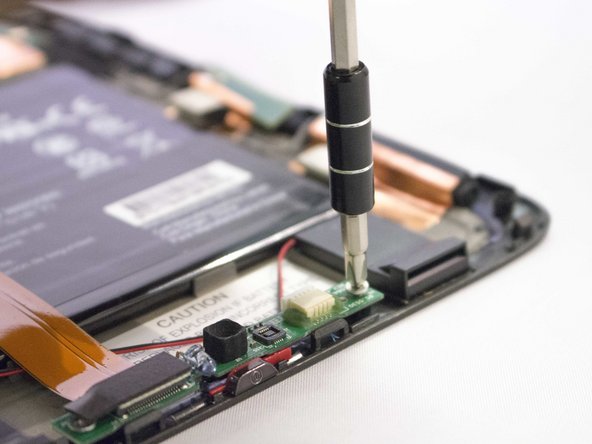
  3. Vizio VTAB1008 Front Facing Camera Replacement, Front Facing Camera and Light Sensor Board: 手順 3、 2の画像 1 Vizio VTAB1008 Front Facing Camera Replacement, Front Facing Camera and Light Sensor Board: 手順 3、 2の画像 2
    • Remove screw with the J1 screwdriver or screw bit.

    • Screw has a 3.66 mm head and is 3.5 mm tall.

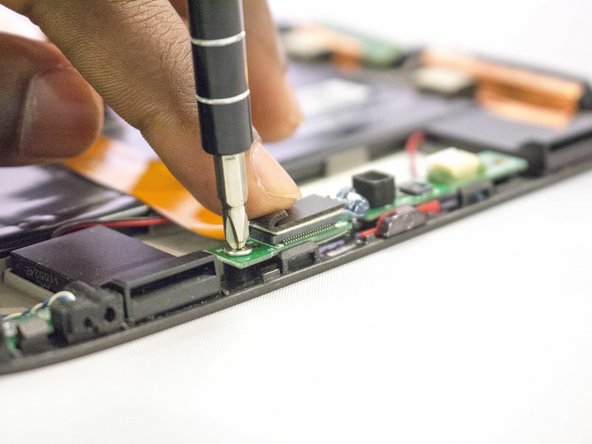
  4. Vizio VTAB1008 Front Facing Camera Replacement: 手順 4、 3の画像 1 Vizio VTAB1008 Front Facing Camera Replacement: 手順 4、 3の画像 2 Vizio VTAB1008 Front Facing Camera Replacement: 手順 4、 3の画像 3
    • Lift the flap hiding second screw.

    • Remove the screw by using J1 screwdriver.

    • Screw has a 3.66 mm head and is 3.5 mm tall.

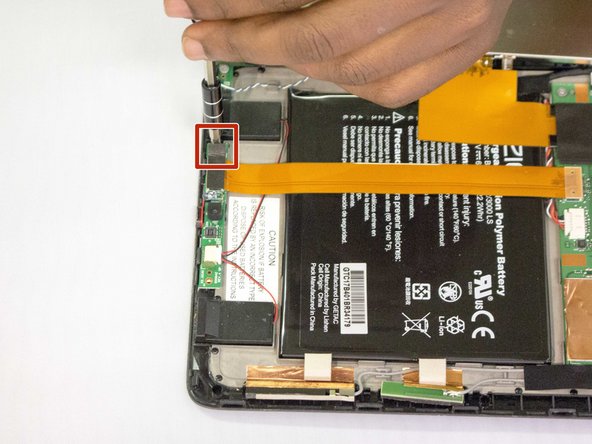
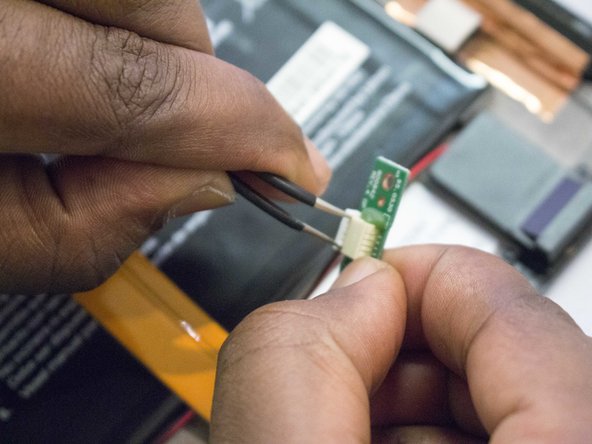
  5. Vizio VTAB1008 Front Facing Camera Replacement: 手順 5、 3の画像 1 Vizio VTAB1008 Front Facing Camera Replacement: 手順 5、 3の画像 2 Vizio VTAB1008 Front Facing Camera Replacement: 手順 5、 3の画像 3
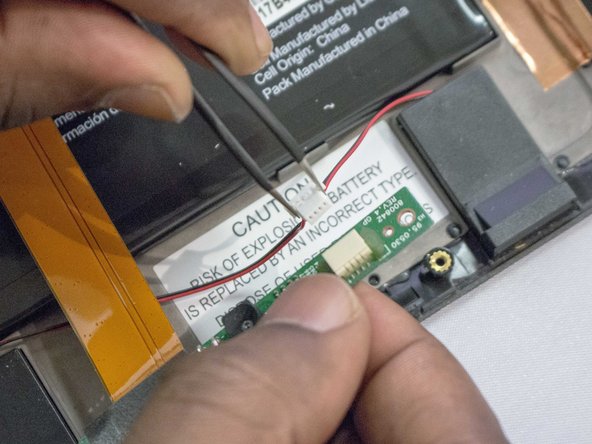
    • Disconnect the black and red cable connector from the camera strip.

    • Using tweezers may help to grab the small connector flanges.

  6. Vizio VTAB1008 Front Facing Camera Replacement: 手順 6、 3の画像 1 Vizio VTAB1008 Front Facing Camera Replacement: 手順 6、 3の画像 2 Vizio VTAB1008 Front Facing Camera Replacement: 手順 6、 3の画像 3
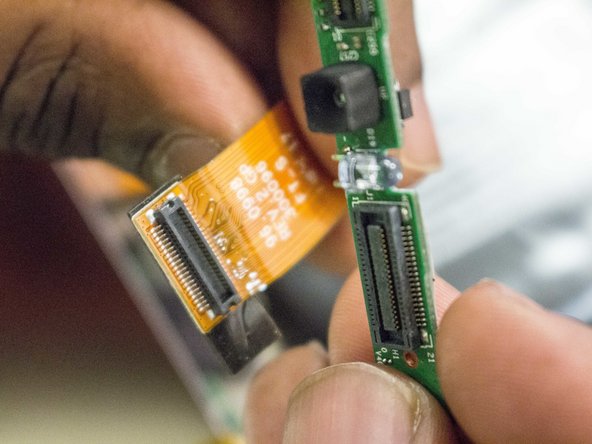
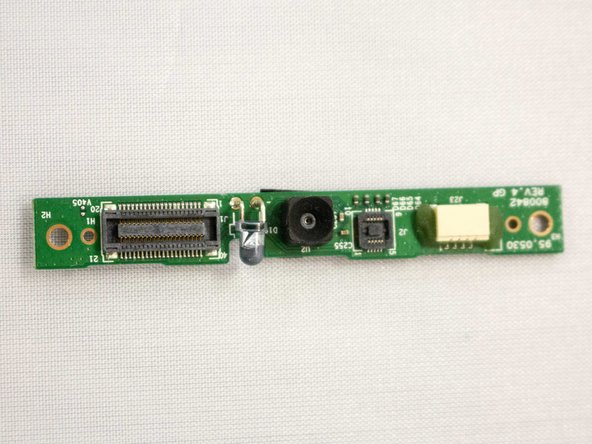
    • Disconnect the ribbon cable from the camera circuit board by lifting it away from circuit board.

    • A spudger may help with leverage when removing the ribbon cable.

終わりに

To reassemble your device, follow these instructions in reverse order.

作成者

4人の作成者と共同で作成されました。

Gilberto Ambriz

メンバー登録日: 09/29/16

546 ポイント

5のガイドは作成済み

チーム

Eastern Washington University, Team 1-1, Crane Fall 2016 Eastern Washington University, Team 1-1, Crane Fall 2016人のメンバー

EWU-CRANE-F16S1G1

4 メンバー

12のガイドは作成済み

0 件のコメント

コメントを追加

統計データ:

過去 24時間: 0

過去 7 日: 0

過去 30 日: 0

今までの合計 128