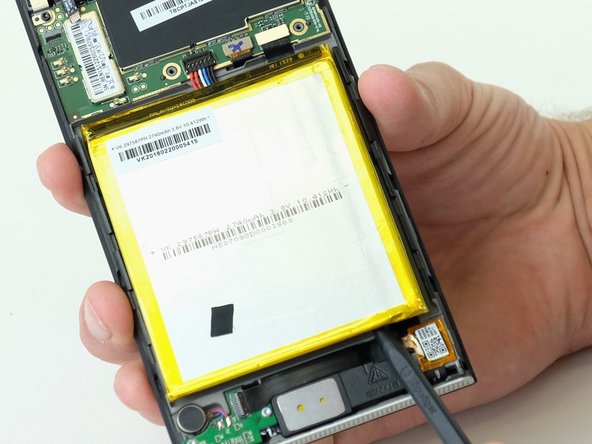
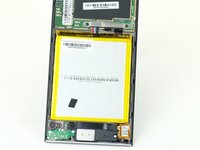
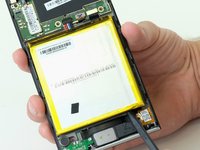
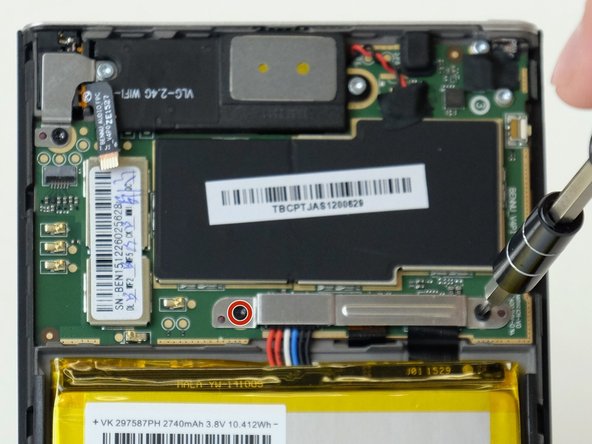
メインコンテンツにスキップ

Vizio SmartCast Tablet Remote XR6P Battery Replacement

必要な工具と部品

  1. Vizio SmartCast Tablet Remote XR6P Battery Replacement, Battery: 手順 1、 1の画像 1
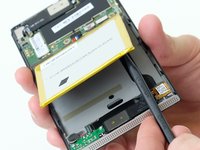
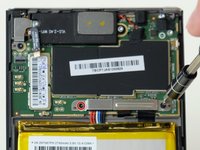
    • Obtain the black plastic spudger tool from the iFixit toolkit. Position the device as shown in the picture. Insert the flat end of the spudger directly in the space above the power button between the back cover and front screen.

  2. Vizio SmartCast Tablet Remote XR6P Battery Replacement: 手順 2、 1の画像 1
    • Gently pry up on the plate with the spudger. You may hear some cracking noises as you work the spudger around your device, this is normal.

  3. Vizio SmartCast Tablet Remote XR6P Battery Replacement: 手順 3、 1の画像 1
    • Pry around the edges of the tablet with your fingers until you have successfully removed the back of the device. Take the back cover off to access the battery.

  4. Vizio SmartCast Tablet Remote XR6P Battery Replacement: 手順 4、 3の画像 1 Vizio SmartCast Tablet Remote XR6P Battery Replacement: 手順 4、 3の画像 2 Vizio SmartCast Tablet Remote XR6P Battery Replacement: 手順 4、 3の画像 3
    • The battery will be easy to identify because it has yellow tape around it. For this step, you will need the black spudger tool. Stick the pointy end of the spudger under the bottom right corner of the battery. Pry the battery up breaking the adhesive glue.

    • Set the battery down until you remove the wires connecting the battery to the device in the next step.

  5. Vizio SmartCast Tablet Remote XR6P Battery Replacement: 手順 5、 3の画像 1 Vizio SmartCast Tablet Remote XR6P Battery Replacement: 手順 5、 3の画像 2 Vizio SmartCast Tablet Remote XR6P Battery Replacement: 手順 5、 3の画像 3
    • Obtain the Torx T5 screwdriver bit and ratchet from the toolkit. Locate the two 3mm black metal screws located on each side of the silver metal bracket holding the wire harness in place. Remove both screws releasing the metal bracket and set it aside.

  6. Vizio SmartCast Tablet Remote XR6P Battery Replacement: 手順 6、 1の画像 1
    • Obtain the black spudger from the toolkit and place the flat edge under the wire harness between the wires and back of the device. Gently pry upwards at an angle until the plug comes out of the harness. You may now safely remove the battery from the device.

終わりに

To reassemble your device, follow these instructions in reverse order.

作成者

3人の作成者と共同で作成されました。

Jordan Adams

メンバー登録日: 10/04/18

445 ポイント

4のガイドは作成済み

チーム

Linn Benton Community College, Team S2-G5, Karnes Fall 2018 Linn Benton Community College, Team S2-G5, Karnes Fall 2018人のメンバー

LBCC-KARNES-F18S2G5

3 メンバー

12のガイドは作成済み

2 件のコメント

Great instructions.

Now the problem is:

Where do you purchase one of these batteries?

Rick Allen - 返信

Were you able to find a replacement battery???

Brian Wilson - 返信

コメントを追加

統計データ:

過去 24時間: 0

過去 7 日: 1

過去 30 日: 5

今までの合計 1,455