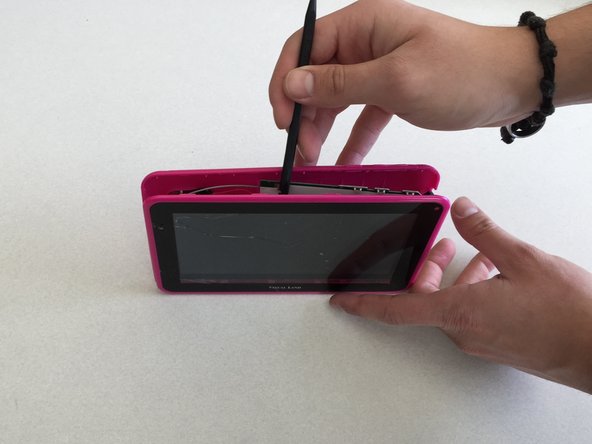
メインコンテンツにスキップ

Visual Land Prestige 7L Back Panel Replacement

必要な工具と部品

  1. Visual Land Prestige 7L Back Panel Replacement, Back Panel: 手順 1、 2の画像 1 Visual Land Prestige 7L Back Panel Replacement, Back Panel: 手順 1、 2の画像 2
    • Remove the two 8mm Phillips Head screws located at the bottom of your device.

  2. Visual Land Prestige 7L Back Panel Replacement: 手順 2、 3の画像 1 Visual Land Prestige 7L Back Panel Replacement: 手順 2、 3の画像 2 Visual Land Prestige 7L Back Panel Replacement: 手順 2、 3の画像 3
    • Insert the spudger between the two pieces of the case around the media ports and pry them apart.

    • We found the best way to get the spudger inside the case was to insert in into the SD card slot. Be sure to only insert the spudger a shallow amount and be careful not to damage any of the inside of the device.

    • Finish unsnapping each plastic piece holding the device together along the bottom.

  3. Visual Land Prestige 7L Back Panel Replacement: 手順 3、 3の画像 1 Visual Land Prestige 7L Back Panel Replacement: 手順 3、 3の画像 2 Visual Land Prestige 7L Back Panel Replacement: 手順 3、 3の画像 3
    • Move the spudger down the rest of the case, separating each side, and finally the top.

    • Pull the back off and place it to the side.

    • Without a back panel for protection, be sure place your device on the table screen-side down to avoid damaging the internal circuitry.

終わりに

To reassemble your device, follow these instructions in reverse order.

ある他の人がこのガイドを完成しました。

作成者

3人の作成者と共同で作成されました。

Robert

メンバー登録日: 01/28/15

141 ポイント

1ガイドが承認済み

チーム

Penn State, Team 2-25, Kaschak Winter 2015 Penn State, Team 2-25, Kaschak Winter 2015人のメンバー

PSU-KASCHAK-W15S2G25

4 メンバー

4のガイドは作成済み

0 件のコメント

コメントを追加

統計データ:

過去 24時間: 0

過去 7 日: 1

過去 30 日: 1

今までの合計 517