メインコンテンツにスキップ

Visual Land Prestige 10 LCD Display Replacement

必要な工具と部品

  1. Visual Land Prestige 10 LCD Display Replacement, Back Case: 手順 1、 3の画像 1 Visual Land Prestige 10 LCD Display Replacement, Back Case: 手順 1、 3の画像 2 Visual Land Prestige 10 LCD Display Replacement, Back Case: 手順 1、 3の画像 3
    この手順で使用する道具:
    Magnetic Project Mat
    $19.95
    購入する
    • Remove the 3mm screws from bottom of tablet with the precision screwdriver and place on magnetic mat. label where they came from.

    • All screws throughout this guide are the same 3mm size.

  2. Visual Land Prestige 10 LCD Display Replacement: 手順 2、 3の画像 1 Visual Land Prestige 10 LCD Display Replacement: 手順 2、 3の画像 2 Visual Land Prestige 10 LCD Display Replacement: 手順 2、 3の画像 3
    • Using the spudger, create a small opening to be used to open the back case.

    • While holding the case open, insert the plastic opening tool to get a larger opening.

    • Once you have a slight opening, insert the spudger and work around the edges, separating the back plate from the front.

  3. Visual Land Prestige 10 LCD Display Replacement: 手順 3、 3の画像 1 Visual Land Prestige 10 LCD Display Replacement: 手順 3、 3の画像 2 Visual Land Prestige 10 LCD Display Replacement: 手順 3、 3の画像 3
    • now that the case is open, carefully remove the speakers and set aside.

  4. Visual Land Prestige 10 LCD Display Replacement: 手順 4、 2の画像 1 Visual Land Prestige 10 LCD Display Replacement: 手順 4、 2の画像 2
    • Gently remove the speakers from the back case with tweezers and set the case aside.

  5. Visual Land Prestige 10 LCD Display Replacement, Front Facing Camera: 手順 5、 3の画像 1 Visual Land Prestige 10 LCD Display Replacement, Front Facing Camera: 手順 5、 3の画像 2 Visual Land Prestige 10 LCD Display Replacement, Front Facing Camera: 手順 5、 3の画像 3
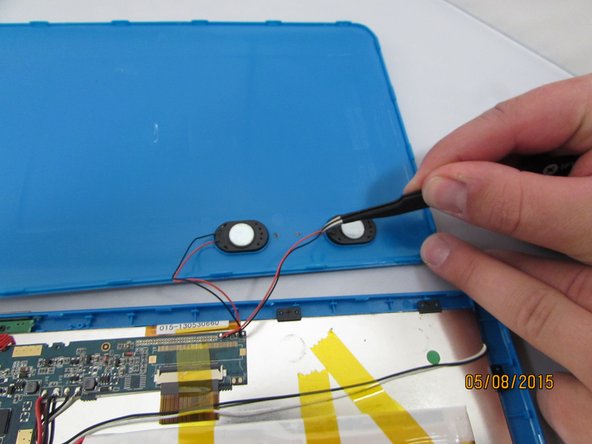
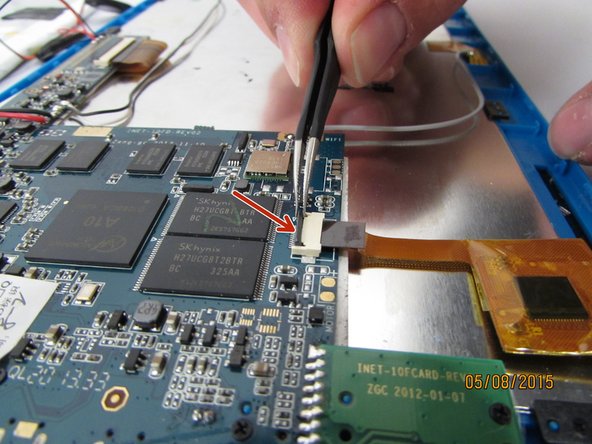
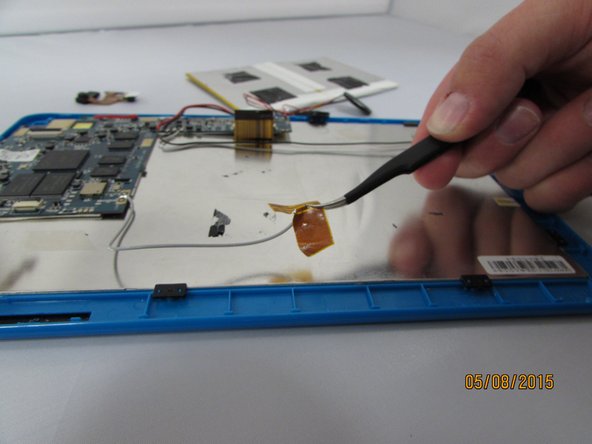
    • Locate the Camera Housing. Gently grip and lift the small black tab until you feel an audible click.

    • Gently remove the connector by pulling straight out, gripping the black connector head or as close as possible.

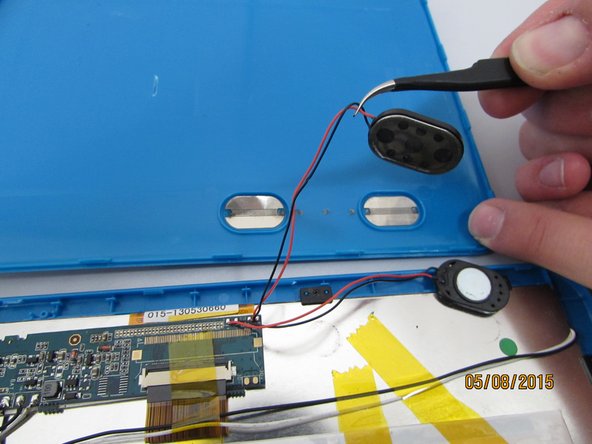
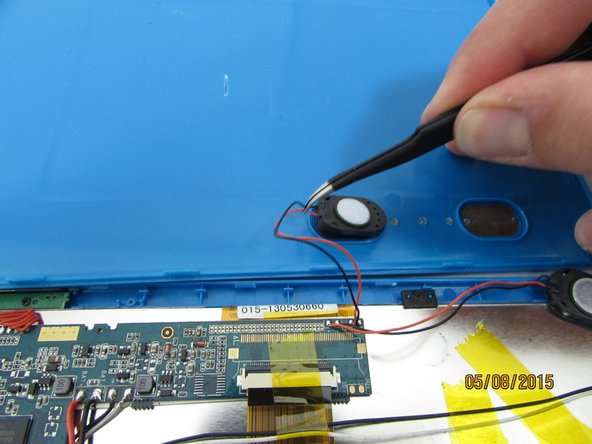
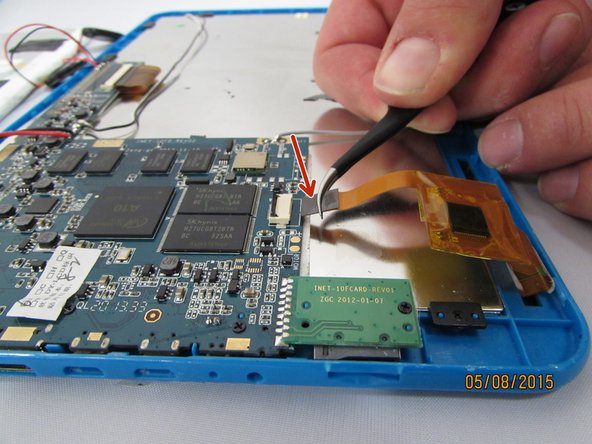
    • Gently grip and pull up the front camera, covered by protective adhesive foam.

    • Set aside the Camera housing.

  6. Visual Land Prestige 10 LCD Display Replacement, Battery: 手順 6、 3の画像 1 Visual Land Prestige 10 LCD Display Replacement, Battery: 手順 6、 3の画像 2 Visual Land Prestige 10 LCD Display Replacement, Battery: 手順 6、 3の画像 3
    • Remove yellow tape from surrounding components.

  7. Visual Land Prestige 10 LCD Display Replacement: 手順 7、 3の画像 1 Visual Land Prestige 10 LCD Display Replacement: 手順 7、 3の画像 2 Visual Land Prestige 10 LCD Display Replacement: 手順 7、 3の画像 3
    • insert the spudger and gently work around and underneath the battery.

    • With the battery separated from the LCD Display, set it aside.

    • The battery is held down by very strong adhesive.

  8. Visual Land Prestige 10 LCD Display Replacement: 手順 8、 1の画像 1
    • Desolder and remove the 2 wires from the motherboard.

    • Use caution when desoldering to avoid damage to yourself or to the components.

  9. Visual Land Prestige 10 LCD Display Replacement, Motherboard: 手順 9、 3の画像 1 Visual Land Prestige 10 LCD Display Replacement, Motherboard: 手順 9、 3の画像 2 Visual Land Prestige 10 LCD Display Replacement, Motherboard: 手順 9、 3の画像 3
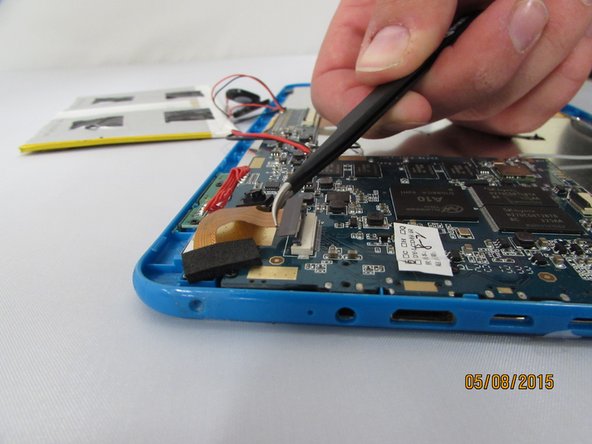
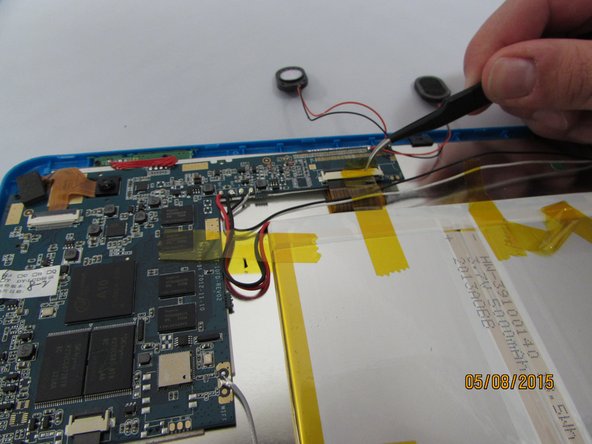
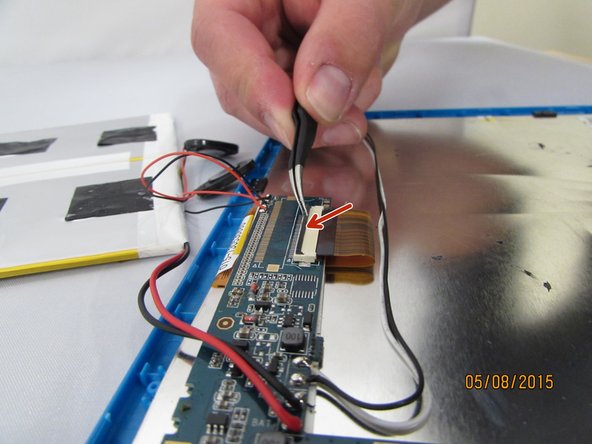
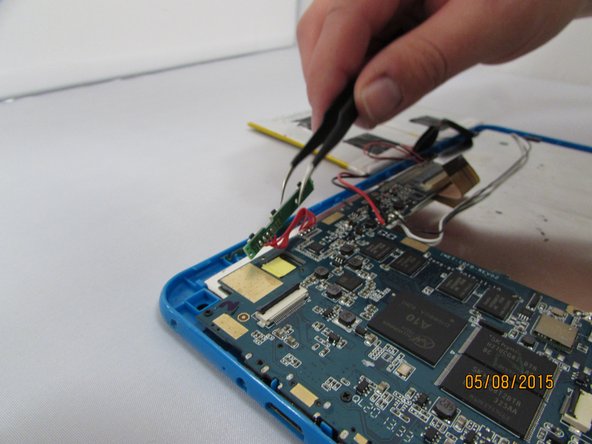
    • Locate the LCD Connector.

    • Using tweezers, grip the small black tab connected to the white plastic.

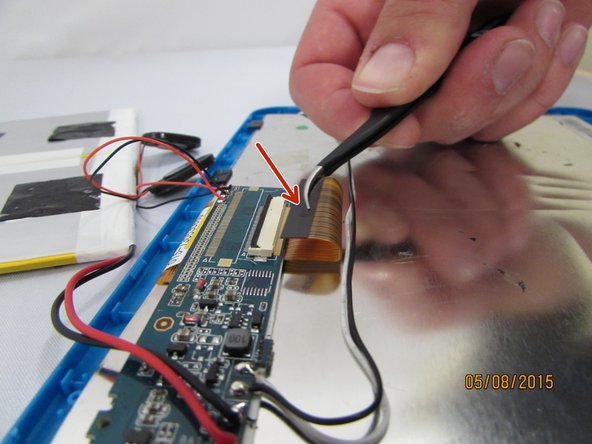
    • Gently lift the tab towards you until it clicks.

    • Remove the connector by pulling straight out, gripping the black connector head.

  10. Visual Land Prestige 10 LCD Display Replacement: 手順 10、 3の画像 1 Visual Land Prestige 10 LCD Display Replacement: 手順 10、 3の画像 2 Visual Land Prestige 10 LCD Display Replacement: 手順 10、 3の画像 3
    • Locate the Touchscreen connector and grip the forward-most black tab with the tweezers.

    • Lift the tab towards you until you feel an audible click.

    • Gently remove the connector by pulling straight out, gripping the black connector head.

  11. Visual Land Prestige 10 LCD Display Replacement: 手順 11、 2の画像 1 Visual Land Prestige 10 LCD Display Replacement: 手順 11、 2の画像 2
    • Gently lift up the WiFi antenna and set aside.

  12. Visual Land Prestige 10 LCD Display Replacement: 手順 12、 2の画像 1 Visual Land Prestige 10 LCD Display Replacement: 手順 12、 2の画像 2
    • Locate and remove the screws holding the volume and hold button controller. Set screws aside on magnetic mat and label them.

    • Gently lift up on the controller and leave it hanging loose.

  13. Visual Land Prestige 10 LCD Display Replacement: 手順 13、 2の画像 1 Visual Land Prestige 10 LCD Display Replacement: 手順 13、 2の画像 2
    • Remove screws located on motherboard.

    • Place on magnetic mat and label them

    • Gently remove the Motherboard and any wires connected to it and set it aside on a static free surface.

  14. Visual Land Prestige 10 LCD Display Replacement, LCD Display: 手順 14、 3の画像 1 Visual Land Prestige 10 LCD Display Replacement, LCD Display: 手順 14、 3の画像 2 Visual Land Prestige 10 LCD Display Replacement, LCD Display: 手順 14、 3の画像 3
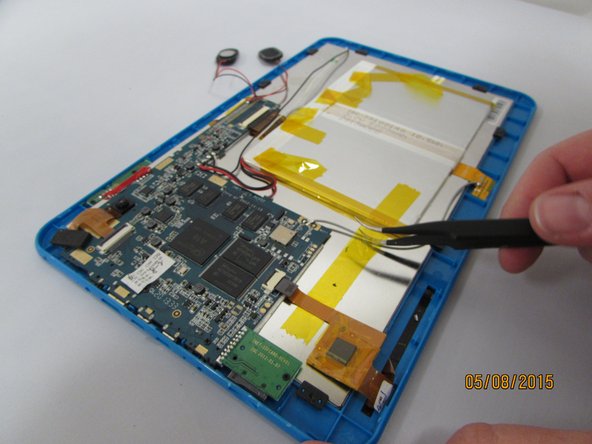
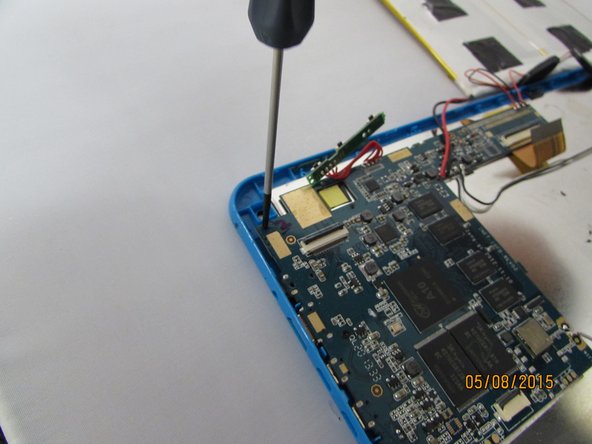
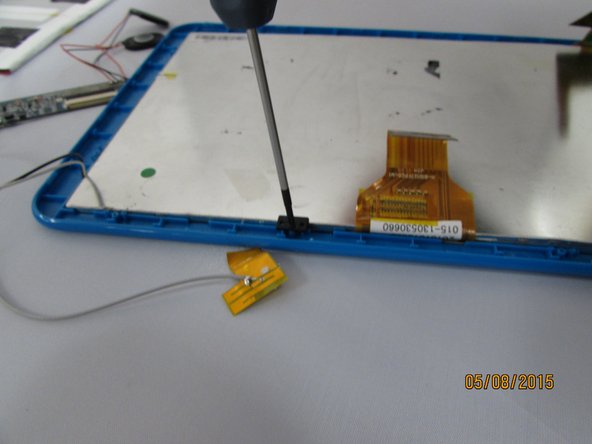
    • Remove the screws and plastic tabs holding the LCD Display and place them on the magnetic mat. Label them.

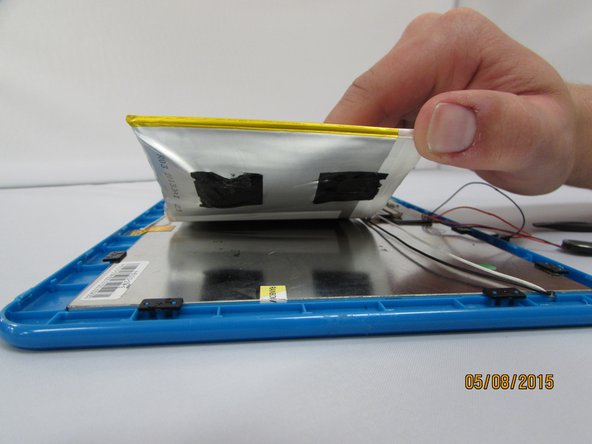
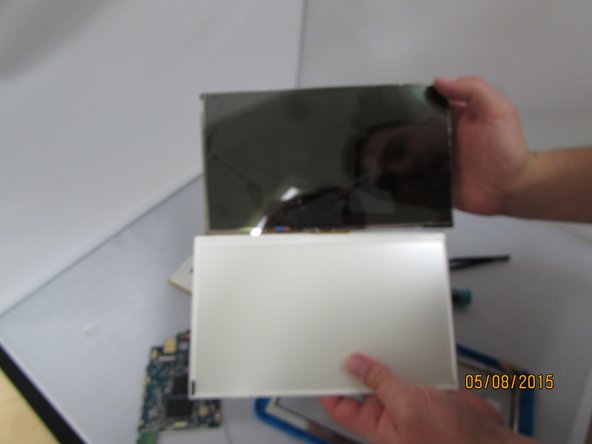
    • Gently remove the LCD Display and backlight by lifting up the LCD Connector with your fingers.

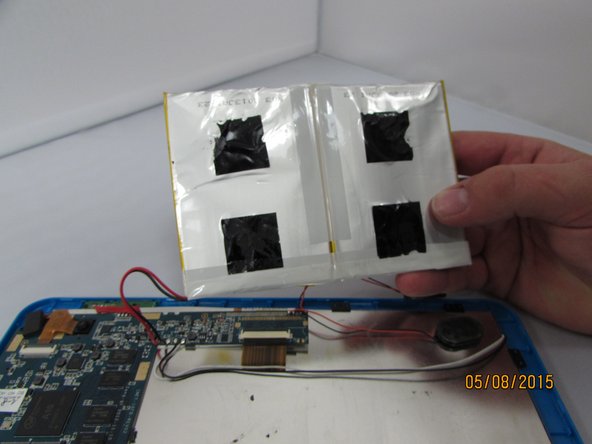
    • Set aside the LCD Assembly.

    • The LCD display and backlight are separated from one another. Be sure to remember how they are aligned when putting the device back together.

終わりに

To reassemble your device, follow these instructions in reverse order.

2 の人々がこのガイドを完成させました。

作成者

1人の作成者と共同作成されました。

Connor Reese

メンバー登録日: 04/08/15

1,298 ポイント

6のガイドは作成済み

チーム

Eastern Washington University, Team 2-1, Matresse Spring 2015 Eastern Washington University, Team 2-1, Matresse Spring 2015人のメンバー

EWU-MATRESSE-S15S2G1

3 メンバー

12のガイドは作成済み

0 件のコメント

コメントを追加

統計データ:

過去 24時間: 4

過去 7 日: 10

過去 30 日: 16

今までの合計 1,632