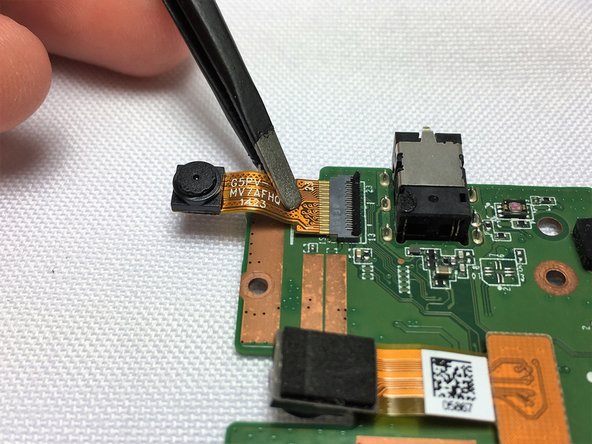
メインコンテンツにスキップ

Verizon Ellipsis 7 Rear Facing Camera Replacement

必要な工具と部品

  1. Verizon Ellipsis 7 Rear Facing Camera Replacement, Charging Port: 手順 1、 3の画像 1 Verizon Ellipsis 7 Rear Facing Camera Replacement, Charging Port: 手順 1、 3の画像 2 Verizon Ellipsis 7 Rear Facing Camera Replacement, Charging Port: 手順 1、 3の画像 3
    • Hold down the power button until the screen goes black to turn off the device.

    • Remove the SIM card from the device to prevent damage.

    • To remove the SIM card, open the SIM card cover on the side of the device.

    • Push SIM card in and pull it out after hearing a click.

  2. Verizon Ellipsis 7 Rear Facing Camera Replacement: 手順 2、 2の画像 1 Verizon Ellipsis 7 Rear Facing Camera Replacement: 手順 2、 2の画像 2
    • Take off the back panel.

    • Pry open the back cover carefully with a plastic opening tool.

    • Use the opening tool to disconnect the cover completely. Do not attempt to pry the back cover off with your hands.

    • Be sure to pry open all sides of the device. Attempting to take off the back cover when part of it is attached may snap the cover.

  3. Verizon Ellipsis 7 Rear Facing Camera Replacement: 手順 3、 3の画像 1 Verizon Ellipsis 7 Rear Facing Camera Replacement: 手順 3、 3の画像 2 Verizon Ellipsis 7 Rear Facing Camera Replacement: 手順 3、 3の画像 3
    • Remove the charging (micro-USB) port.

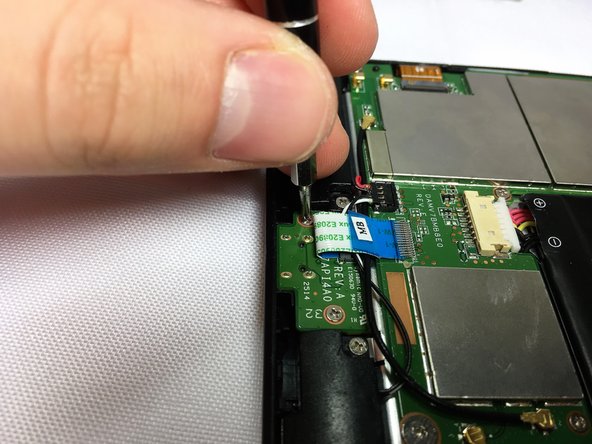
    • Unscrew the indicated screws using the Phillips #00 screwdriver.

    • The screws shown in the picture are the more common 4.76 mm.

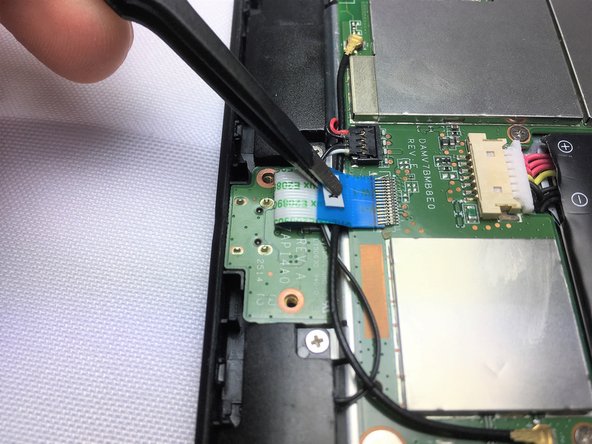
    • Disconnect the ribbon cable connecting the charging port board to the motherboard using tweezers.

    • Use the tweezers to grab the sides of black, plastic connector. Do not grab from the wires or try to wedge it out from the bottom.

    • Be extremely careful when disconnecting the ribbon cable. It is very delicate.

  4. Verizon Ellipsis 7 Rear Facing Camera Replacement: 手順 4、 2の画像 1 Verizon Ellipsis 7 Rear Facing Camera Replacement: 手順 4、 2の画像 2
    • Remove the charging port board from the phone using tweezers.

    • Place the replacement charging port into the phone.

    • Be cautious when replacing the ribbon cable onto the new charging port board.

  5. Verizon Ellipsis 7 Rear Facing Camera Replacement, Speaker: 手順 5、 2の画像 1 Verizon Ellipsis 7 Rear Facing Camera Replacement, Speaker: 手順 5、 2の画像 2
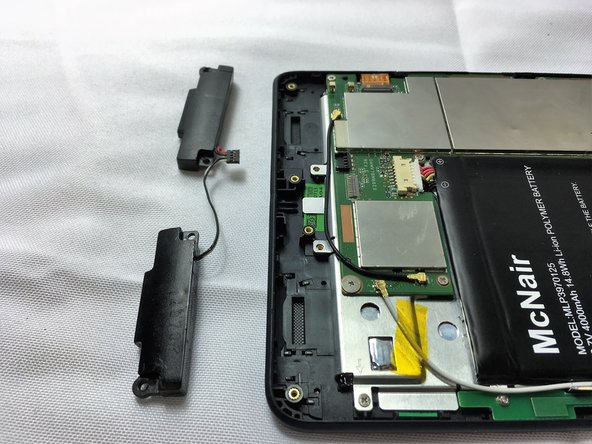
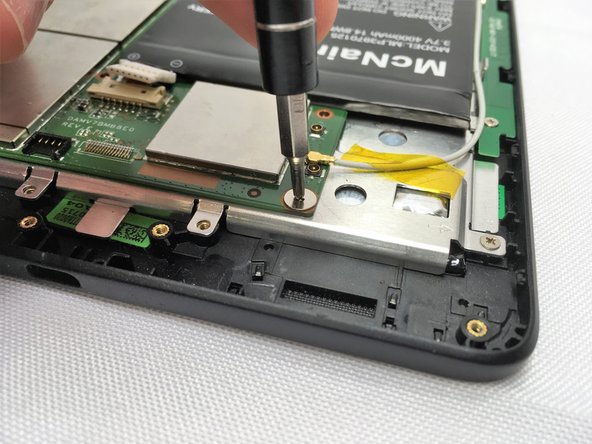
    • Remove 2 screws from each speaker, 4 screws in total, using a Phillips #00 screwdriver.

    • The screws shown in the picture are the more common 4.76 mm.

  6. Verizon Ellipsis 7 Rear Facing Camera Replacement: 手順 6、 3の画像 1 Verizon Ellipsis 7 Rear Facing Camera Replacement: 手順 6、 3の画像 2 Verizon Ellipsis 7 Rear Facing Camera Replacement: 手順 6、 3の画像 3
    • Using tweezers carefully lift the connector up to disconnect it from the motherboard.

    • Using tweezers carefully pull the speakers up and out of device.

  7. Verizon Ellipsis 7 Rear Facing Camera Replacement, Rear Facing Camera: 手順 7、 1の画像 1
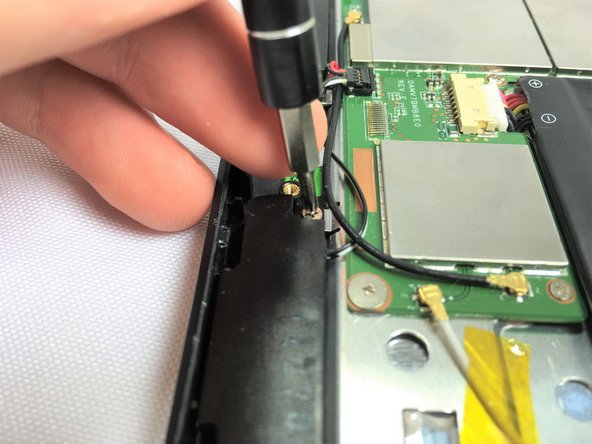
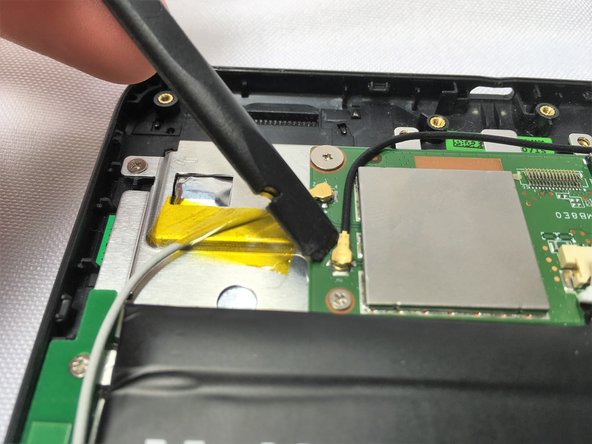
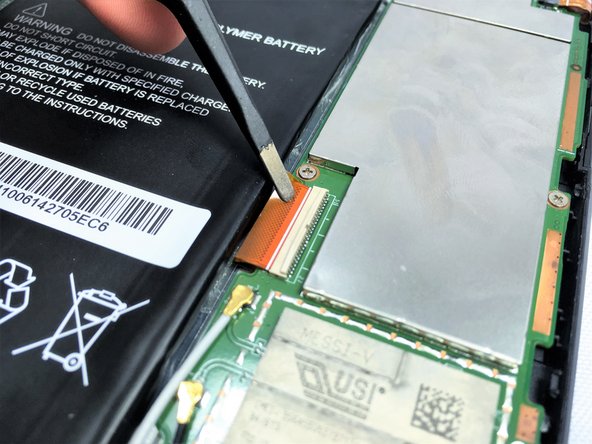
    • Use the tweezers to carefully disconnect the power cable bundle from the motherboard.

  8. Verizon Ellipsis 7 Rear Facing Camera Replacement: 手順 8、 2の画像 1 Verizon Ellipsis 7 Rear Facing Camera Replacement: 手順 8、 2の画像 2
    • Use a Phillips #0 screwdriver to remove the 10 screws from the motherboard.

    • The screws shown in the first picture are the more common 4.76 mm.

    • The screw shown in the second picture is shorter, 3.175 mm, than the rest of the screws

  9. Verizon Ellipsis 7 Rear Facing Camera Replacement: 手順 9、 2の画像 1 Verizon Ellipsis 7 Rear Facing Camera Replacement: 手順 9、 2の画像 2
    • Remove the 5 antenna cable connectors from the motherboard using a spudger.

  10. Verizon Ellipsis 7 Rear Facing Camera Replacement: 手順 10、 3の画像 1 Verizon Ellipsis 7 Rear Facing Camera Replacement: 手順 10、 3の画像 2 Verizon Ellipsis 7 Rear Facing Camera Replacement: 手順 10、 3の画像 3
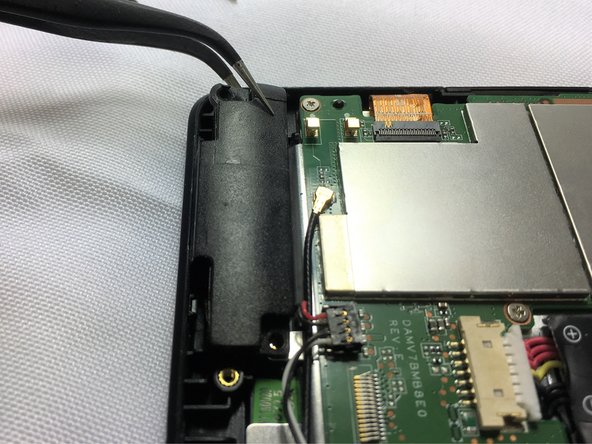
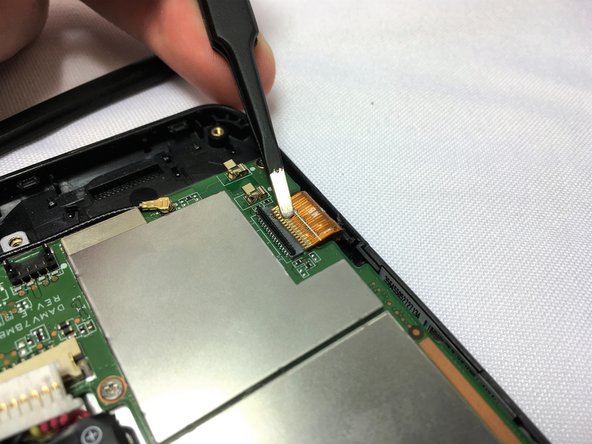
    • Disconnect the two ZIF connectors that are connected to the motherboard with a spudger. Lift up the metal part of the connector and then pull the connector off of its port

    • Once disconnected pull away from its connector carefully with tweezers.

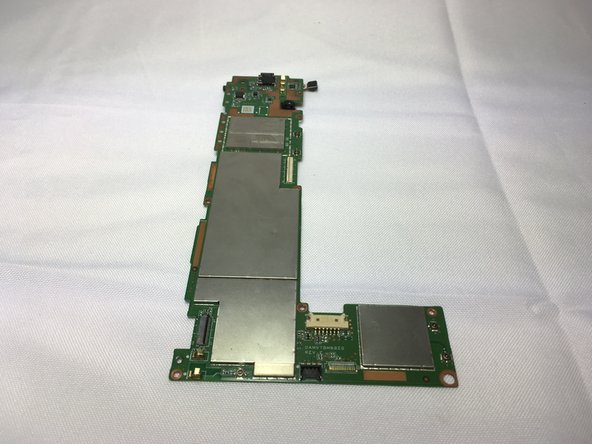
    • Once the connectors have been disconnected you can gently lift up on the motherboard to remove it from the device.

  11. Verizon Ellipsis 7 Rear Facing Camera Replacement: 手順 11、 3の画像 1 Verizon Ellipsis 7 Rear Facing Camera Replacement: 手順 11、 3の画像 2 Verizon Ellipsis 7 Rear Facing Camera Replacement: 手順 11、 3の画像 3
    • Remove the motherboard from the tablet.

    • Use the spudger to disconnect the press lift connector.

    • Carefully flip the motherboard over. Disconnect the camera at the top of the board using tweezers.

終わりに

To reassemble your device, follow these instructions in reverse order.

ある他の人がこのガイドを完成しました。

作成者

8人の作成者と共同で作成されました。

Charles Gorbett

メンバー登録日: 10/10/16

242 ポイント

2のガイドは作成済み

チーム

Sam Houston State, Team 12-7, Blackburne Fall 2016 Sam Houston State, Team 12-7, Blackburne Fall 2016人のメンバー

SHSU-BLACKBURNE-F16S12G7

3 メンバー

10のガイドは作成済み

0 件のコメント

コメントを追加

統計データ:

過去 24時間: 0

過去 7 日: 1

過去 30 日: 5

今までの合計 370