メインコンテンツにスキップ

このバージョンは誤った内容を含んでいる可能性があります。最新の承認済みスナップショットに切り替えてください。

必要な工具と部品

  1. この手順は未翻訳です。 翻訳を手伝う。

    : 手順 1、 2の画像 1 : 手順 1、 2の画像 2
    • Place the notebook on the table, with the battery facing away from you.

    • Slide the switch from "lock" to "unlock" with your right hand on the right side of the computer.

    • Maintain holding the right switch in the "unlock" position.

    • Use your left hand to slide the left switch from "lock" to "unlock".

  2. この手順は未翻訳です。 翻訳を手伝う。

    : 手順 2、 2の画像 1 : 手順 2、 2の画像 2
    • Maintain both left and right switches in the "unlock" position.

    • Use your forefingers to push the battery out of the computer.

  3. この手順は未翻訳です。 翻訳を手伝う。

    : 手順 3、 1の画像 1
    • Place the laptop fully opened with the keyboard facing upwards.

    • Remove the hinge cover by wedging the spudger underneath at the bottom edge and gently prying upwards while sliding the spudger along the cover.

  4. この手順は未翻訳です。 翻訳を手伝う。

    : 手順 4、 1の画像 1
    • Carefully remove the keyboard by lifting the top of the keyboard closest to the screen.

    • Pull the keyboard away from the mousepad.

    • Be careful to not damage the ribbon underneath the keyboard that connects the keyboard to the computer during removal.

  5. この手順は未翻訳です。 翻訳を手伝う。

    : 手順 5、 1の画像 1
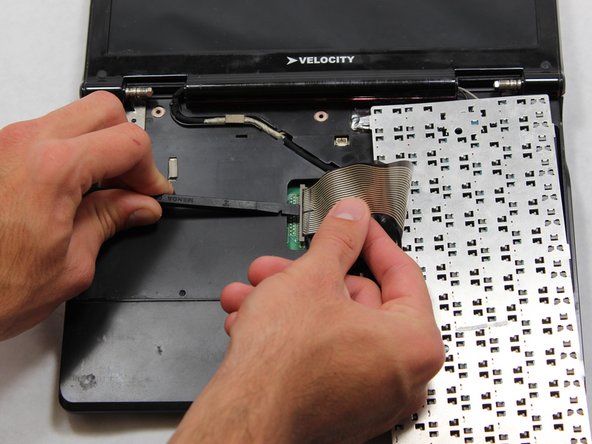
    • Wedge the spudger between the plastic clamp that holds the ribbon in place and carefully pry the connector off.

  6. この手順は未翻訳です。 翻訳を手伝う。

    : 手順 6、 1の画像 1
    • Remove the eight 5.65mm Phillips #1 screws.

  7. この手順は未翻訳です。 翻訳を手伝う。

    : 手順 7、 2の画像 1 : 手順 7、 2の画像 2
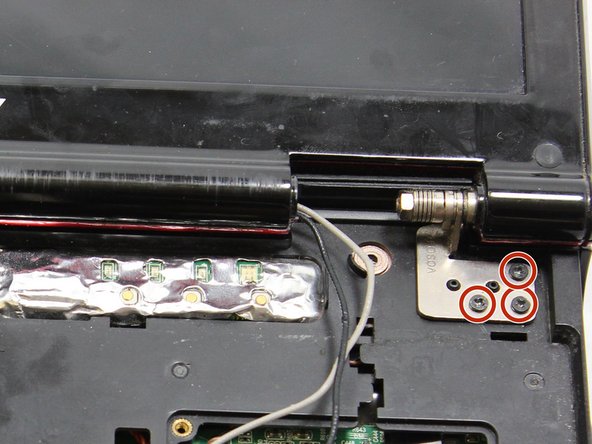
    • Place the computer open and with the screen facing up on the table.

    • Remove the three 3.65mm Phillips #1 screws in the right hand corner. Also remove the mirrored set of screws on the left side.

  8. この手順は未翻訳です。 翻訳を手伝う。

    : 手順 8、 1の画像 1
    • Remove the black and gray wires by gently grasping the wires where they connect to the motherboard and pulling up.

  9. この手順は未翻訳です。 翻訳を手伝う。

    : 手順 9、 1の画像 1
    • Using the plastic opening tool, pry the base of the cable connecting the screen to the motherboard upwards.

  10. この手順は未翻訳です。 翻訳を手伝う。

    : 手順 10、 2の画像 1 : 手順 10、 2の画像 2
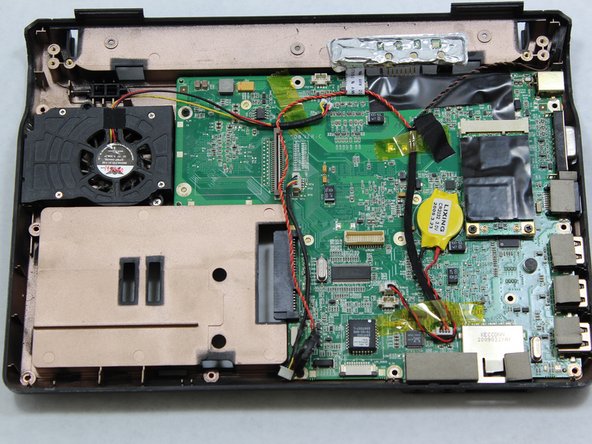
    • Remove the front cover plate by wedging the spudger underneath at the bottom edge of the computer and gently prying upwards while sliding the spudger around the base of the laptop.

  11. この手順は未翻訳です。 翻訳を手伝う。

    : 手順 11、 1の画像 1
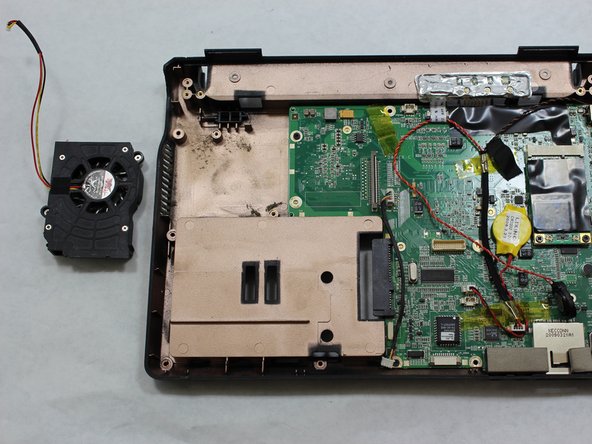
    • Remove the two 4.80mm Phillips #00 screws holding down the fan.

  12. この手順は未翻訳です。 翻訳を手伝う。

    : 手順 12、 2の画像 1 : 手順 12、 2の画像 2
    • Remove the red, yellow, and black wires connecting the fan to the motherboard by placing your index finger underneath the wires where they connect to the motherboard, pinching the wires together with your thumb and index finger, and gently pulling the wires upwards.

ゴール

作成者

7人の作成者と共同で作成されました。

Jaymes Lee

メンバー登録日: 08/17/12

101 ポイント

1ガイドが承認済み

チーム

Cal Poly, Team 14-9, Forte Fall 2013 Cal Poly, Team 14-9, Forte Fall 2013人のメンバー

CPSU-FORTE-F13S14G9

5 メンバー

6のガイドは作成済み

0 件のコメント

コメントを追加

統計データ:

過去 24時間: 3

過去 7 日: 9

過去 30 日: 9

今までの合計 497