必要な工具と部品
-
-
Using one of the plastic opening tools, separate the plastic back from the tablet in one spot.
-
Gently work the tool around the diameter of the tablet until the back pops completely off.
 FixBotに聞いてみる
-
-
-
-
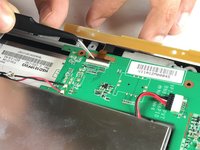
Locate the camera as illustrated. Remove the 3 black screws at the top of the tablet.
-
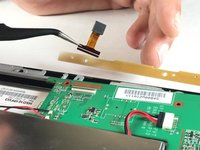
Gently pull back the yellow piece so that the camera may be accessed.
-
-
この手順で使用する道具:Tweezers$4.99
-
Use the tweezers to pull back the black latch on the motherboard that holds the camera.
-
Finally, use the tweezers to remove the camera from the motherboard.
-


終わりに
To reassemble your device, follow these instructions in reverse order.
