メインコンテンツにスキップ
リペアコミュニティに参加 - アカウントの作成

Vacuum Cleaner Brush Roll Replacement

必要な工具と部品

    1. Vacuum Cleaner Brush Roll Replacement, Brush Roll: 手順 1、 1の画像 1
      • Be sure to unplug the device from the wall outlet before disassembling.

      • Remove the bottom head of the vacuum cleaner by pressing the push button.

      FixBotに聞いてみる

      コメントを追加

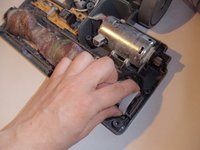
    2. Vacuum Cleaner Brush Roll Replacement: 手順 2、 2の画像 1 Vacuum Cleaner Brush Roll Replacement: 手順 2、 2の画像 2
      • Carefully unscrew the 6 screws with a Phillips screwdriver. Set aside.

      FixBotに聞いてみる

      コメントを追加

    3. Vacuum Cleaner Brush Roll Replacement: 手順 3、 1の画像 1
      • Separate the top portion of the head from the bottom.

      • Make sure not to pull off or damage the connected wires.

      FixBotに聞いてみる

      コメントを追加

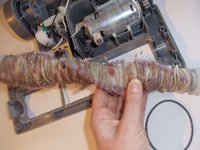
    4. Vacuum Cleaner Brush Roll Replacement: 手順 4、 1の画像 1
      • Slip off the belt.

      FixBotに聞いてみる

      コメントを追加

    5. Vacuum Cleaner Brush Roll Replacement: 手順 5、 2の画像 1 Vacuum Cleaner Brush Roll Replacement: 手順 5、 2の画像 2
      • Pull the brush roll from its slots.

      FixBotに聞いてみる

      コメントを追加

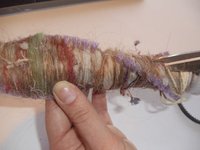
    6. Vacuum Cleaner Brush Roll Replacement: 手順 6、 2の画像 1 Vacuum Cleaner Brush Roll Replacement: 手順 6、 2の画像 2
      • Use scissors to cut strings and other debris from the brush roll. Avoid cutting the bristles.

      FixBotに聞いてみる

      コメントを追加

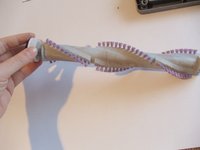
    7. Vacuum Cleaner Brush Roll Replacement: 手順 7、 1の画像 1
      • Return the clean brush roll and re-situate the belt to secure it in place.

      FixBotに聞いてみる

      コメントを追加

終わりに

To reassemble your device, follow the disassembly instructions in reverse order.

キャンセル: このガイドを終了できませんでした。

ある他の人がこのガイドを完成しました。

作成者

6人の作成者と共同で作成されました。

Kaitlyn Sheets

メンバー登録日: 01/19/16

129 ポイント

1ガイドが承認済み

チーム

Oakland University, Team 6-12, Walwema Winter 2016 Oakland University, Team 6-12, Walwema Winter 2016人のメンバー

OAK-WALWEMA-W16S6G12

1 メンバー

3のガイドは作成済み

0件のガイドコメント

コメントを追加

統計データ:

過去 24時間: 5

過去 7 日: 19

過去 30 日: 97

今までの合計 4,780