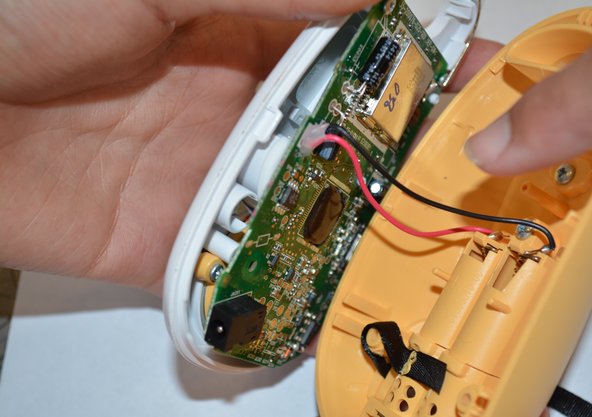
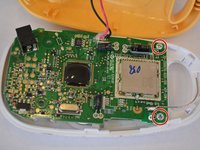
メインコンテンツにスキップ

VTech Safe and Sound DM111-2 Speaker Replacement

必要な工具と部品

  1. VTech Safe and Sound DM111-2 Speaker Replacement, Battery: 手順 1、 1の画像 1
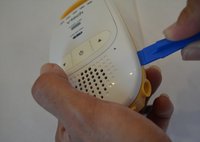
    • Expose the battery compartment by removing the lower back cover of the device.

    • Do this by holding the back side of the device upside down in your hands and applying pressure to the indented portion with both thumbs.

  2. VTech Safe and Sound DM111-2 Speaker Replacement: 手順 2、 1の画像 1
    • Once the batteries are exposed, use your index finger to push the battery against the spring and pull up to dislodge the battery.

    • Make sure to check for battery acid or other corrosive substances before touching the battery. If needed, use latex gloves to avoid skin irritation from battery acid.

  3. VTech Safe and Sound DM111-2 Speaker Replacement, Speaker: 手順 3、 1の画像 1
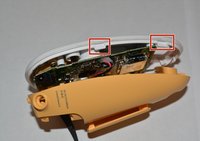
    • Use the Philips #0 Screwdriver to remove the two 11.2 mm screws located on either side of the battery slots.

  4. VTech Safe and Sound DM111-2 Speaker Replacement: 手順 4、 3の画像 1 VTech Safe and Sound DM111-2 Speaker Replacement: 手順 4、 3の画像 2 VTech Safe and Sound DM111-2 Speaker Replacement: 手順 4、 3の画像 3
    • Use a plastic opening tool to gently disconnect the clips holding the case together.

    • Be careful when taking the case apart there are wires attached to the back case and the motherboard which should not be disconnected.

  5. VTech Safe and Sound DM111-2 Speaker Replacement: 手順 5、 2の画像 1 VTech Safe and Sound DM111-2 Speaker Replacement: 手順 5、 2の画像 2
    • Carefully unscrew the two 6.8 mm Philips head screws near the top of the device using the Philips#0 screw driver.

    • Be careful removing the motherboard because there will be a set of wires connecting the speaker and motherboard.

  6. VTech Safe and Sound DM111-2 Speaker Replacement: 手順 6、 1の画像 1
    • Use a Philips#0 screwdriver and unscrew the two 6.8mm Philips screws holding the speaker in place.

  7. VTech Safe and Sound DM111-2 Speaker Replacement: 手順 7、 1の画像 1
    • Remove the solder from the bottom left corner of the motherboard to completely detach the speaker from the device.

終わりに

To reassemble your device, follow these instructions in reverse order.

ある他の人がこのガイドを完成しました。

作成者

3人の作成者と共同で作成されました。

Darrell Griffin

メンバー登録日: 08/31/15

222 ポイント

2のガイドは作成済み

チーム

USF Tampa, Team 6-3, Remmell Fall 2015 USF Tampa, Team 6-3, Remmell Fall 2015人のメンバー

USFT-REMMELL-F15S6G3

4 メンバー

7のガイドは作成済み

0 件のコメント

コメントを追加

統計データ:

過去 24時間: 1

過去 7 日: 7

過去 30 日: 32

今までの合計 3,262