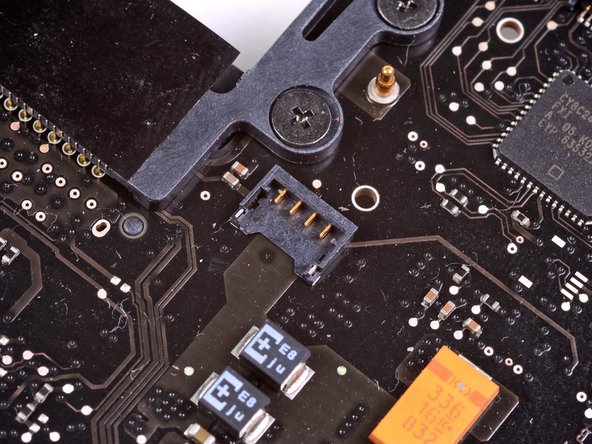
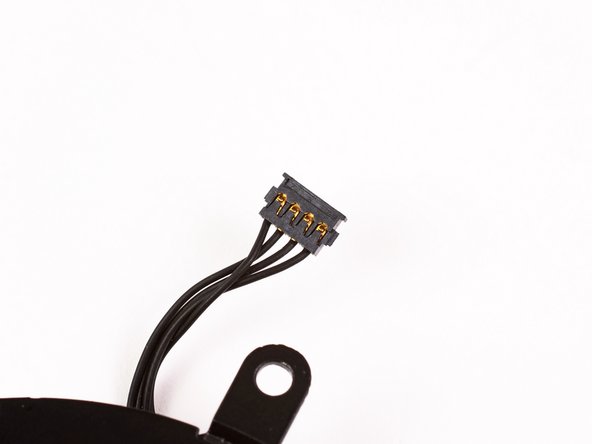
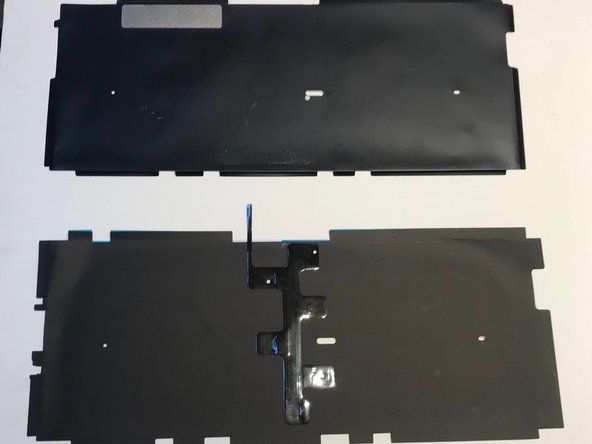
Some 2.0 GHz A1278 MacBook Unibody logic boards do not have the necessary socket installed to accept the keyboard backlight ribbon cable attached to the upper case. The first and second pictures show logic boards with and without the socket installed, respectively. If your logic board does not have the backlight ribbon cable socket installed, the keyboard will work but the keys will not light up.
If your logic board does not have the socket installed to accept the keyboard backlight ribbon cable and you are installing a backlit upper case, simply tuck the keyboard backlight ribbon cable out of the way when you reinstall the logic board into the upper case.
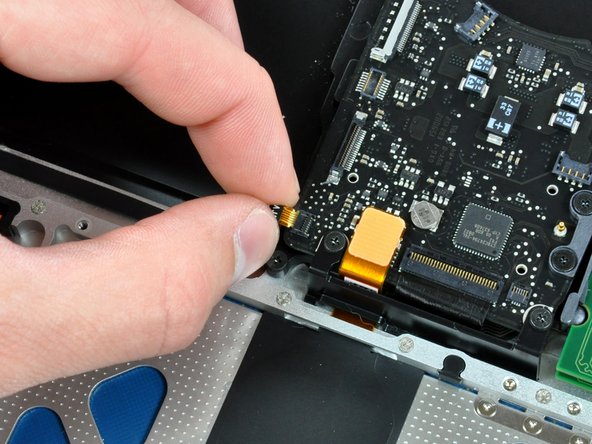
Use a spudger to pry the fan connector straight up and out of its socket on the logic board.
It is useful to twist the spudger axially from beneath the fan cable wires to release the connector.
The fan socket and the fan connector can be seen in the second and third pictures. Be careful not to break the plastic fan socket off the logic board as you use your spudger to lift the fan connector straight up and out of its socket. The layout of the logic board shown in the second picture may look slightly different than your machine but the fan socket is the same.
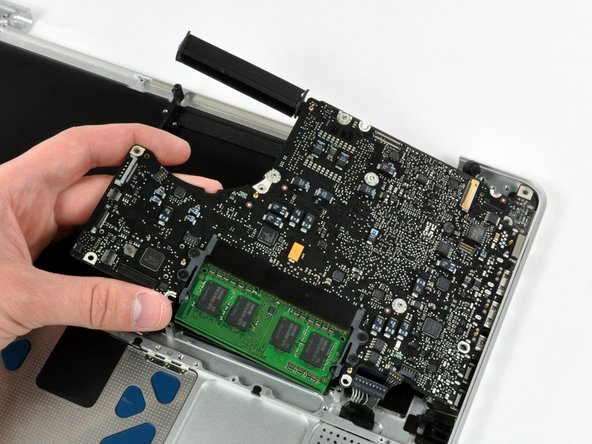
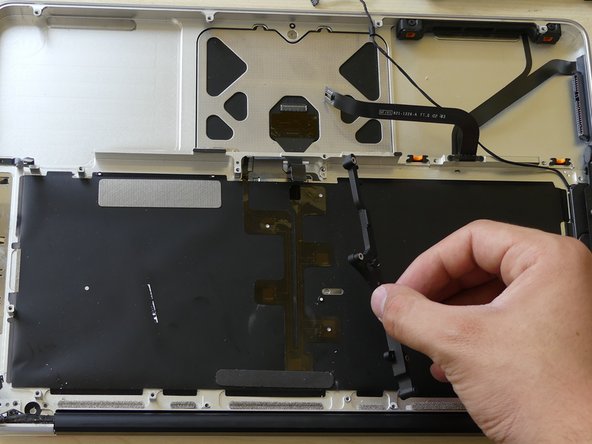
Now that you have removed the display (only required if a new top case is used to replace the keyboard), logic board, optical drive, and various other components from the upper case (or top case), you should have something that looks like this.
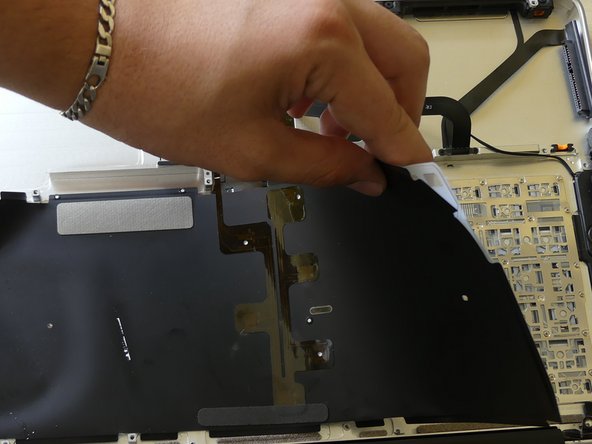
Now that you can see the back of the individual keys, stop there.
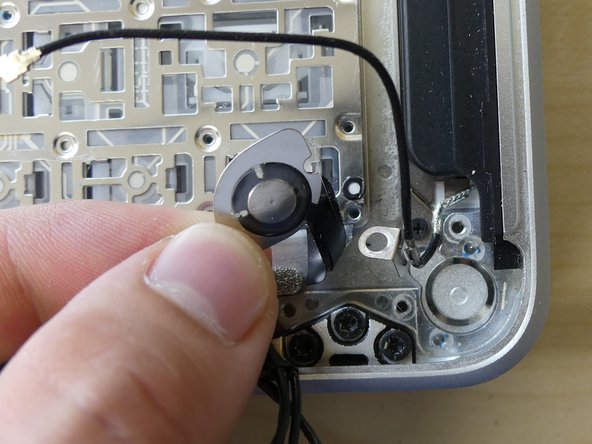
You now need to unscrew the 2 small, black Philips screws from the back of the power button assembly. Failing to do this will tear the the power button's ribbon cable when you try to remove the keyboard.
After you do this, remove the power button by pressing on the power button from the top of the upper case. The power button and a small metal ring (spring) will come out.
Now you have all probably noticed the horde of tiny black screws that cover the back of your keyboard. Yes, unfortunately we have to to take 'em out!
Be very careful here as you don't want to strip the small screw heads and you also don't want to lose any. I've found that having a magnet to pick up the screws is helpful. A small container to put them in is also useful for keeping them out of the carpet.
Now that you have removed all of the screws, you can gently press on the face side of the keyboard and it will come right out. (If you have removed all the screws.)
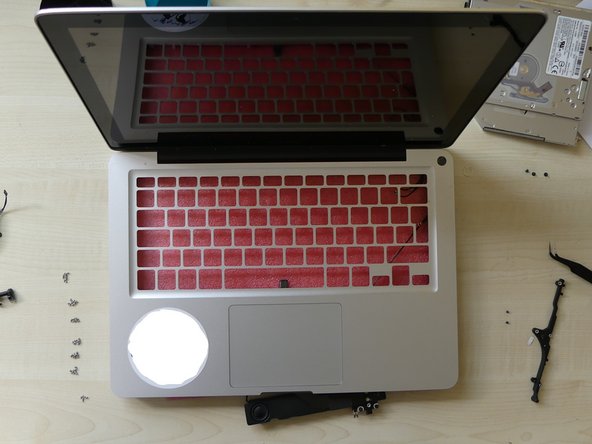
Here is an image of the top case without its keyboard. I hope you're not winded yet. We're only half way there!
The photos aren't failing to show up, there just aren't any photos - no one ever uploaded any, even though the text of the guide talks about the pictures. As you're doing the upgrade yourself though, snap some pictures, edit the steps here, and upload your pictures!
just a question. Where exactly do I put the backlight? Because I have a black film, then a thick plastic sheet, then the metal. then the silicon layer with the components inside, and then the front black sheet, and above that you mount the keys. In between which layer do I put the backlight?
I realize that this guide is getting a bit old, but I bought just the backlight part off Ebay. It's essentially a black film with couple of leds, a clear plastic sheet and a black matte layer. It goes on top (if you look at the MB from the bottom, as in this guide) the metal layer. So it replaces the parts you remove in steps 32 and 33, after which you can start reassembling.