このバージョンは誤った内容を含んでいる可能性があります。最新の承認済みスナップショットに切り替えてください。
必要な工具と部品
-
この手順は未翻訳です。 翻訳を手伝う。
-
So, here is one of the Dell 1908FpB monitors. It did not come with a stand or any other accessory. The LCD looks odd, it just needed a heavy cleaning. That what those streaks are.
-
First thing to do is to remove the front bezel. It simply snaps in. Use your fingertips in between the bezel and the LCD to pop the bezel loose.
-
It does get a bit snug at the edges. Again, all that is needed is to pop the snaps with ones fingertips.
-
-
この手順は未翻訳です。 翻訳を手伝う。
-
This close-up shows the position of the fingertip to remove the bezel.
-
This is one of the snaps that the bezel hooks into the back cover to remain fixed.
-
The place to be careful at is around the button bar. There is a ribbon cable that attaches to those buttons. Simply continue to unsnap the bezel without removing it.
-
-
この手順は未翻訳です。 翻訳を手伝う。
-
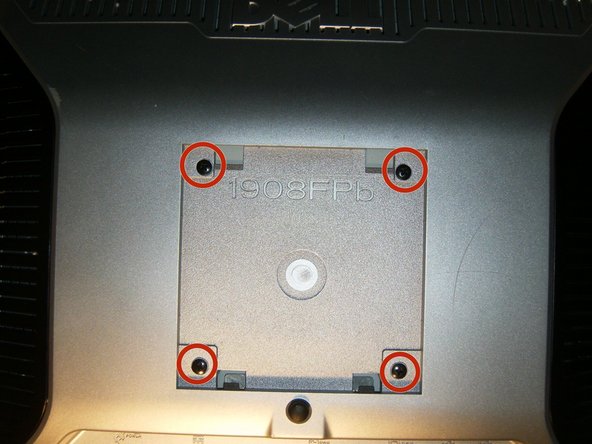
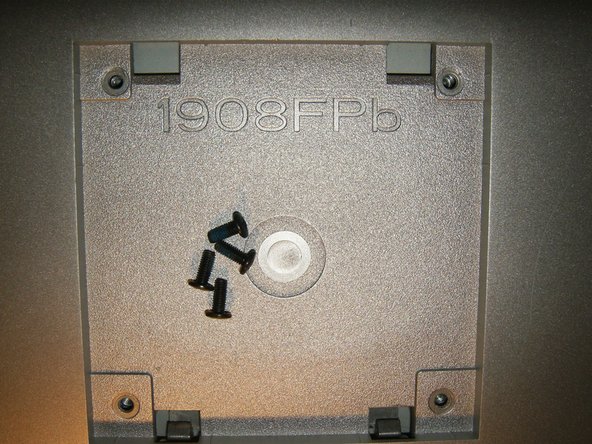
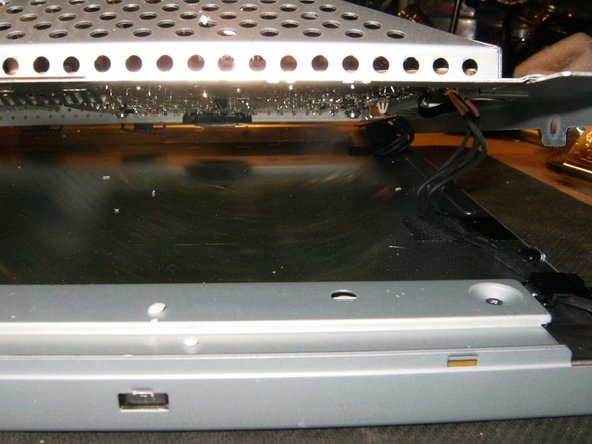
With the four screws removed and the front bezel snapped off, the back cover simply pulls off.
-
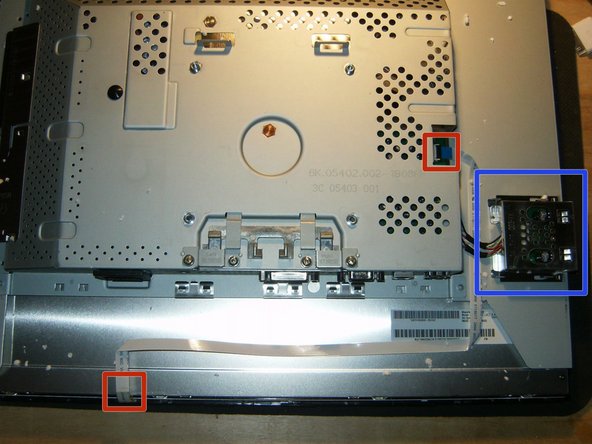
Here is the ribbon cable coming from the front button bar, the way it is routed and where it connects.
-
this monitor has an additional 2 USB ports
-
The ribbon cable connector needs to be flipped open to remove the cable. Flip the black tab from left to right to open it
-
-
-
この手順は未翻訳です。 翻訳を手伝う。
-
This monitor had a cover over the CCFL connectors. Remove it by simply sliding it in the direction of the arrow that is marked on it.
-
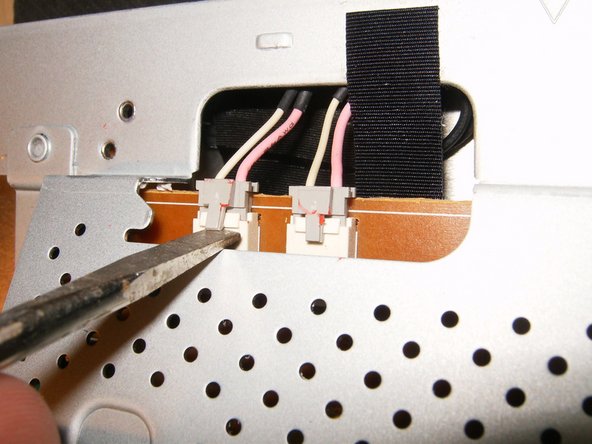
Here are the four connectors for the CCFL's.
-
Remove the connectors by lifting the locking tab. This can be done with good fingernails or a small screwdriver, and then pull the connectors apart.
-
-
この手順は未翻訳です。 翻訳を手伝う。
-
All CCFL connectors removed. The position on the CCFL connectors is irrelevant. They will only fit one way into the connection.
-
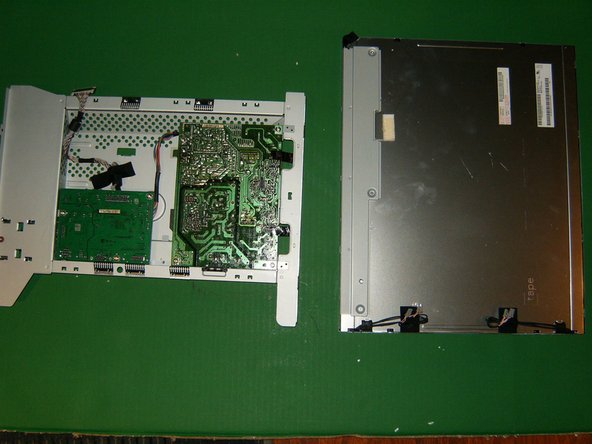
With the CCFL's disconnected separate the back case from the LCD
-
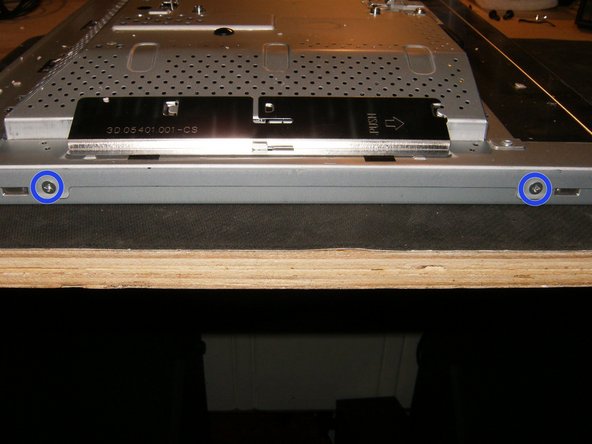
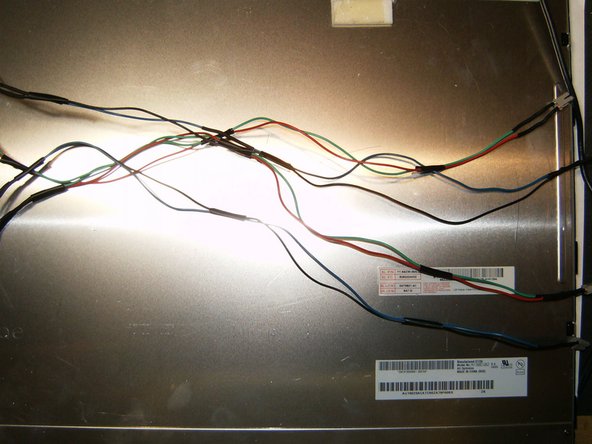
The panel has two connectors on the top right, and two connectors on the bottom right.
-
-
この手順は未翻訳です。 翻訳を手伝う。
-
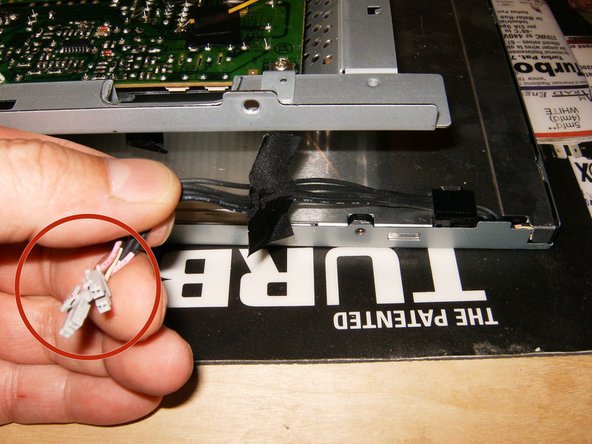
Destruction! Simply use a pair of scissors, or any other cutting instrument, and cut the connectors. Leave about 1/2 inch to 3/4 inch of the cable on the connector.
-
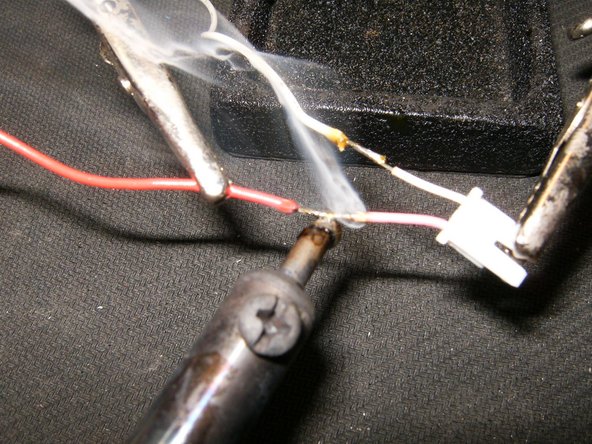
Remove the insulation from the cut ends.
-
Use 2 28AWG wires. The length on these is about 12inches. Remove the insulation from all the ends.
-
-
この手順は未翻訳です。 翻訳を手伝う。
-
Find a place for the inverter. Plenty of it in this model
-
Mark the outline of the inverter with a marker in the case. This will give a guide for the hook and loop tape (Velcro).
-
Before getting ready to mount the inverter, take another look at the bottom of the inverter (on this model) for a wiring description.
-
-
この手順は未翻訳です。 翻訳を手伝う。
-
Now apply two strips of Velcro to the back of the inverter.
-
Place the inverter with the Velcro in the case. Once placed properly, insert the four backlight connector into the inverter.
-
The monitor is now ready for reassembly. Fish the four wires from the inverter through an opening in the case.
-
-
この手順は未翻訳です。 翻訳を手伝う。
-
Once more, the four wires from the inverter need to be fished through am opening in the back
-
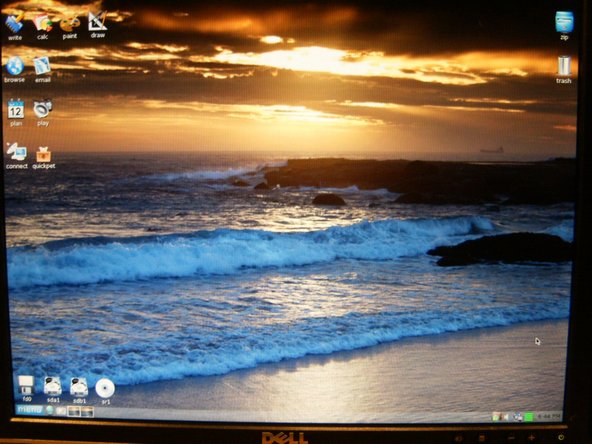
Okay, now it's test time. Combine the Yellow On/Off wire with the Black Vin Wire. That will be the positive connection, the Red wire is ground and will be the negative. This inverter is rated 12-24Volt, so an old laptop power brick will be perfect.
-
Data line connected to a computer and power to the inverter shows a great image. The only issue with this right now is that the power to the monitor and the backlight are separate. I did not find a suitable power source on the original power board. Also, the brightness can not be adjusted with this hook up.
-


9 の人々がこのガイドを完成させました。

チーム

12 件のコメント
Hello Oldturkey03:
Fixing my little girl's4-CCFL monitor.
Bad inverter:
• 2 xformers,but
• 2 outplugs(FYI: Also have 3rd grd prong each, contacts chassis screw to each CCFL ground -- Can I skip?)
EBay U-inverters (All w/2-prong outplugs = no CCFL grd). Which to get?
• AVT2028-V2 1-xformer 2-outplug? (Can 1 xformer work for all 4 CCFLs?)
Vids I've seen: lights not power if 1 wire/plug unconnected.
• AVT4029 2-xformer 4-outplug? (If I use 2 plugs, will U-inverter work w/other plugs unconnected?)
So:
1) Do all monitor CCFLs use same volts? (Is it 700VAC?)
TRANSLATION: Will described U-inverter work on any monitor/screen with 4 CCFLs?
2) Any way to test CCFLs w/Multimeter? What setting?
Pls help.
Monitor Specs
Gateway FPD1810 18.1" Diag
Power brick: Out=12VDC,4A
Backlight: 4 CCFL (per svc man)
Inverter: Samsung LG1805 -- In=12VDC(per svc man),Out=?; No schematic found
• 1 In plug --8-prong (=7 grey, 1 blue)
• 2 Out plugs --4-prong each (=2 pink, 1 blank, 1 blk gnd)
texasjoe100
1) yes it should
2) Usually you use a HV probe for those. If you use a multimeter keep in mind that the inverter may produce upwards of 3000VAC to start the light then return to around a couple of hundred volts. considered replacing the inverter with something like this http://www.pchub.com/uph/laptop/628-4543...
@Oldturkey03, from TexasJoe100
Thanks for the LG1805 replacement idea. It's just that it has a history of failure, and is beyond the repair budget (can get a whole monitor for about the same price).
Which of the 2 below do you think may work as a fair replacement?
The monitor has 4-CCFLs that are connected in pairs, per the service manual.
The original inverter has:
• 2 transformers ("xformer"), but
• only 2 outplugs (FYI: they also have a 3rd ground prong each, that contacts the chassis screw to each CCFL ground -- Can I skip it?)
I found (15"-22" Screen) U-inverters on EBay for ~$4 free shipping. So which one to get?
Here are the options (All have 2-prong outplugs = no CCFL grounds):
• AVT2028-V2 1-xformer 2-outplug? (But can one transformer do the job for all four CCFLs?)
• AVT4029 2-xformer 4-outplug? (So if I use just 2 plugs, will this U-inverter work with the other plugs unconnected?
Else can I connect the U-inverter 4 outputs to 2, each pair in parallel?)
Thanks!
@Oldturkey03, from TexasJoe100
Hello, again:
Any ideas on my February 23 post? I'd appreciate any help.
Thanks!