メインコンテンツにスキップ

Uniden UTAB71 Screen Replacement

必要な工具と部品

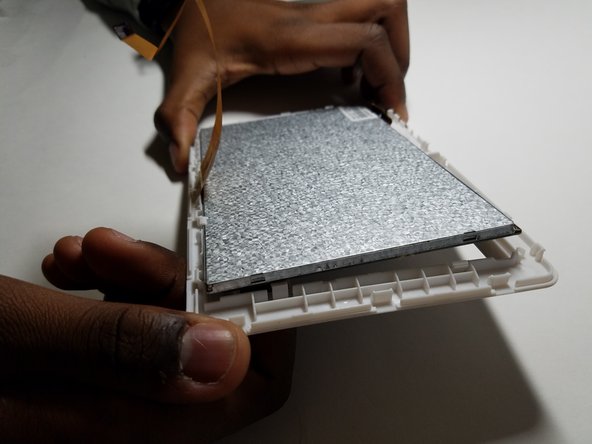
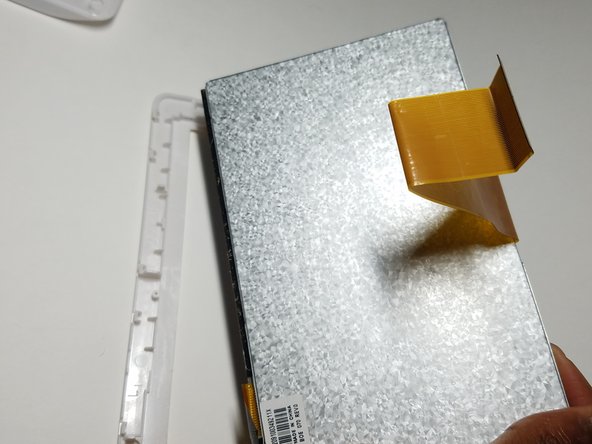
  1. Uniden UTAB71 Screen Replacement, Screen: 手順 1、 2の画像 1 Uniden UTAB71 Screen Replacement, Screen: 手順 1、 2の画像 2
    • Use a pry tool to undo the clips that attach the two halves of the tablet.

    • Make sure to be gentle with the pry tool and work your way around the edges of the tablet slowly.

    • Make sure the tablet is powered off before prying open.

    • There are two power ribbons connecting the screen to the back of the tablet. Make sure not to put too much stress on them.

  2. Uniden UTAB71 Screen Replacement: 手順 2、 2の画像 1 Uniden UTAB71 Screen Replacement: 手順 2、 2の画像 2
    • Lift off the black clip connecting the first power ribbon to the motherboard

    • Undo the clips off the second power ribbon connecting the screen to the motherboard.

  3. Uniden UTAB71 Screen Replacement: 手順 3、 3の画像 1 Uniden UTAB71 Screen Replacement: 手順 3、 3の画像 2 Uniden UTAB71 Screen Replacement: 手順 3、 3の画像 3
    • Slowly remove the screen component off the tablet by clipping the screen from the tablet outine

    • Do not apply too much pressure on the tablet casing.

終わりに

To reassemble your device, follow these instructions in reverse order.

ある他の人がこのガイドを完成しました。

作成者

3人の作成者と共同で作成されました。

Ryan Jewell

メンバー登録日: 10/20/16

422 ポイント

4のガイドは作成済み

チーム

UMass Dartmouth, Team 5-4, Martin Fall 2016 UMass Dartmouth, Team 5-4, Martin Fall 2016人のメンバー

UMASSD-MARTIN-F16S5G4

3 メンバー

8のガイドは作成済み

0 件のコメント

コメントを追加

統計データ:

過去 24時間: 0

過去 7 日: 1

過去 30 日: 1

今までの合計 334