メインコンテンツにスキップ

Uniden TCX905 Button Keypad Cleaning Guide

必要な工具と部品

  1. Uniden TCX905 Button Keypad Cleaning Guide, Battery Cover: 手順 1、 2の画像 1 Uniden TCX905 Button Keypad Cleaning Guide, Battery Cover: 手順 1、 2の画像 2
    • Starting from the top of the cover, slide down and away from the phone with your thumb

    • Lift battery cover off of batter and place it to the side

  2. Uniden TCX905 Button Keypad Cleaning Guide, Battery Pack: 手順 2、 2の画像 1 Uniden TCX905 Button Keypad Cleaning Guide, Battery Pack: 手順 2、 2の画像 2
    • Once battery cover is removed, place your thumb and index fingers on the the wires near the receptacle

    • Gently pull straight up on the wires until a click is heard which signifies the battery is completely disconnected

    • Place battery pack to the side

  3. Uniden TCX905 Button Keypad Cleaning Guide, Back Shell: 手順 3、 2の画像 1 Uniden TCX905 Button Keypad Cleaning Guide, Back Shell: 手順 3、 2の画像 2
    • Remove the two 11mm screws inside the battery storage compartment using Phillips #1 screwdriver (located near the very bottom of the phone)

  4. Uniden TCX905 Button Keypad Cleaning Guide: 手順 4、 3の画像 1 Uniden TCX905 Button Keypad Cleaning Guide: 手順 4、 3の画像 2 Uniden TCX905 Button Keypad Cleaning Guide: 手順 4、 3の画像 3
    • Gently open phone casing along the seam at the bottom of the phone using index and middle fingers of both hands

  5. Uniden TCX905 Button Keypad Cleaning Guide: 手順 5、 3の画像 1 Uniden TCX905 Button Keypad Cleaning Guide: 手順 5、 3の画像 2 Uniden TCX905 Button Keypad Cleaning Guide: 手順 5、 3の画像 3
    • Ensure that wired connection between circuit board and back shell is not strained

    • Fold the back shell underneath the front shell and circuit board

  6. Uniden TCX905 Button Keypad Cleaning Guide, Circuit Board: 手順 6、 2の画像 1 Uniden TCX905 Button Keypad Cleaning Guide, Circuit Board: 手順 6、 2の画像 2
    • Carefully remove the middle two 7mm screws, the outer top 9mm screws, and the top middle 7 mm screw that hold the logic board to the front shell of the phone casing using the Phillips #1 screwdriver

  7. Uniden TCX905 Button Keypad Cleaning Guide: 手順 7、 3の画像 1 Uniden TCX905 Button Keypad Cleaning Guide: 手順 7、 3の画像 2 Uniden TCX905 Button Keypad Cleaning Guide: 手順 7、 3の画像 3
    • Using index finger and thumb, carefully remove the circuit board from the front shell of phone

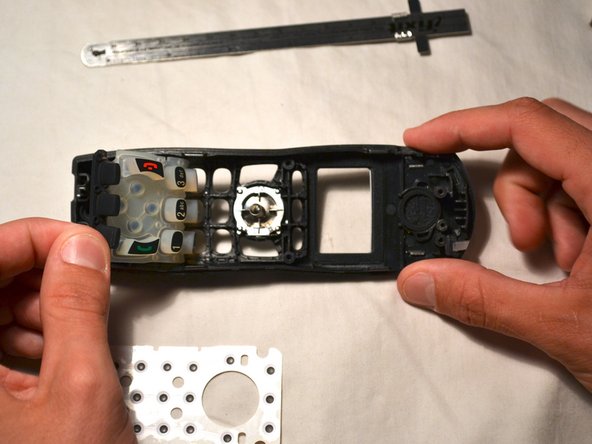
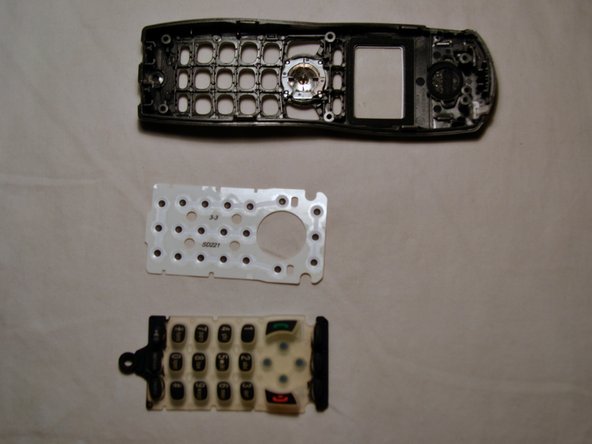
  8. Uniden TCX905 Button Keypad Cleaning Guide, Button Keypad: 手順 8、 3の画像 1 Uniden TCX905 Button Keypad Cleaning Guide, Button Keypad: 手順 8、 3の画像 2 Uniden TCX905 Button Keypad Cleaning Guide, Button Keypad: 手順 8、 3の画像 3
    • Remove the white plastic sheet covering the button pad with your fingers

    • Gently remove the silicon button pad

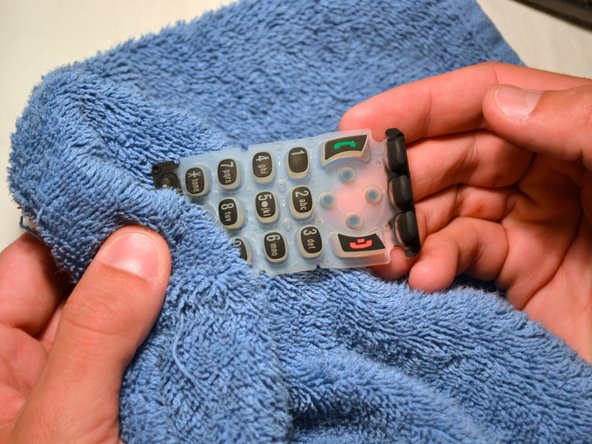
  9. Uniden TCX905 Button Keypad Cleaning Guide: 手順 9、 2の画像 1 Uniden TCX905 Button Keypad Cleaning Guide: 手順 9、 2の画像 2
    • Wet one end of the cotton swab with water and clean button pad as needed

    • Repeat process with multiple cotton swabs if needed

    • Dry the button pad with a clean, soft rag before replacing

終わりに

To reassemble your device, follow these instructions in reverse order.

作成者

3人の作成者と共同で作成されました。

Gary Pence

メンバー登録日: 03/26/14

807 ポイント

8のガイドは作成済み

チーム

Clemson, Team 1-1, Benson Spring 2014 Clemson, Team 1-1, Benson Spring 2014人のメンバー

CLEM-BENSON-S14S1G1

3 メンバー

16のガイドは作成済み

0 件のコメント

コメントを追加

統計データ:

過去 24時間: 0

過去 7 日: 0

過去 30 日: 10

今までの合計 842