メインコンテンツにスキップ

Umbrella Tail Beads Replacement

必要な工具と部品

  1. Umbrella Tail Beads Replacement, Tail Beads: 手順 1、 2の画像 1 Umbrella Tail Beads Replacement, Tail Beads: 手順 1、 2の画像 2
    • Measure the length of an intact tail bead.

    • Measure the diameter of the metal ribs.

    • Measuring tape is extremely sharp. Press the lock button on the measuring tape to prevent the tape from rolling back and causing injury.

  2. Umbrella Tail Beads Replacement: 手順 2、 1の画像 1
    • Get a tail bead with a similar length to the original beads with a diameter a little bit bigger than the metal ribs.

    • The diameter of the new tail beads should not be so big that they are too loose.

  3. Umbrella Tail Beads Replacement: 手順 3、 3の画像 1 Umbrella Tail Beads Replacement: 手順 3、 3の画像 2 Umbrella Tail Beads Replacement: 手順 3、 3の画像 3
    • Insert a tail bead into a metal rib.

    • It is okay if the tail bead is a little bit loose.

    • Ensure the position of the holes is left-to-right rather than top-to-bottom. (The wrong direction of hole will lead to sewing difficulty.)

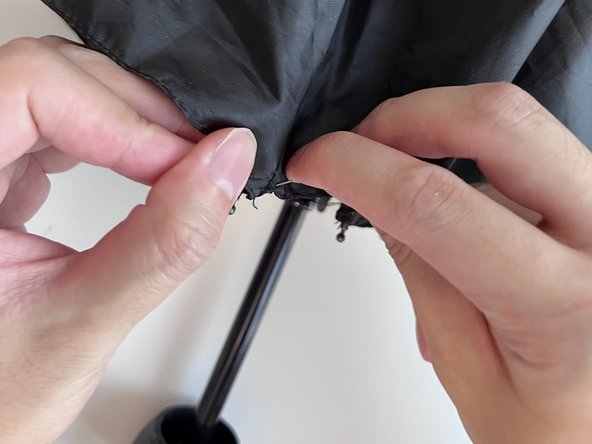
  4. Umbrella Tail Beads Replacement: 手順 4、 3の画像 1 Umbrella Tail Beads Replacement: 手順 4、 3の画像 2 Umbrella Tail Beads Replacement: 手順 4、 3の画像 3
    • Loop the thread through a needle and tie it together. (Ensure the knot is tied.)

    • Push the needle to go through the holes, and then go through the fabric of the umbrella (Pic. 2). At the same time, hold the other side of the thread to avoid fraying.

    • Open the tied knot side of thread (Pic. 3), allowing the needle to go through the center.

  5. Umbrella Tail Beads Replacement: 手順 5、 3の画像 1 Umbrella Tail Beads Replacement: 手順 5、 3の画像 2 Umbrella Tail Beads Replacement: 手順 5、 3の画像 3
    • When the needle goes through the center, pull the thread, and allow the tied knot to close and stick in the tail bead.

    • Ensure the fabric and tail beads are fixed together, so try to pull thread as tight as you can.

    • Make a right-to-left stitch, allowing the needle to go through the fabric and holes again. You can make the same stitch in the same way 4 to 5 times.

    • If you want the tail beads to be very secure, make as many stitches as you can.

  6. Umbrella Tail Beads Replacement: 手順 6、 3の画像 1 Umbrella Tail Beads Replacement: 手順 6、 3の画像 2 Umbrella Tail Beads Replacement: 手順 6、 3の画像 3
    • After sewing, let the thread wrap around the tail bead a few times.

    • Tie the two sides of thread, making 2-3 knots.

    • Use scissors to cut off the thread on the needle side.

  7. Umbrella Tail Beads Replacement: 手順 7、 2の画像 1 Umbrella Tail Beads Replacement: 手順 7、 2の画像 2
    • Cut off the excess thread on the knot side.

    • Avoid cutting off the knot.

    • Check if the fabric and tail beads are secure.

ゴール

ある他の人がこのガイドを完成しました。

作成者

2人の作成者と共同で作成されました。

Hao Zheng

メンバー登録日: 07/25/23

169 ポイント

1ガイドが承認済み

チーム

York University, Team M-10, Allen Summer 2023 York University, Team M-10, Allen Summer 2023人のメンバー

YORK-ALLEN-SU23SMG10

2 メンバー

1のガイドは作成済み

0 件のコメント

コメントを追加

統計データ:

過去 24時間: 9

過去 7 日: 33

過去 30 日: 152

今までの合計 1,131