メインコンテンツにスキップ

UTStarcom XV6700 Camera Replacement

必要な工具と部品

  1. UTStarcom XV6700 Camera Replacement, Battery: 手順 1、 1の画像 1
    • Press the on/off button on the top to power the phone off.

  2. UTStarcom XV6700 Camera Replacement: 手順 2、 1の画像 1
    • Remove the battery cover by pressing and sliding the cover down and off of the phone.

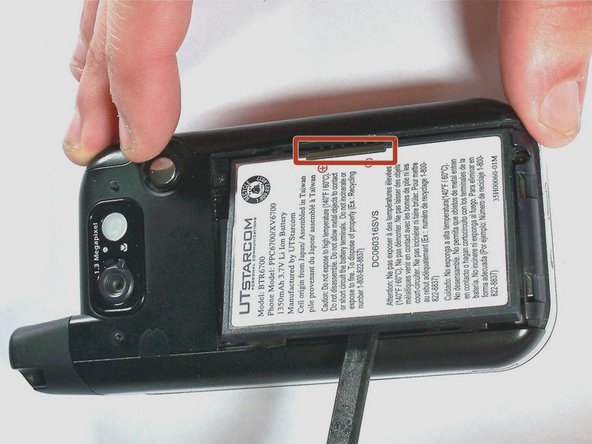
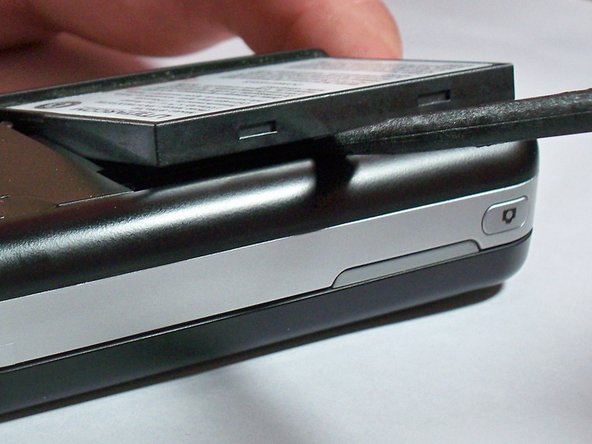
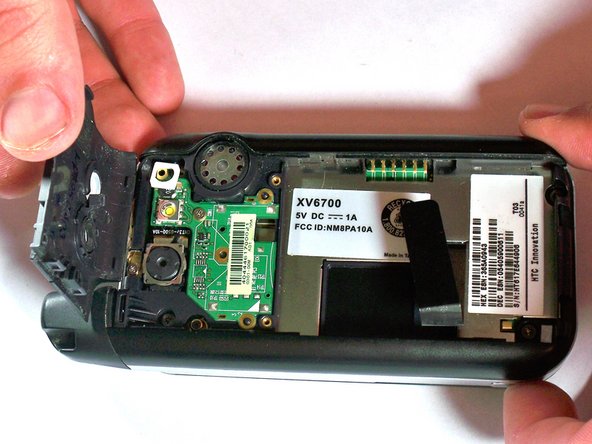
  3. UTStarcom XV6700 Camera Replacement: 手順 3、 3の画像 1 UTStarcom XV6700 Camera Replacement: 手順 3、 3の画像 2 UTStarcom XV6700 Camera Replacement: 手順 3、 3の画像 3
    • Pull the battery removal tab and lift the battery out of the phone.

    • If the battery removal tab is missing, place a spudger on the opposite side of the highlighted connector and pry the battery up.

  4. UTStarcom XV6700 Camera Replacement, Camera: 手順 4、 1の画像 1
    • Remove the two 4.0-mm #000 Phillips screws at the top of the battery compartment. Tweezers may be useful to remove the screws.

  5. UTStarcom XV6700 Camera Replacement: 手順 5、 2の画像 1 UTStarcom XV6700 Camera Replacement: 手順 5、 2の画像 2
    • Use firm pressure to carefully pry off the cover with your fingers.

  6. UTStarcom XV6700 Camera Replacement: 手順 6、 1の画像 1
    • Remove the 4.0-mm #00 Phillips screw securing the camera flash circuit board. The board is still connected by a connector on the bottom of the board.

  7. UTStarcom XV6700 Camera Replacement: 手順 7、 1の画像 1
    • Gently pry off the camera flash circuit board with the spudger.

  8. UTStarcom XV6700 Camera Replacement: 手順 8、 1の画像 1
    • Gently pry off the camera with the spudger.

終わりに

To reassemble your device, follow these instructions in reverse order.

作成者

3人の作成者と共同で作成されました。

Jesse Walker

メンバー登録日: 06/04/13

201 ポイント

2のガイドは作成済み

チーム

University of Kentucky Louisville, Team 1-4, Chamberlain Spring 2013 University of Kentucky Louisville, Team 1-4, Chamberlain Spring 2013人のメンバー

LOUISVILLE-CHAMBERLAIN-S13S1G4

3 メンバー

8のガイドは作成済み

0 件のコメント

コメントを追加

統計データ:

過去 24時間: 0

過去 7 日: 0

過去 30 日: 1

今までの合計 176