メインコンテンツにスキップ

UK-830LN Disassembly

必要な工具と部品

  1. UK-830LN Disassembly, Please remove the case of the electrical tester: 手順 1、 3の画像 1 UK-830LN Disassembly, Please remove the case of the electrical tester: 手順 1、 3の画像 2 UK-830LN Disassembly, Please remove the case of the electrical tester: 手順 1、 3の画像 3
    • The case is made of flexible silicone and can be easily peeled off.

  2. UK-830LN Disassembly, Loosen the 2 screws on the back.: 手順 2、 3の画像 1 UK-830LN Disassembly, Loosen the 2 screws on the back.: 手順 2、 3の画像 2 UK-830LN Disassembly, Loosen the 2 screws on the back.: 手順 2、 3の画像 3
    • Loosen (remove) the two screws on the back by installing the J1 (JIS1) standard screwdriver bit of the ifixit pro tech toolkit.

  3. UK-830LN Disassembly, Open the rear panel by lifting only the lower part: 手順 3、 3の画像 1 UK-830LN Disassembly, Open the rear panel by lifting only the lower part: 手順 3、 3の画像 2 UK-830LN Disassembly, Open the rear panel by lifting only the lower part: 手順 3、 3の画像 3
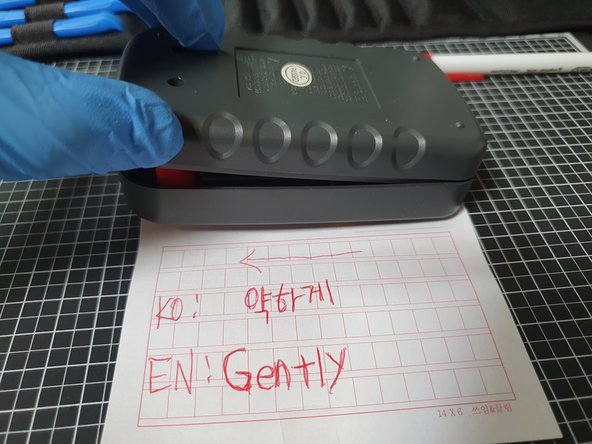
    • At first, there is a latch on the upper part, so only the lower part is lifted as much as it is lifted without force.

    • After lifting only as much as it can be lifted, pull it very slightly in the direction of the arrow in the photo, thinking that it is moving only 1mm very weakly. Very little!

  4. UK-830LN Disassembly, intermediate internal cleanup: 手順 4、 1の画像 1
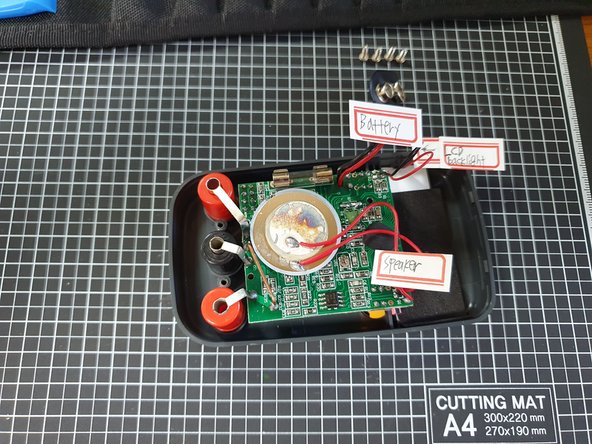
    • This step is inserted in the middle to show the internal structure

  5. UK-830LN Disassembly, Remove the battery: 手順 5、 2の画像 1 UK-830LN Disassembly, Remove the battery: 手順 5、 2の画像 2
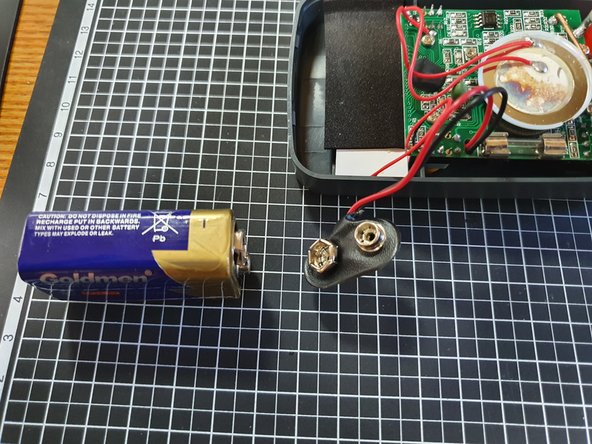
    • Disconnect the 9V battery from the device.

    • Be careful not to cut the battery cable at this time.

  6. UK-830LN Disassembly, To remove the motherboard, loosen the 4 screws.: 手順 6、 2の画像 1 UK-830LN Disassembly, To remove the motherboard, loosen the 4 screws.: 手順 6、 2の画像 2
    • Remove (unscrew) only the screws shown in the picture

    • At this time, the driver bit uses J0 (JIS0).

  7. UK-830LN Disassembly, internal structure: 手順 7、 1の画像 1
    • A = operation mode selection switch (inner connect)

    • A = operation mode setting switch (internal contact)

  8. UK-830LN Disassembly, internal structure: 手順 8、 1の画像 1
    • A' = Lubricated Steel Beads

    • A' = lubricated iron beads

終わりに

To reassemble the unit, follow the instructions in reverse order.

3 の人々がこのガイドを完成させました。

以下の翻訳者の皆さんにお礼を申し上げます:

ko en

100%

これらの翻訳者の方々は世界を修理する私たちのサポートをしてくれています。 あなたも貢献してみませんか?
翻訳を始める ›

作成者

1人の作成者と共同作成されました。

Turtle

メンバー登録日: 07/12/21

3,916 ポイント

3のガイドは作成済み

チーム

Blackpink [Korea] Blackpink [Korea]人のメンバー

Community

2 メンバー

5のガイドは作成済み

0 件のコメント

コメントを追加

統計データ:

過去 24時間: 1

過去 7 日: 7

過去 30 日: 33

今までの合計 319