メインコンテンツにスキップ

Turtle Beach Elite 800 Charging Pins on Headset Replacement

必要な工具と部品

  1. Turtle Beach Elite 800 Charging Pins on Headset Replacement, Ear Cushion: 手順 1、 2の画像 1 Turtle Beach Elite 800 Charging Pins on Headset Replacement, Ear Cushion: 手順 1、 2の画像 2
    • To remove the ear cushions, press firmly down and rotate them clockwise, it should twist about 2mm and release, allowing you to pull it off.

    • When reassembling, be sure to line up the locking plates.

  2. Turtle Beach Elite 800 Charging Pins on Headset Replacement, Charging Contact Pins on Headset: 手順 2、 2の画像 1 Turtle Beach Elite 800 Charging Pins on Headset Replacement, Charging Contact Pins on Headset: 手順 2、 2の画像 2
    • Use the Phillips #0 screw bit to remove the four screws (9.47 mm long) that have been revealed from removing the ear cup. Carefully take off the blue casing to reveal the audio board.

  3. Turtle Beach Elite 800 Charging Pins on Headset Replacement: 手順 3、 3の画像 1 Turtle Beach Elite 800 Charging Pins on Headset Replacement: 手順 3、 3の画像 2 Turtle Beach Elite 800 Charging Pins on Headset Replacement: 手順 3、 3の画像 3
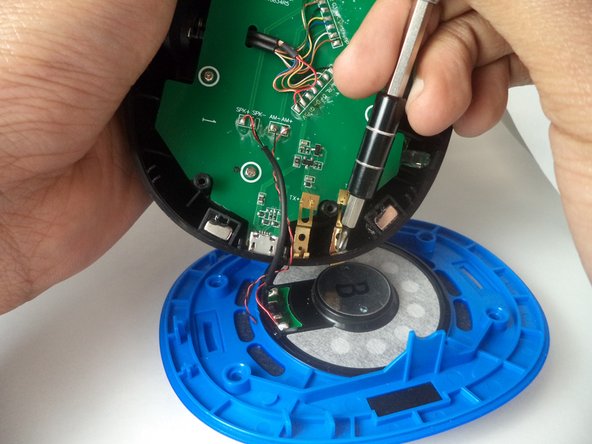
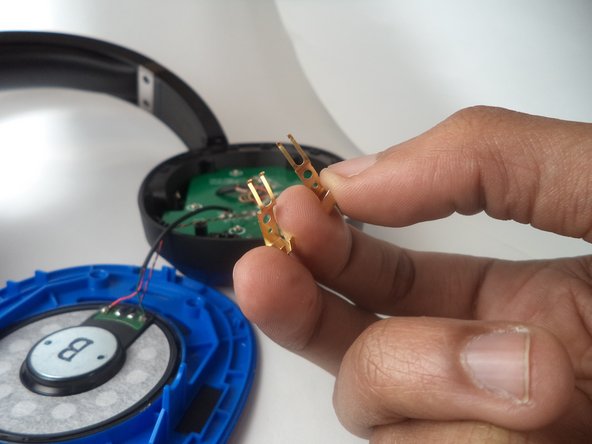
    • Use the Phillips #00 screw bit to remove the two screws (7.92 mm long) that are holding the contact pins in place.

    • Then, simply push the pins from the board.

終わりに

To reassemble your device, follow these instructions in reverse order.

作成者

1人の作成者と共同作成されました。

Johnny Lofton

メンバー登録日: 01/18/17

861 ポイント

5のガイドは作成済み

チーム

Arkansas State University, Team 1-5, Chamberlain Spring 2017 Arkansas State University, Team 1-5, Chamberlain Spring 2017人のメンバー

ARSU-CHAMBERLAIN-S17S1G5

3 メンバー

10のガイドは作成済み

0 件のコメント

コメントを追加

統計データ:

過去 24時間: 0

過去 7 日: 0

過去 30 日: 4

今までの合計 933