メインコンテンツにスキップ

Tristar Blender Disassembly

必要な工具と部品

  1. Tristar Blender Disassembly, Tristar Blender Disassembly: 手順 1、 1の画像 1
    • The assembled mixer.

  2. Tristar Blender Disassembly: 手順 2、 3の画像 1 Tristar Blender Disassembly: 手順 2、 3の画像 2 Tristar Blender Disassembly: 手順 2、 3の画像 3
    • To disassemble the 3 parts you've got to disconnect the little ring. Use a screw driver to get the ring loose.

  3. Tristar Blender Disassembly: 手順 3、 3の画像 1 Tristar Blender Disassembly: 手順 3、 3の画像 2 Tristar Blender Disassembly: 手順 3、 3の画像 3
    • Unscrew 3 screws to open the casing.

  4. Tristar Blender Disassembly: 手順 4、 3の画像 1 Tristar Blender Disassembly: 手順 4、 3の画像 2 Tristar Blender Disassembly: 手順 4、 3の画像 3
    • Unscrew 4 screws to disassemble the printplate and 2 to unscrew the wiring. Then you can lift the motor out by hand.

  5. Tristar Blender Disassembly: 手順 5、 2の画像 1 Tristar Blender Disassembly: 手順 5、 2の画像 2
    • To disassemble the motor holders you can slide them of the casing.

終わりに

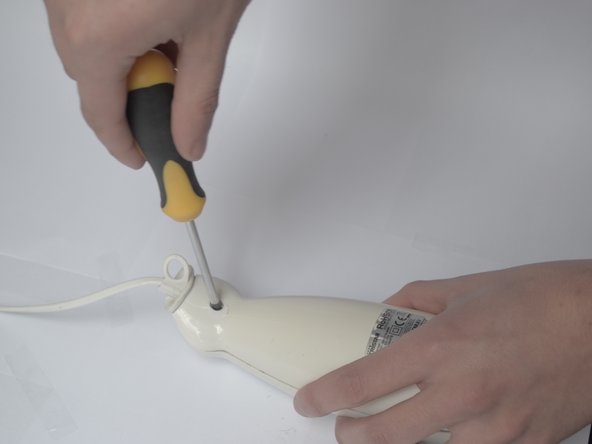
un-screw 3 screw froms the housing

作成者

3人の作成者と共同で作成されました。

koen merkx

メンバー登録日: 03/07/18

121 ポイント

1ガイドが承認済み

チーム

0 件のコメント

コメントを追加

統計データ:

過去 24時間: 3

過去 7 日: 9

過去 30 日: 31

今までの合計 1,148