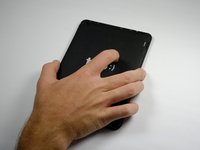
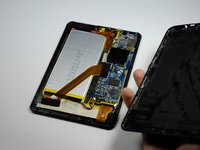
メインコンテンツにスキップ

Trio Stealth G4 Back Panel Replacement

必要な工具と部品

  1. Trio Stealth G4 Back Panel Replacement, Back Panel: 手順 1、 1の画像 1
    • Working on your device while it is turned on may result in electric shock. Be sure to shut down and unplug your device before you begin.

    • Flip your tablet over so that the back panel is facing up.

  2. Trio Stealth G4 Back Panel Replacement: 手順 2、 2の画像 1 Trio Stealth G4 Back Panel Replacement: 手順 2、 2の画像 2
    • Use a plastic opening tool to gently pry the back panel assembly apart from the front casing.

    • Start on one edge of the device by inserting the plastic opening tool between the back panel and the front casing using a gentle rocking motion.

  3. Trio Stealth G4 Back Panel Replacement: 手順 3、 1の画像 1
    • Once you have successfully separated one edge of the back panel from the front casing, slide the plastic opening tool along the other edges to detach them as well.

    • The latches keeping the back panel attached to the front casing can sometimes be a little difficult to separate, so don't be afraid to use some force.

  4. Trio Stealth G4 Back Panel Replacement: 手順 4、 2の画像 1 Trio Stealth G4 Back Panel Replacement: 手順 4、 2の画像 2
    • Remove the back panel from the rest of the tablet and set it aside.

  5. Trio Stealth G4 Back Panel Replacement: 手順 5、 1の画像 1
    • The plastic volume button cover may fall out when you remove the back panel. Set it aside.

終わりに

To reassemble your device, follow these instructions in reverse order.

ある他の人がこのガイドを完成しました。

作成者

2人の作成者と共同で作成されました。

Matt Arnold

メンバー登録日: 09/22/15

607 ポイント

5のガイドは作成済み

チーム

Baylor, Team 4-1, Williams Fall 2015 Baylor, Team 4-1, Williams Fall 2015人のメンバー

BU-WILLIAMS-F15S4G1

4 メンバー

10のガイドは作成済み

コメント 1 件

Where can they fix the screen

Itzak Bautista - 返信

コメントを追加

統計データ:

過去 24時間: 0

過去 7 日: 0

過去 30 日: 8

今までの合計 1,049