メインコンテンツにスキップ

Toshiba Satellite P855-S5312 Screen Replacement

必要な工具と部品

  1. Toshiba Satellite P855-S5312 Screen Replacement, Fan: 手順 1、 3の画像 1 Toshiba Satellite P855-S5312 Screen Replacement, Fan: 手順 1、 3の画像 2 Toshiba Satellite P855-S5312 Screen Replacement, Fan: 手順 1、 3の画像 3
    • Unscrew the one 1.5mm screw using a Philips #0 screwdriver holding the L shape panel.

    • Pry up the panel to gain access to hidden screws.

  2. Toshiba Satellite P855-S5312 Screen Replacement: 手順 2、 2の画像 1 Toshiba Satellite P855-S5312 Screen Replacement: 手順 2、 2の画像 2
    • Remove the fourteen (14) screws using a Philips #0 screwdriver for the 1.5mm screws on the underside of casing.

  3. Toshiba Satellite P855-S5312 Screen Replacement: 手順 3、 3の画像 1 Toshiba Satellite P855-S5312 Screen Replacement: 手順 3、 3の画像 2 Toshiba Satellite P855-S5312 Screen Replacement: 手順 3、 3の画像 3
    • Unscrew the nine 1.5mm screws using a Philips #0 screwdriver under the keyboard with the F6 printed next to them.

    • Unplug the three no-fuss ribbon cable connector cables by gently pulling on them away from you towards the keyboard.

  4. Toshiba Satellite P855-S5312 Screen Replacement: 手順 4、 2の画像 1 Toshiba Satellite P855-S5312 Screen Replacement: 手順 4、 2の画像 2
    • Pry apart the casing with the plastic opening tool.

    • Removing the cover under keyboard.

  5. Toshiba Satellite P855-S5312 Screen Replacement: 手順 5、 3の画像 1 Toshiba Satellite P855-S5312 Screen Replacement: 手順 5、 3の画像 2 Toshiba Satellite P855-S5312 Screen Replacement: 手順 5、 3の画像 3
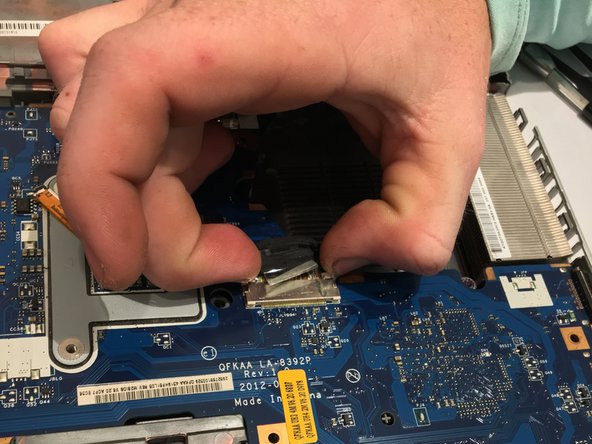
    • Unplug the single no-fuss cable connector using the plastic opening tool pushing the edges towards the fan.

    • Unscrew the two 1.5mm screws using a Philips #0 screwdriver by the head mounting holding down the fan.

    • Pull the fan up and remove it from the device.

  6. Toshiba Satellite P855-S5312 Screen Replacement, Screen: 手順 6、 3の画像 1 Toshiba Satellite P855-S5312 Screen Replacement, Screen: 手順 6、 3の画像 2 Toshiba Satellite P855-S5312 Screen Replacement, Screen: 手順 6、 3の画像 3
    • Turn laptop upside down with the spine facing towards you and locate the microchip.

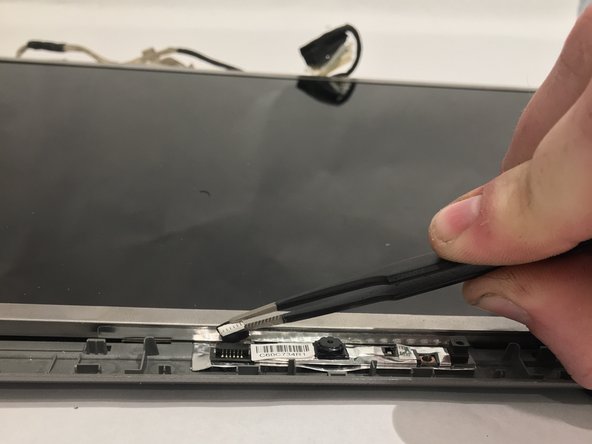
    • Remove the white and black sliding connector wires by prying upward with tweezers gently pulling the black and white wires upwards.

  7. Toshiba Satellite P855-S5312 Screen Replacement: 手順 7、 2の画像 1 Toshiba Satellite P855-S5312 Screen Replacement: 手順 7、 2の画像 2
    • Unplug the single ZIF connector ribbon by gently pulling up.

    • Pull the white and black wires through from the underside of device.

  8. Toshiba Satellite P855-S5312 Screen Replacement: 手順 8、 3の画像 1 Toshiba Satellite P855-S5312 Screen Replacement: 手順 8、 3の画像 2 Toshiba Satellite P855-S5312 Screen Replacement: 手順 8、 3の画像 3
    • Unscrew the four hinges mounting the 1.5mm screws on each side from casing using a Philips #0 screwdriver.

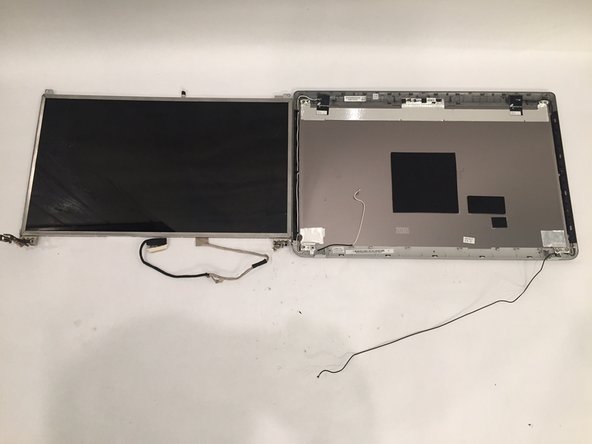
    • Remove entire screen assembly from casing.

  9. Toshiba Satellite P855-S5312 Screen Replacement: 手順 9、 3の画像 1 Toshiba Satellite P855-S5312 Screen Replacement: 手順 9、 3の画像 2 Toshiba Satellite P855-S5312 Screen Replacement: 手順 9、 3の画像 3
    • Locate the two black sticker covers on the bottom of both sides of the monitor

    • Using a pair of tweezers, carefully remove black stickers concealing two screws

  10. Toshiba Satellite P855-S5312 Screen Replacement: 手順 10、 3の画像 1 Toshiba Satellite P855-S5312 Screen Replacement: 手順 10、 3の画像 2 Toshiba Satellite P855-S5312 Screen Replacement: 手順 10、 3の画像 3
    • Using a prying tool, carefully pry along the edges of the screen cover

  11. Toshiba Satellite P855-S5312 Screen Replacement: 手順 11、 2の画像 1 Toshiba Satellite P855-S5312 Screen Replacement: 手順 11、 2の画像 2
    • Unscrew the two 1.5mm screws at the bottom of monitor using a Philips #0 screwdriver.

  12. Toshiba Satellite P855-S5312 Screen Replacement: 手順 12、 3の画像 1 Toshiba Satellite P855-S5312 Screen Replacement: 手順 12、 3の画像 2 Toshiba Satellite P855-S5312 Screen Replacement: 手順 12、 3の画像 3
    • With all the edges of the screen cover pried up, carefully remove the screen cover.

  13. Toshiba Satellite P855-S5312 Screen Replacement: 手順 13、 3の画像 1 Toshiba Satellite P855-S5312 Screen Replacement: 手順 13、 3の画像 2 Toshiba Satellite P855-S5312 Screen Replacement: 手順 13、 3の画像 3
    • Using the Philips #0 screwdriver, remove the four 1.5mm screws at the corners of the screen.

  14. Toshiba Satellite P855-S5312 Screen Replacement: 手順 14、 3の画像 1 Toshiba Satellite P855-S5312 Screen Replacement: 手順 14、 3の画像 2 Toshiba Satellite P855-S5312 Screen Replacement: 手順 14、 3の画像 3
    • At the top of the screen, using the tweezers, remove the ZIF ribbon connector by gently pushing it up.

  15. Toshiba Satellite P855-S5312 Screen Replacement: 手順 15、 2の画像 1 Toshiba Satellite P855-S5312 Screen Replacement: 手順 15、 2の画像 2
    • Remove the screen from the device.

    • Make sure to be carful because the screen is very fragile.

終わりに

To reassemble your device, follow these instructions in reverse order.

ある他の人がこのガイドを完成しました。

作成者

3人の作成者と共同で作成されました。

Bishop Clark

メンバー登録日: 10/02/17

225 ポイント

2のガイドは作成済み

チーム

USF Tampa, Team S10-G2, Thompson Fall 2017 USF Tampa, Team S10-G2, Thompson Fall 2017人のメンバー

USFT-THOMPSON-F17S10G2

3 メンバー

6のガイドは作成済み

0 件のコメント

コメントを追加

統計データ:

過去 24時間: 0

過去 7 日: 1

過去 30 日: 4

今までの合計 730