メインコンテンツにスキップ

Toshiba Satellite P855-S5102 Hard Drive Replacement

必要な工具と部品

  1. Toshiba Satellite P855-S5102 Hard Drive Replacement, Battery: 手順 1、 2の画像 1 Toshiba Satellite P855-S5102 Hard Drive Replacement, Battery: 手順 1、 2の画像 2
    • Push the locking tabs away from each other.

  2. Toshiba Satellite P855-S5102 Hard Drive Replacement: 手順 2、 2の画像 1 Toshiba Satellite P855-S5102 Hard Drive Replacement: 手順 2、 2の画像 2
    • Pull up on the battery to remove.

  3. Toshiba Satellite P855-S5102 Hard Drive Replacement, RAM: 手順 3、 2の画像 1 Toshiba Satellite P855-S5102 Hard Drive Replacement, RAM: 手順 3、 2の画像 2
    • Remove the 3mm Phillips #0 screw from the cover.

  4. Toshiba Satellite P855-S5102 Hard Drive Replacement: 手順 4、 3の画像 1 Toshiba Satellite P855-S5102 Hard Drive Replacement: 手順 4、 3の画像 2 Toshiba Satellite P855-S5102 Hard Drive Replacement: 手順 4、 3の画像 3
    • Use a plastic opening tool to lift up the cover and remove by hand.

  5. Toshiba Satellite P855-S5102 Hard Drive Replacement: 手順 5、 3の画像 1 Toshiba Satellite P855-S5102 Hard Drive Replacement: 手順 5、 3の画像 2 Toshiba Satellite P855-S5102 Hard Drive Replacement: 手順 5、 3の画像 3
    • Two clips secure the RAM module in place, one on each side. Using your fingers, spread the clips away from the RAM module.


    • When released, the RAM module will pop up at a slight angle.

    • 
Lift the RAM module to an angle of about 30 degrees and slide it out.

  6. Toshiba Satellite P855-S5102 Hard Drive Replacement, Hard Drive: 手順 6、 1の画像 1
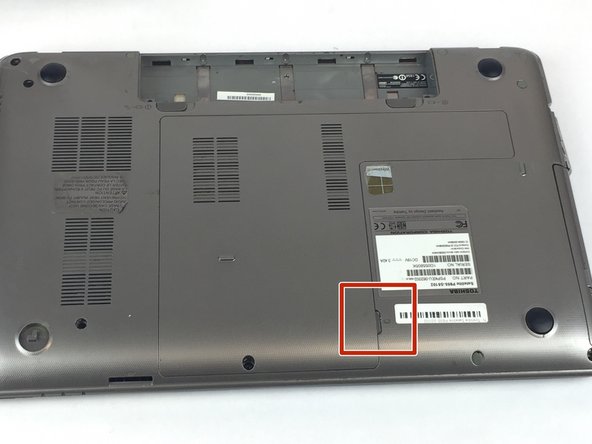
    • Remove the three 3mm Phillips #0 screws from the hard drive.

    • Remove the hard drive.

終わりに

To reassemble your device, follow these instructions in reverse order.

作成者

1人の作成者と共同作成されました。

Benson Smith

メンバー登録日: 01/25/18

351 ポイント

3のガイドは作成済み

チーム

USF Tampa, Team S20-G3, Passmore Spring 2018 USF Tampa, Team S20-G3, Passmore Spring 2018人のメンバー

USFT-PASSMORE-S18S20G3

4 メンバー

7のガイドは作成済み

0 件のコメント

コメントを追加

統計データ:

過去 24時間: 1

過去 7 日: 4

過去 30 日: 6

今までの合計 709