メインコンテンツにスキップ

Toshiba Satellite P205-S8811 Keyboard Replacement

必要な工具と部品

  1. Toshiba Satellite P205-S8811 Keyboard Replacement, Battery: 手順 1、 2の画像 1 Toshiba Satellite P205-S8811 Keyboard Replacement, Battery: 手順 1、 2の画像 2
    • Flip the laptop over so the bottom is facing upward and the battery is on top.

    • Slide the tab below the battery to the left.

  2. Toshiba Satellite P205-S8811 Keyboard Replacement: 手順 2、 2の画像 1 Toshiba Satellite P205-S8811 Keyboard Replacement: 手順 2、 2の画像 2
    • Slide and hold the tab on the right side of the battery to the right.

    • While holding the right tab, slide the battery upward and out its socket.

  3. Toshiba Satellite P205-S8811 Keyboard Replacement, Keyboard: 手順 3、 2の画像 1 Toshiba Satellite P205-S8811 Keyboard Replacement, Keyboard: 手順 3、 2の画像 2
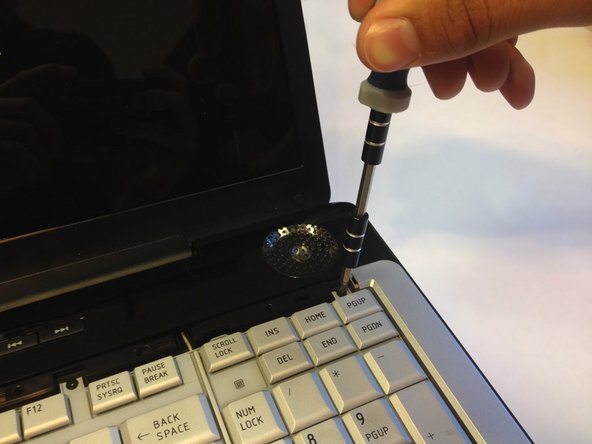
    • Place the head of a plastic opening tool underneath the plastic strip lining the top of the keyboard, right above the "PGUP" button.

    • Next, pull the strip up using a plastic opening tool with a light force, until it pops off.

  4. Toshiba Satellite P205-S8811 Keyboard Replacement: 手順 4、 1の画像 1
    • Lightly lift from the side that was popped up earlier in order to pop the rest of the strip off of the laptop.

  5. Toshiba Satellite P205-S8811 Keyboard Replacement: 手順 5、 2の画像 1 Toshiba Satellite P205-S8811 Keyboard Replacement: 手順 5、 2の画像 2
    • Use a #1 Phillips screwdriver to take out the four 4mm Phillips #1 screws that were underneath the plastic strip.

  6. Toshiba Satellite P205-S8811 Keyboard Replacement: 手順 6、 3の画像 1 Toshiba Satellite P205-S8811 Keyboard Replacement: 手順 6、 3の画像 2 Toshiba Satellite P205-S8811 Keyboard Replacement: 手順 6、 3の画像 3
    • Be careful to not lift up on the keyboard too quickly or harshly; there is a ribbon cable connecting the keyboard and the base which may be breakable.

    • Lightly lift up on the keyboard from one of its top corners and pull it towards the screen so you can safely remove the ribbon cable.

    • At the base of the ribbon cable, there is a tiny tab that runs across the width of the connector. Flip it up. You can now pull the ribbon cable free with no resistance towards the monitor.

    • With the cable unplugged, the keyboard can be lifted away from the laptop.

終わりに

To reassemble your device, follow these instructions in reverse order.

作成者

2人の作成者と共同で作成されました。

Andrew Meyer

メンバー登録日: 02/03/14

245 ポイント

2のガイドは作成済み

チーム

Cal Poly, Team 2-8, Amido Winter 2014 Cal Poly, Team 2-8, Amido Winter 2014人のメンバー

CPSU-AMIDO-W14S2G8

4 メンバー

7のガイドは作成済み

0 件のコメント

コメントを追加

統計データ:

過去 24時間: 0

過去 7 日: 0

過去 30 日: 0

今までの合計 764