メインコンテンツにスキップ

Toshiba Satellite L305D-S5950 Fan Replacement

必要な工具と部品

  1. Toshiba Satellite L305D-S5950 Fan Replacement, Battery: 手順 1、 1の画像 1
    • Locate the two sliding battery locks on the underside of the laptop.

  2. Toshiba Satellite L305D-S5950 Fan Replacement: 手順 2、 2の画像 1 Toshiba Satellite L305D-S5950 Fan Replacement: 手順 2、 2の画像 2
    • Locate the right battery lock and slide it to the right.

  3. Toshiba Satellite L305D-S5950 Fan Replacement: 手順 3、 2の画像 1 Toshiba Satellite L305D-S5950 Fan Replacement: 手順 3、 2の画像 2
    • While holding the left battery lock to the left, lift up the battery using the tab located on the top center of the battery.

  4. Toshiba Satellite L305D-S5950 Fan Replacement: 手順 4、 1の画像 1
    • Remove the battery from the laptop.

  5. Toshiba Satellite L305D-S5950 Fan Replacement, Hard Disk Drive: 手順 5、 2の画像 1 Toshiba Satellite L305D-S5950 Fan Replacement, Hard Disk Drive: 手順 5、 2の画像 2
    • Unscrew the screws enough to remove the top cover.

  6. Toshiba Satellite L305D-S5950 Fan Replacement: 手順 6、 1の画像 1
    • Remove the cover by lifting the right side up at an angle before removing the entire cover.

  7. Toshiba Satellite L305D-S5950 Fan Replacement: 手順 7、 2の画像 1 Toshiba Satellite L305D-S5950 Fan Replacement: 手順 7、 2の画像 2
    • Remove the hard drive from the SATA slot by tugging lightly on the ribbon cable to the right.

  8. Toshiba Satellite L305D-S5950 Fan Replacement: 手順 8、 3の画像 1 Toshiba Satellite L305D-S5950 Fan Replacement: 手順 8、 3の画像 2 Toshiba Satellite L305D-S5950 Fan Replacement: 手順 8、 3の画像 3
    • To separate the hard drive from the caddy, unscrew the two screws.

  9. Toshiba Satellite L305D-S5950 Fan Replacement, RAM: 手順 9、 3の画像 1 Toshiba Satellite L305D-S5950 Fan Replacement, RAM: 手順 9、 3の画像 2 Toshiba Satellite L305D-S5950 Fan Replacement, RAM: 手順 9、 3の画像 3
    • Unscrew the RAM cover and rotate the cover up to remove it. The screw should not be fully removed from the cover itself.

  10. Toshiba Satellite L305D-S5950 Fan Replacement: 手順 10、 2の画像 1 Toshiba Satellite L305D-S5950 Fan Replacement: 手順 10、 2の画像 2
    • Push the small levers at the sides of the RAM module away from each other. The RAM module should automatically rotate upwards.

  11. Toshiba Satellite L305D-S5950 Fan Replacement: 手順 11、 2の画像 1 Toshiba Satellite L305D-S5950 Fan Replacement: 手順 11、 2の画像 2
    • Remove the RAM module by pulling it out at the angle it was rotated to.

  12. Toshiba Satellite L305D-S5950 Fan Replacement: 手順 12、 3の画像 1 Toshiba Satellite L305D-S5950 Fan Replacement: 手順 12、 3の画像 2 Toshiba Satellite L305D-S5950 Fan Replacement: 手順 12、 3の画像 3
    • If you want to replace the second RAM module, apply steps 2 and 3 to do so.

  13. Toshiba Satellite L305D-S5950 Fan Replacement, Keyboard: 手順 13、 2の画像 1 Toshiba Satellite L305D-S5950 Fan Replacement, Keyboard: 手順 13、 2の画像 2
    • Locate the plastic strip at the top of the keyboard.

    • Use a pry tool to remove the plastic strip.

    • Using your hands pull out the rest of the plastic strip.

  14. Toshiba Satellite L305D-S5950 Fan Replacement: 手順 14、 1の画像 1
    • Use a phillips head #0 screwdriver to remove the two 3.75mm screws holding the keyboard in place.

  15. Toshiba Satellite L305D-S5950 Fan Replacement: 手順 15、 3の画像 1 Toshiba Satellite L305D-S5950 Fan Replacement: 手順 15、 3の画像 2 Toshiba Satellite L305D-S5950 Fan Replacement: 手順 15、 3の画像 3
    • Lift up the top of the keyboard to remove it.

    • Under the keyboard there is a ribbon cable connecting the keyboard to the laptop. Do not just quickly pull out the keyboard.

    • Unlock the ribbon cable by pushing on the locks that are located on both sides of ribbon cable.

    • Unplug the ribbon cable from the laptop.

  16. Toshiba Satellite L305D-S5950 Fan Replacement: 手順 16、 1の画像 1
    • Remove the keyboard completely from the laptop.

  17. Toshiba Satellite L305D-S5950 Fan Replacement, Motherboard Cover: 手順 17、 2の画像 1 Toshiba Satellite L305D-S5950 Fan Replacement, Motherboard Cover: 手順 17、 2の画像 2
    • Remove all 6.75mm screws from the bottom of the laptop. The 3 screws under the battery are 3.75mm.

    • Remove all 5.25mm screws from the top of the laptop.

  18. Toshiba Satellite L305D-S5950 Fan Replacement: 手順 18、 3の画像 1 Toshiba Satellite L305D-S5950 Fan Replacement: 手順 18、 3の画像 2 Toshiba Satellite L305D-S5950 Fan Replacement: 手順 18、 3の画像 3
    • Unplug the wires highlighted with red squares.

    • Using a pry tool and yours hands to remove the motherboard cover.

  19. Toshiba Satellite L305D-S5950 Fan Replacement, Motherboard: 手順 19、 1の画像 1
    • Unscrew all the screws indicated by the red circles (The bottom two screws are 10.75mm and the top screw is 5mm).

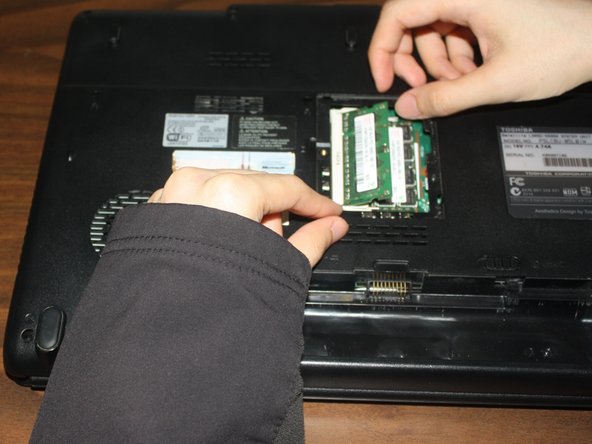
    • Unplug all the wires indicated by the orange squares.

    • Some wires may have a lock on them that needs to be pulled out before the wire is removed.

  20. Toshiba Satellite L305D-S5950 Fan Replacement: 手順 20、 1の画像 1
    • At this point the motherboard can be fully removed from the laptop.

  21. Toshiba Satellite L305D-S5950 Fan Replacement, Fan: 手順 21、 1の画像 1
    • Using your fingers, disconnect the fan power cord from the motherboard.

  22. Toshiba Satellite L305D-S5950 Fan Replacement: 手順 22、 2の画像 1 Toshiba Satellite L305D-S5950 Fan Replacement: 手順 22、 2の画像 2
    • Using your fingers, disconnect the fan from the heatsink.

終わりに

To reassemble your device, follow these instructions in reverse order.

ある他の人がこのガイドを完成しました。

作成者

3人の作成者と共同で作成されました。

William

メンバー登録日: 03/26/14

875 ポイント

7のガイドは作成済み

チーム

Clemson, Team 1-2, Benson Spring 2014 Clemson, Team 1-2, Benson Spring 2014人のメンバー

CLEM-BENSON-S14S1G2

3 メンバー

10のガイドは作成済み

0 件のコメント

コメントを追加

統計データ:

過去 24時間: 0

過去 7 日: 0

過去 30 日: 0

今までの合計 840