メインコンテンツにスキップ

Toshiba SD-K740 Disc Drive Replacement

必要な工具と部品

  1. Toshiba SD-K740 Disc Drive Replacement, Top Panel: 手順 1、 1の画像 1
    • Unplug the DVD player before beginning.

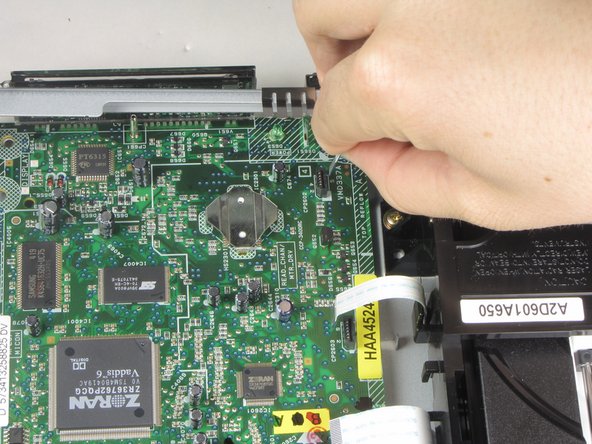
    • Remove the three 7.7 mm screws from the back panel using a Phillips #0 screwdriver.

  2. Toshiba SD-K740 Disc Drive Replacement: 手順 2、 2の画像 1 Toshiba SD-K740 Disc Drive Replacement: 手順 2、 2の画像 2
    • Turn the DVD player on its side.

    • Remove the 7.7 mm screw.

    • Flip the DVD player onto its other side.

    • Remove the 7.7 mm screw.

  3. Toshiba SD-K740 Disc Drive Replacement: 手順 3、 1の画像 1
    • Flip the DVD player over onto its front face.

    • Remove the back panel by lifting up and pulling it towards yourself.

  4. Toshiba SD-K740 Disc Drive Replacement, Front Panel: 手順 4、 1の画像 1
    • Flip the DVD player so its top is sitting on your working surface.

    • Lift and push away the two tabs located in the middle of the player.

    • The front panel will not detach during this step, so do not force it.

  5. Toshiba SD-K740 Disc Drive Replacement: 手順 5、 1の画像 1
    • Flip the DVD player on its side.

    • Lift and slide forward the single tab on the side.

    • The front panel will not detach during this step, so do not force it.

  6. Toshiba SD-K740 Disc Drive Replacement: 手順 6、 2の画像 1 Toshiba SD-K740 Disc Drive Replacement: 手順 6、 2の画像 2
    • Grasp the front panel and pull forward to your right to remove it.

  7. Toshiba SD-K740 Disc Drive Replacement, Disc Drive: 手順 7、 2の画像 1 Toshiba SD-K740 Disc Drive Replacement, Disc Drive: 手順 7、 2の画像 2
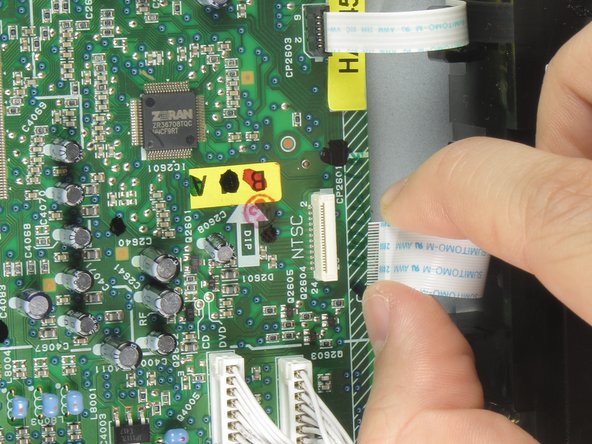
    • Remove the first of three ribbon cables on left hand side of disc drive by pulling vertically.

  8. Toshiba SD-K740 Disc Drive Replacement: 手順 8、 2の画像 1 Toshiba SD-K740 Disc Drive Replacement: 手順 8、 2の画像 2
    • Remove the second of three ribbon cables on left hand side of disc drive by pulling vertically.

  9. Toshiba SD-K740 Disc Drive Replacement: 手順 9、 2の画像 1 Toshiba SD-K740 Disc Drive Replacement: 手順 9、 2の画像 2
    • Remove the third of three ribbon cables on left hand side of disc drive by pulling vertically.

  10. Toshiba SD-K740 Disc Drive Replacement: 手順 10、 1の画像 1
    • Remove the four screws holding the disc drive in place using a #0 Phillips screwdriver.

  11. Toshiba SD-K740 Disc Drive Replacement: 手順 11、 1の画像 1
    • Lift disc drive vertically to remove.

終わりに

To reassemble your device, follow these instructions in reverse order.

ある他の人がこのガイドを完成しました。

作成者

5人の作成者と共同で作成されました。

Joe Murphy

メンバー登録日: 01/20/11

542 ポイント

5のガイドは作成済み

チーム

Cal Poly, Team 1-16, Amido Winter 2011 Cal Poly, Team 1-16, Amido Winter 2011人のメンバー

CPSU-AMIDO-W11S1G16

4 メンバー

8のガイドは作成済み

0 件のコメント

コメントを追加

統計データ:

過去 24時間: 0

過去 7 日: 0

過去 30 日: 1

今までの合計 2,603