メインコンテンツにスキップ

Toshiba Portege R835-P56X Speaker Replacement

必要な工具と部品

  1. Toshiba Portege R835-P56X Speaker Replacement, Speaker: 手順 1、 1の画像 1
    • Turn laptop with the back cover facing up .

    • Make sure the laptop is unplugged and powered off before beginning.

  2. Toshiba Portege R835-P56X Speaker Replacement: 手順 2、 2の画像 1 Toshiba Portege R835-P56X Speaker Replacement: 手順 2、 2の画像 2
    • Unlock the clips by pulling towards the unlock.

  3. Toshiba Portege R835-P56X Speaker Replacement: 手順 3、 3の画像 1 Toshiba Portege R835-P56X Speaker Replacement: 手順 3、 3の画像 2 Toshiba Portege R835-P56X Speaker Replacement: 手順 3、 3の画像 3
    • Holding the unlock clips push the battery away from the laptop.

  4. Toshiba Portege R835-P56X Speaker Replacement: 手順 4、 1の画像 1
    • Remove the screws from the back of the laptop

    • you should have removed 18 screws, make sure to keep these in a safe place as you will need them for reassembly.

  5. Toshiba Portege R835-P56X Speaker Replacement: 手順 5、 2の画像 1 Toshiba Portege R835-P56X Speaker Replacement: 手順 5、 2の画像 2
    • Using the blue prying plastic tool remove the back cover.

  6. Toshiba Portege R835-P56X Speaker Replacement: 手順 6、 1の画像 1
    • Remove the screws from the fan and side ports

  7. Toshiba Portege R835-P56X Speaker Replacement: 手順 7、 3の画像 1 Toshiba Portege R835-P56X Speaker Replacement: 手順 7、 3の画像 2 Toshiba Portege R835-P56X Speaker Replacement: 手順 7、 3の画像 3
    • Remove the white and orange cables attached by pulling out the cables

  8. Toshiba Portege R835-P56X Speaker Replacement: 手順 8、 2の画像 1 Toshiba Portege R835-P56X Speaker Replacement: 手順 8、 2の画像 2
    • locate the speakers

    • Gently lift the motherboard to release the speaker cables

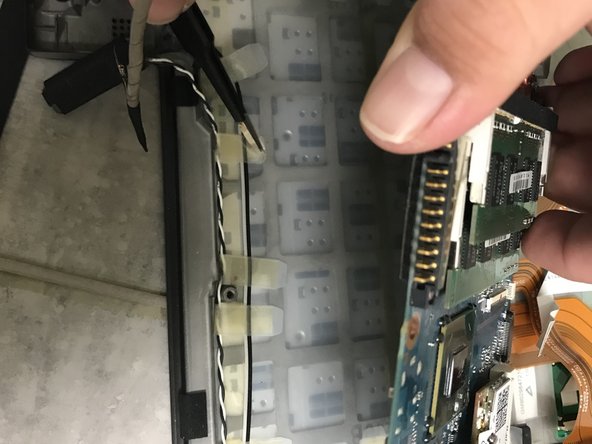
  9. Toshiba Portege R835-P56X Speaker Replacement: 手順 9、 2の画像 1 Toshiba Portege R835-P56X Speaker Replacement: 手順 9、 2の画像 2
    • Using the tweezers, gently remove the tape being used to hold down the speaker cables.

  10. Toshiba Portege R835-P56X Speaker Replacement: 手順 10、 2の画像 1 Toshiba Portege R835-P56X Speaker Replacement: 手順 10、 2の画像 2
    • Once the cable had been released you have successfully removed the speakers!

終わりに

To reassemble your device, follow these instructions in reverse order.

ある他の人がこのガイドを完成しました。

作成者

1人の作成者と共同作成されました。

Anay Sanchez

メンバー登録日: 09/20/17

494 ポイント

4のガイドは作成済み

チーム

University of North Texas, Team S6-G6, Thomas Fall 2017 University of North Texas, Team S6-G6, Thomas Fall 2017人のメンバー

UNT-THOMAS-F17S6G6

3 メンバー

12のガイドは作成済み

0 件のコメント

コメントを追加

統計データ:

過去 24時間: 1

過去 7 日: 2

過去 30 日: 3

今までの合計 381